Computers
macOS
-
Change Default PDF Application
-
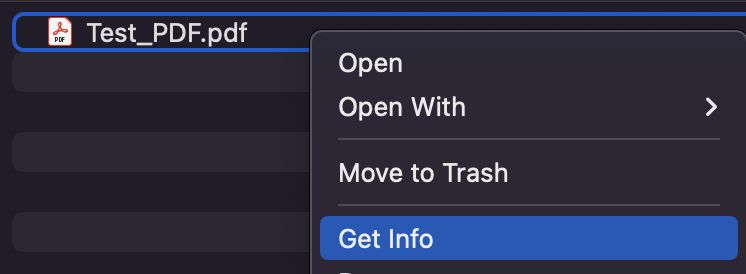
Find any PDF file, right-click it and select “Get Info”
-
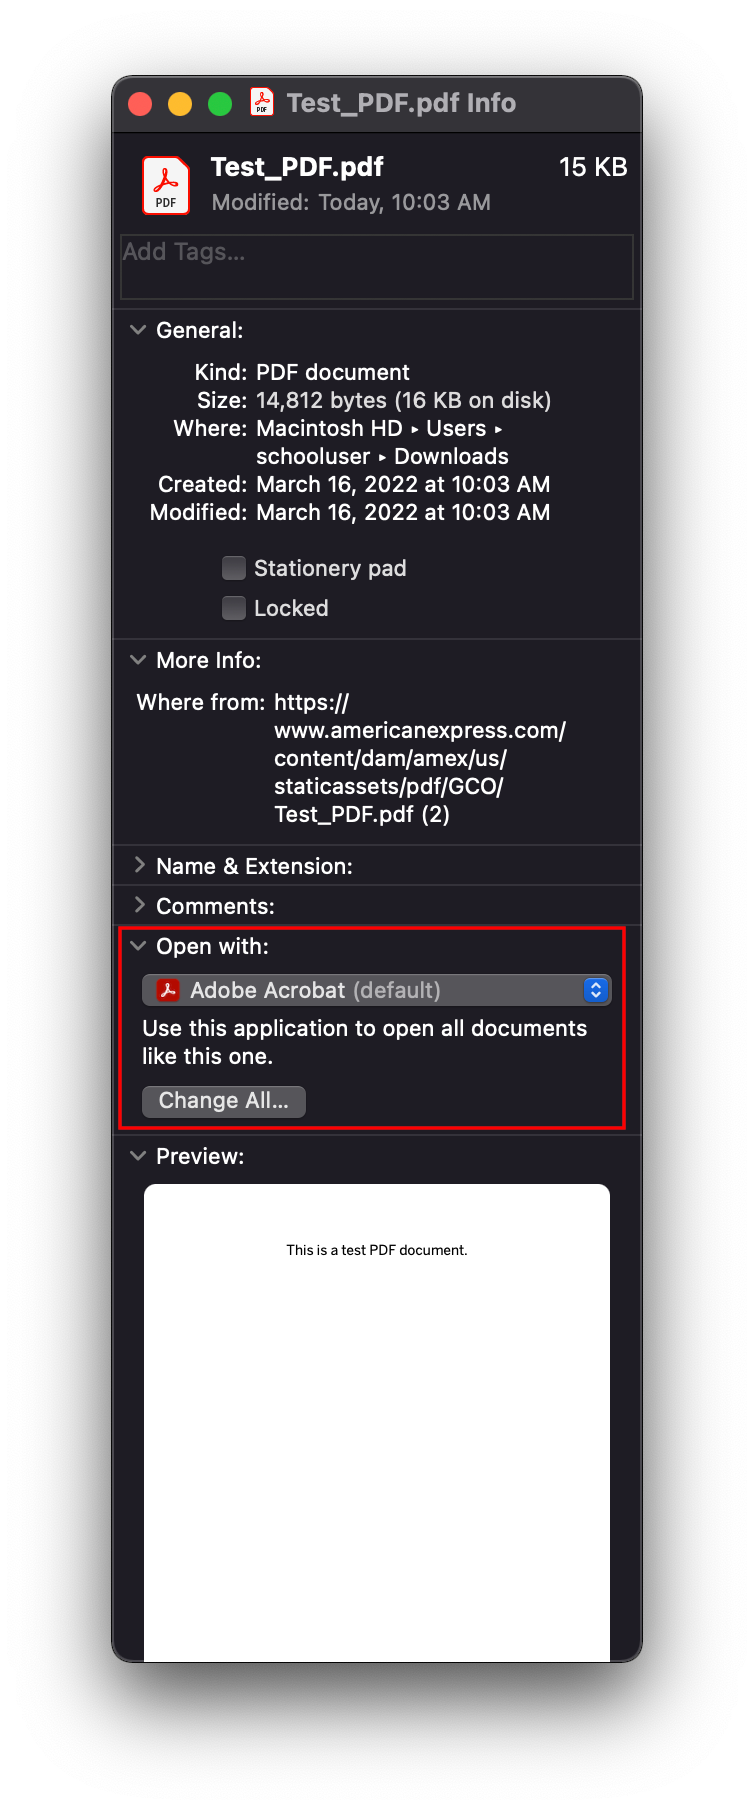
Find the “Open with” section, expand it, and choose your preferred PDF viewer from the list of applications
-
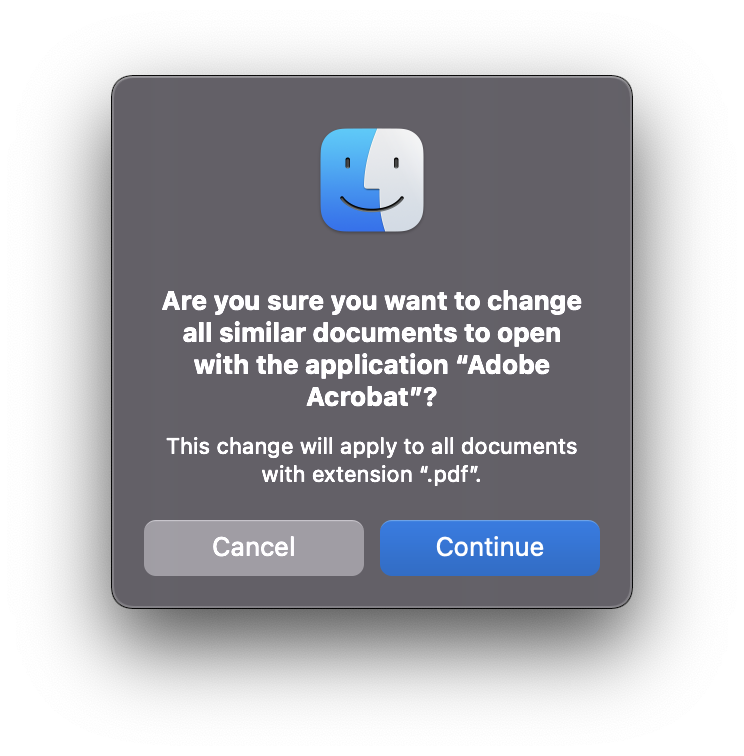
Click on “Change All” under the dropdown, then hit “Continue” in the confirmation prompt that appears
-
-
Managing Storage
Ventura (macOS 13)
-
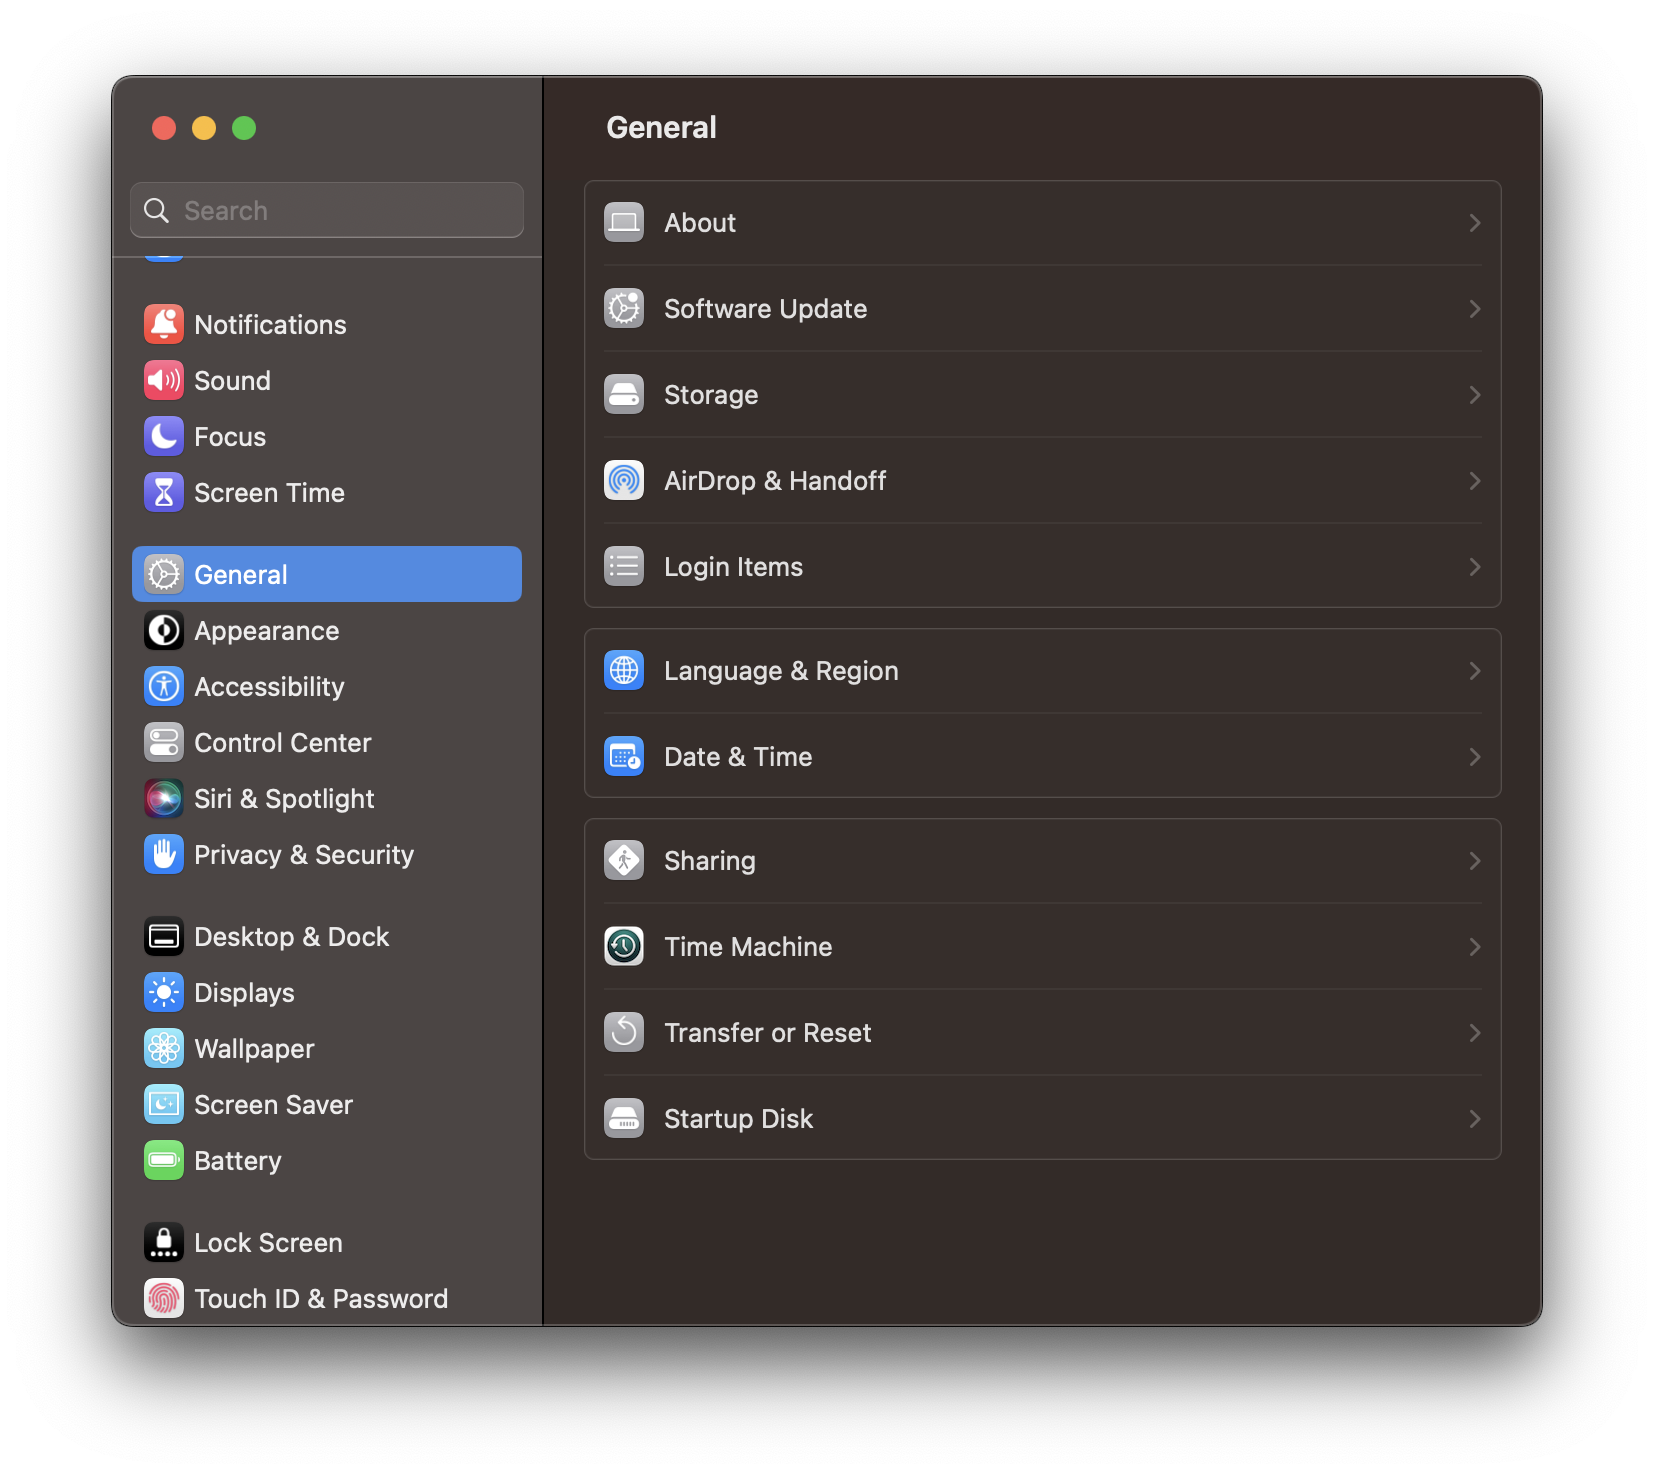
Open System Preferences from the Apple menu or Applications folder
-
Navigate to the General tab, then select Storage
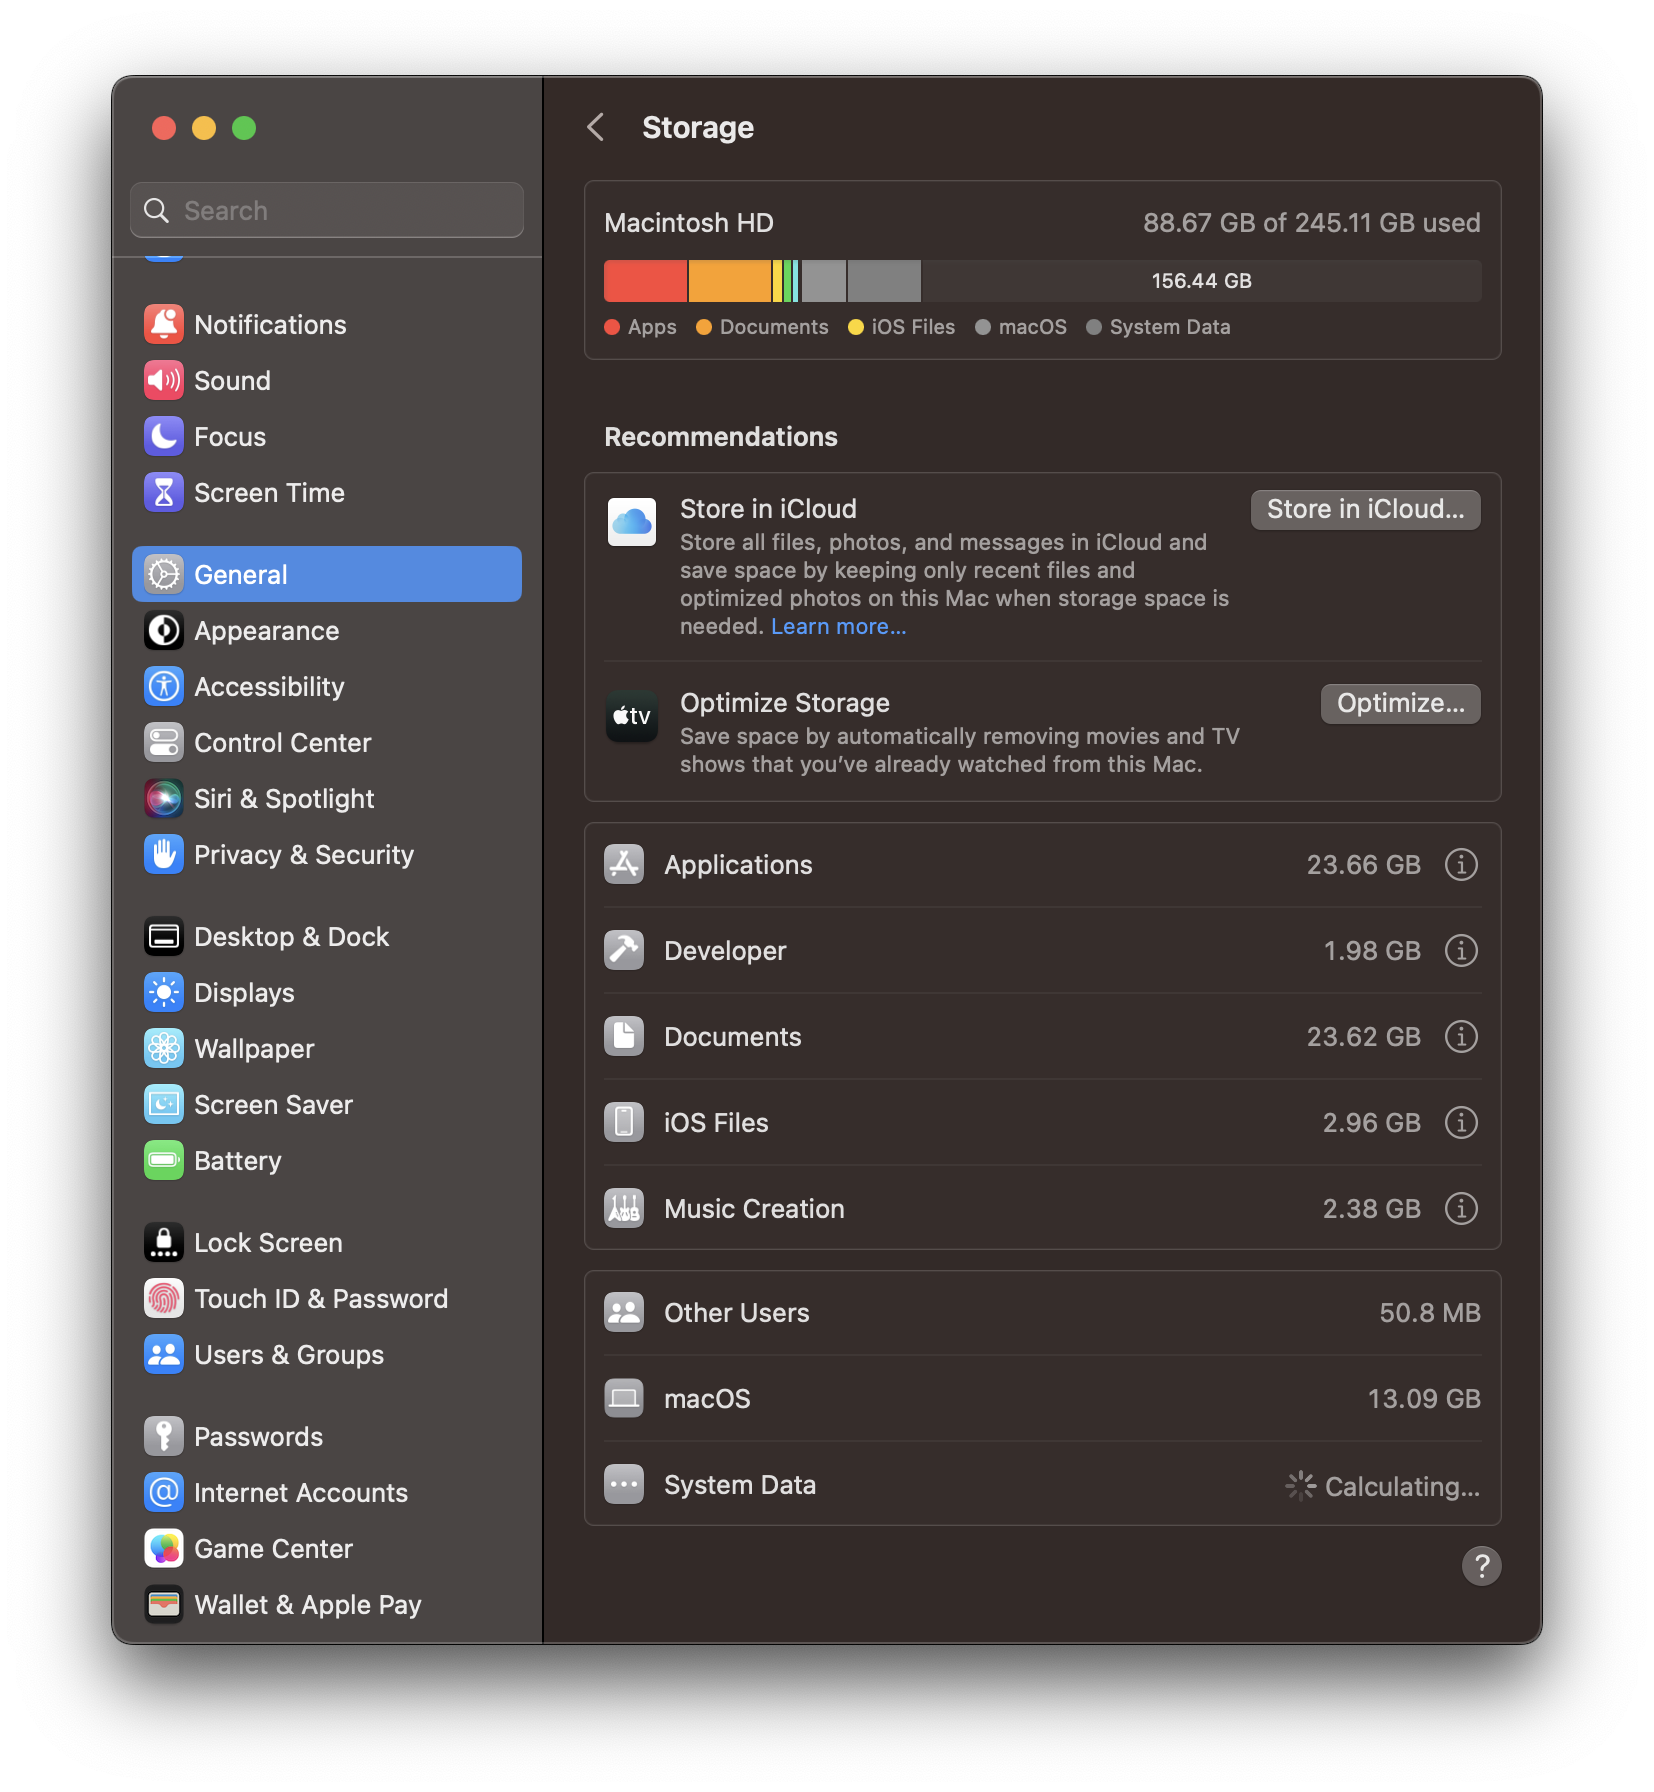
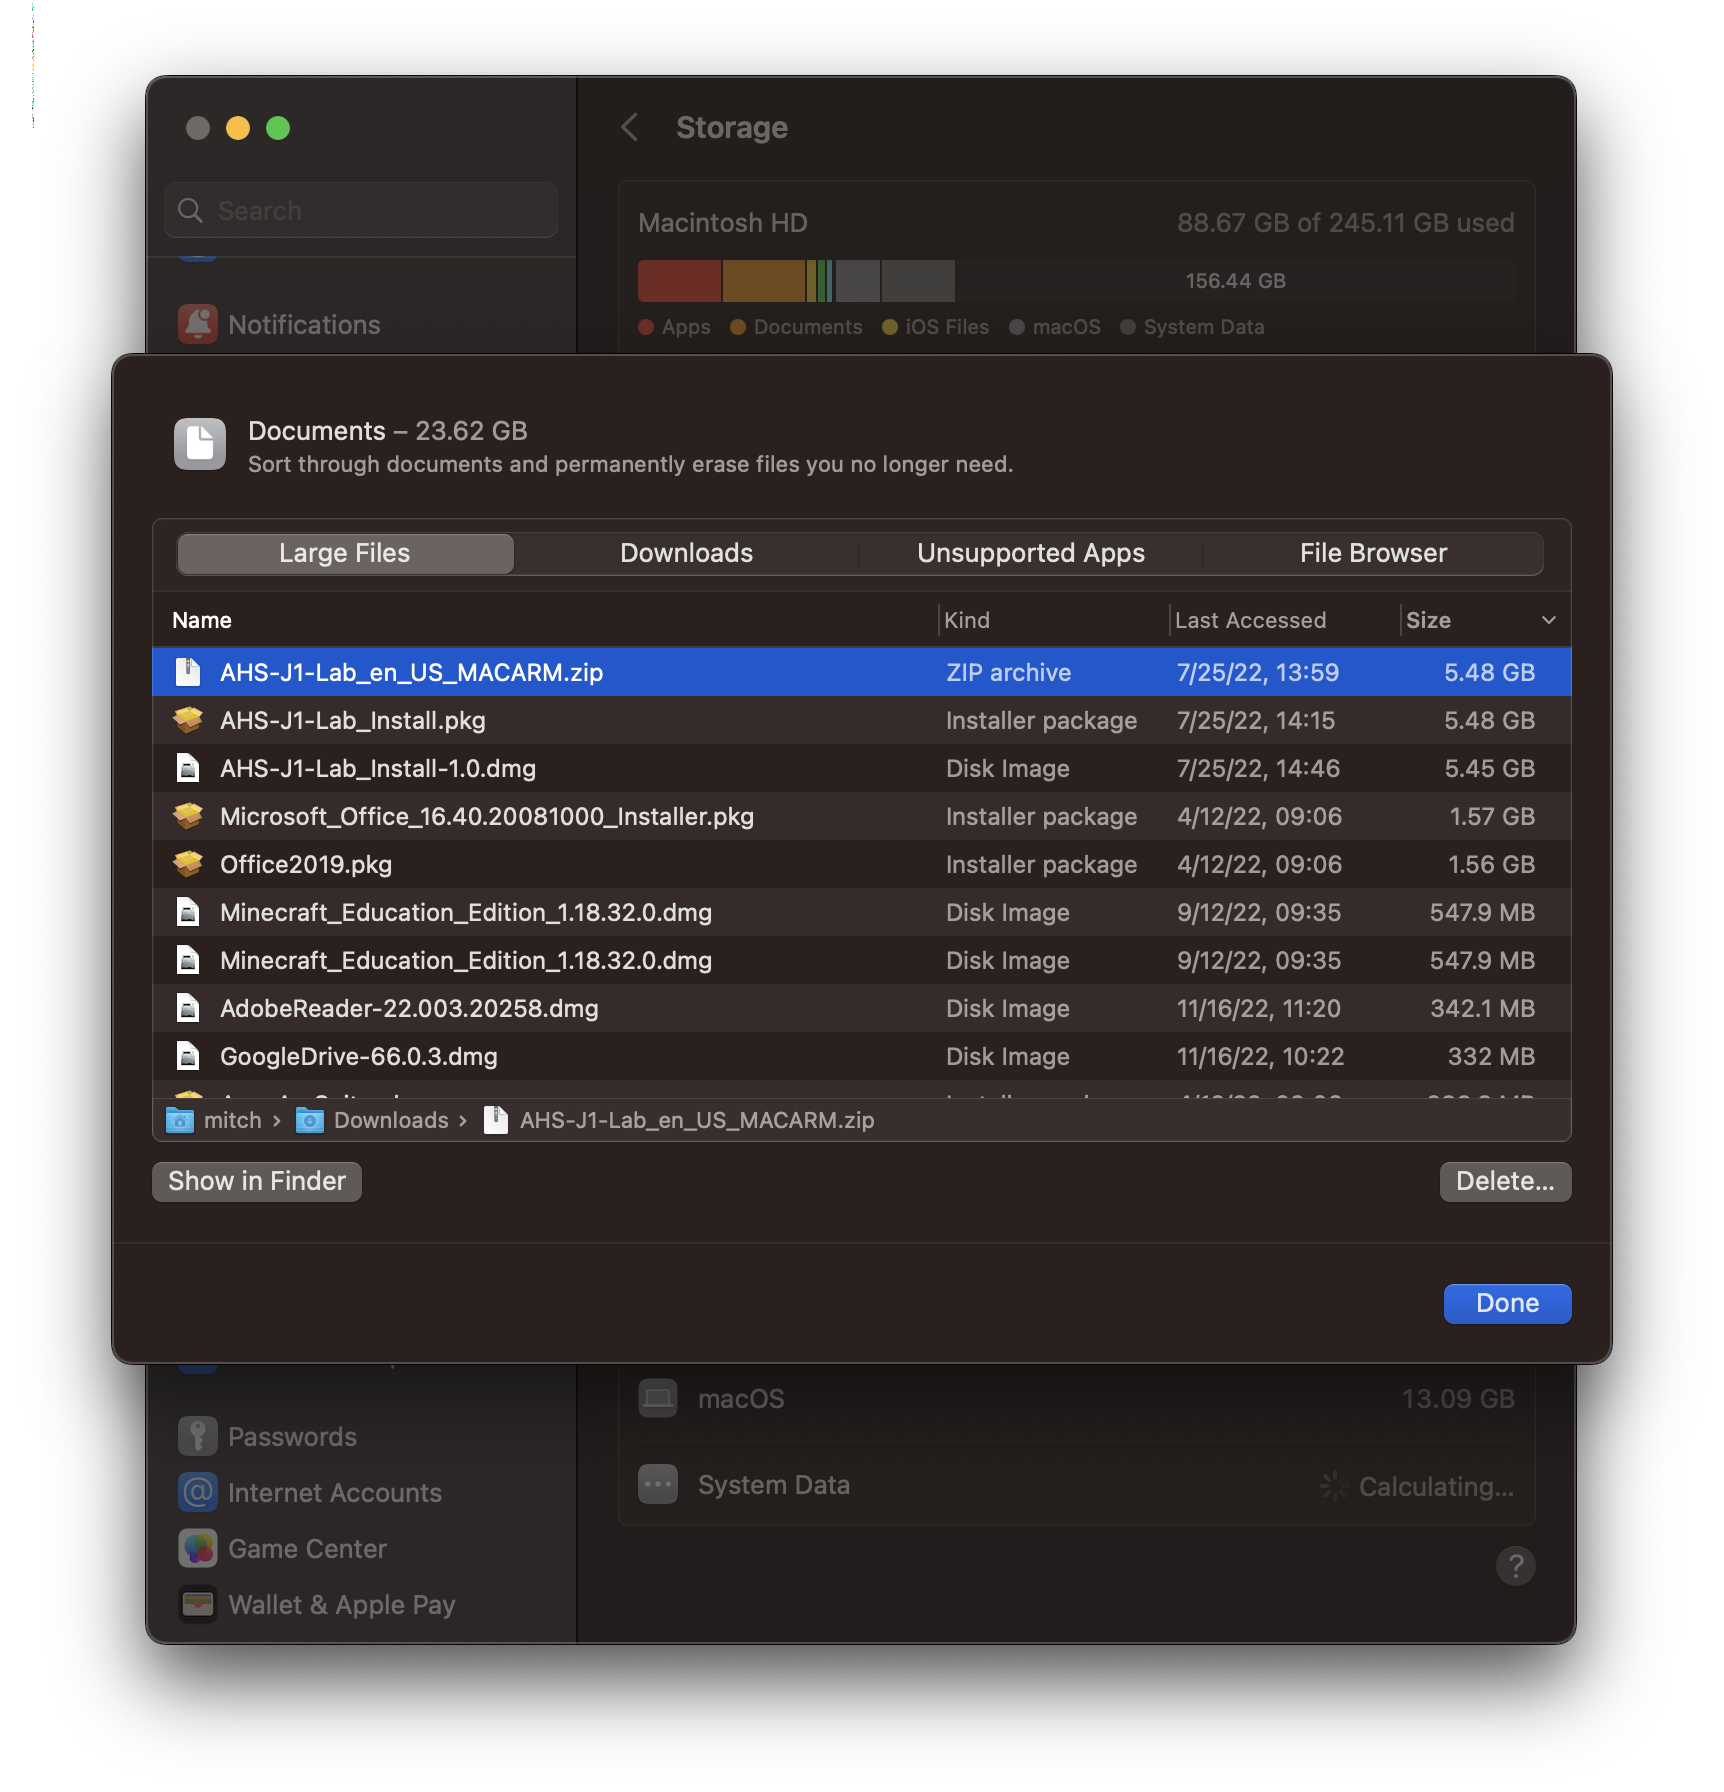
- Select on the category you would like to manage
-
Select any files you don’t need, then select Delete
Monterey (macOS 12)
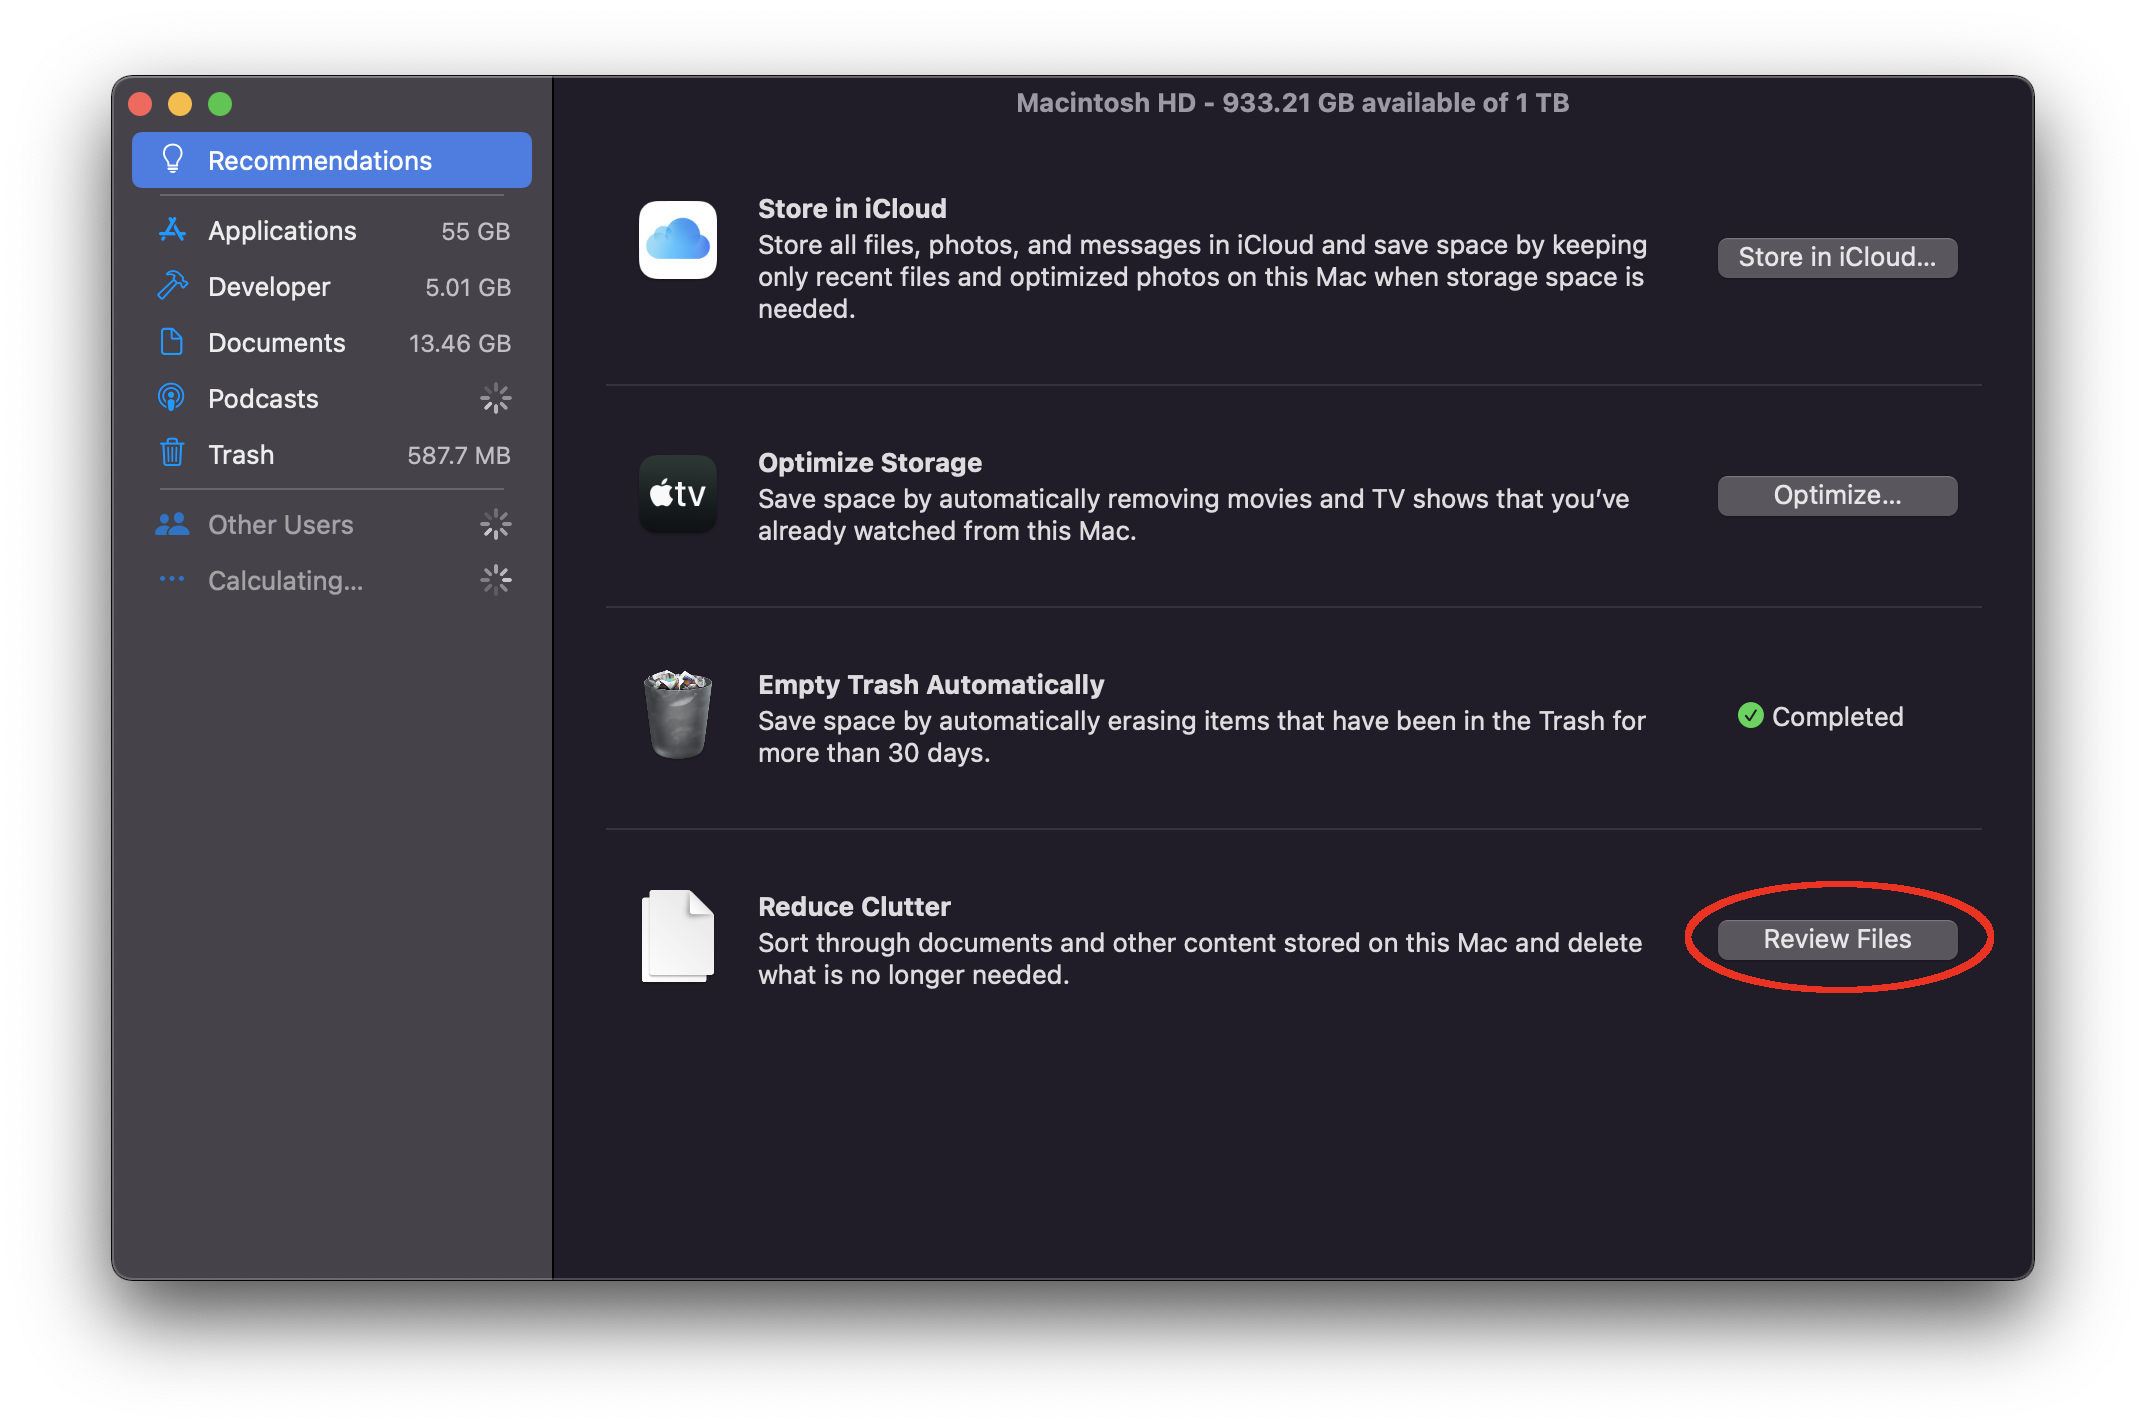
- Find “Macintosh HD” on the desktop
-
Right-click and select “Manage Storage…”

-
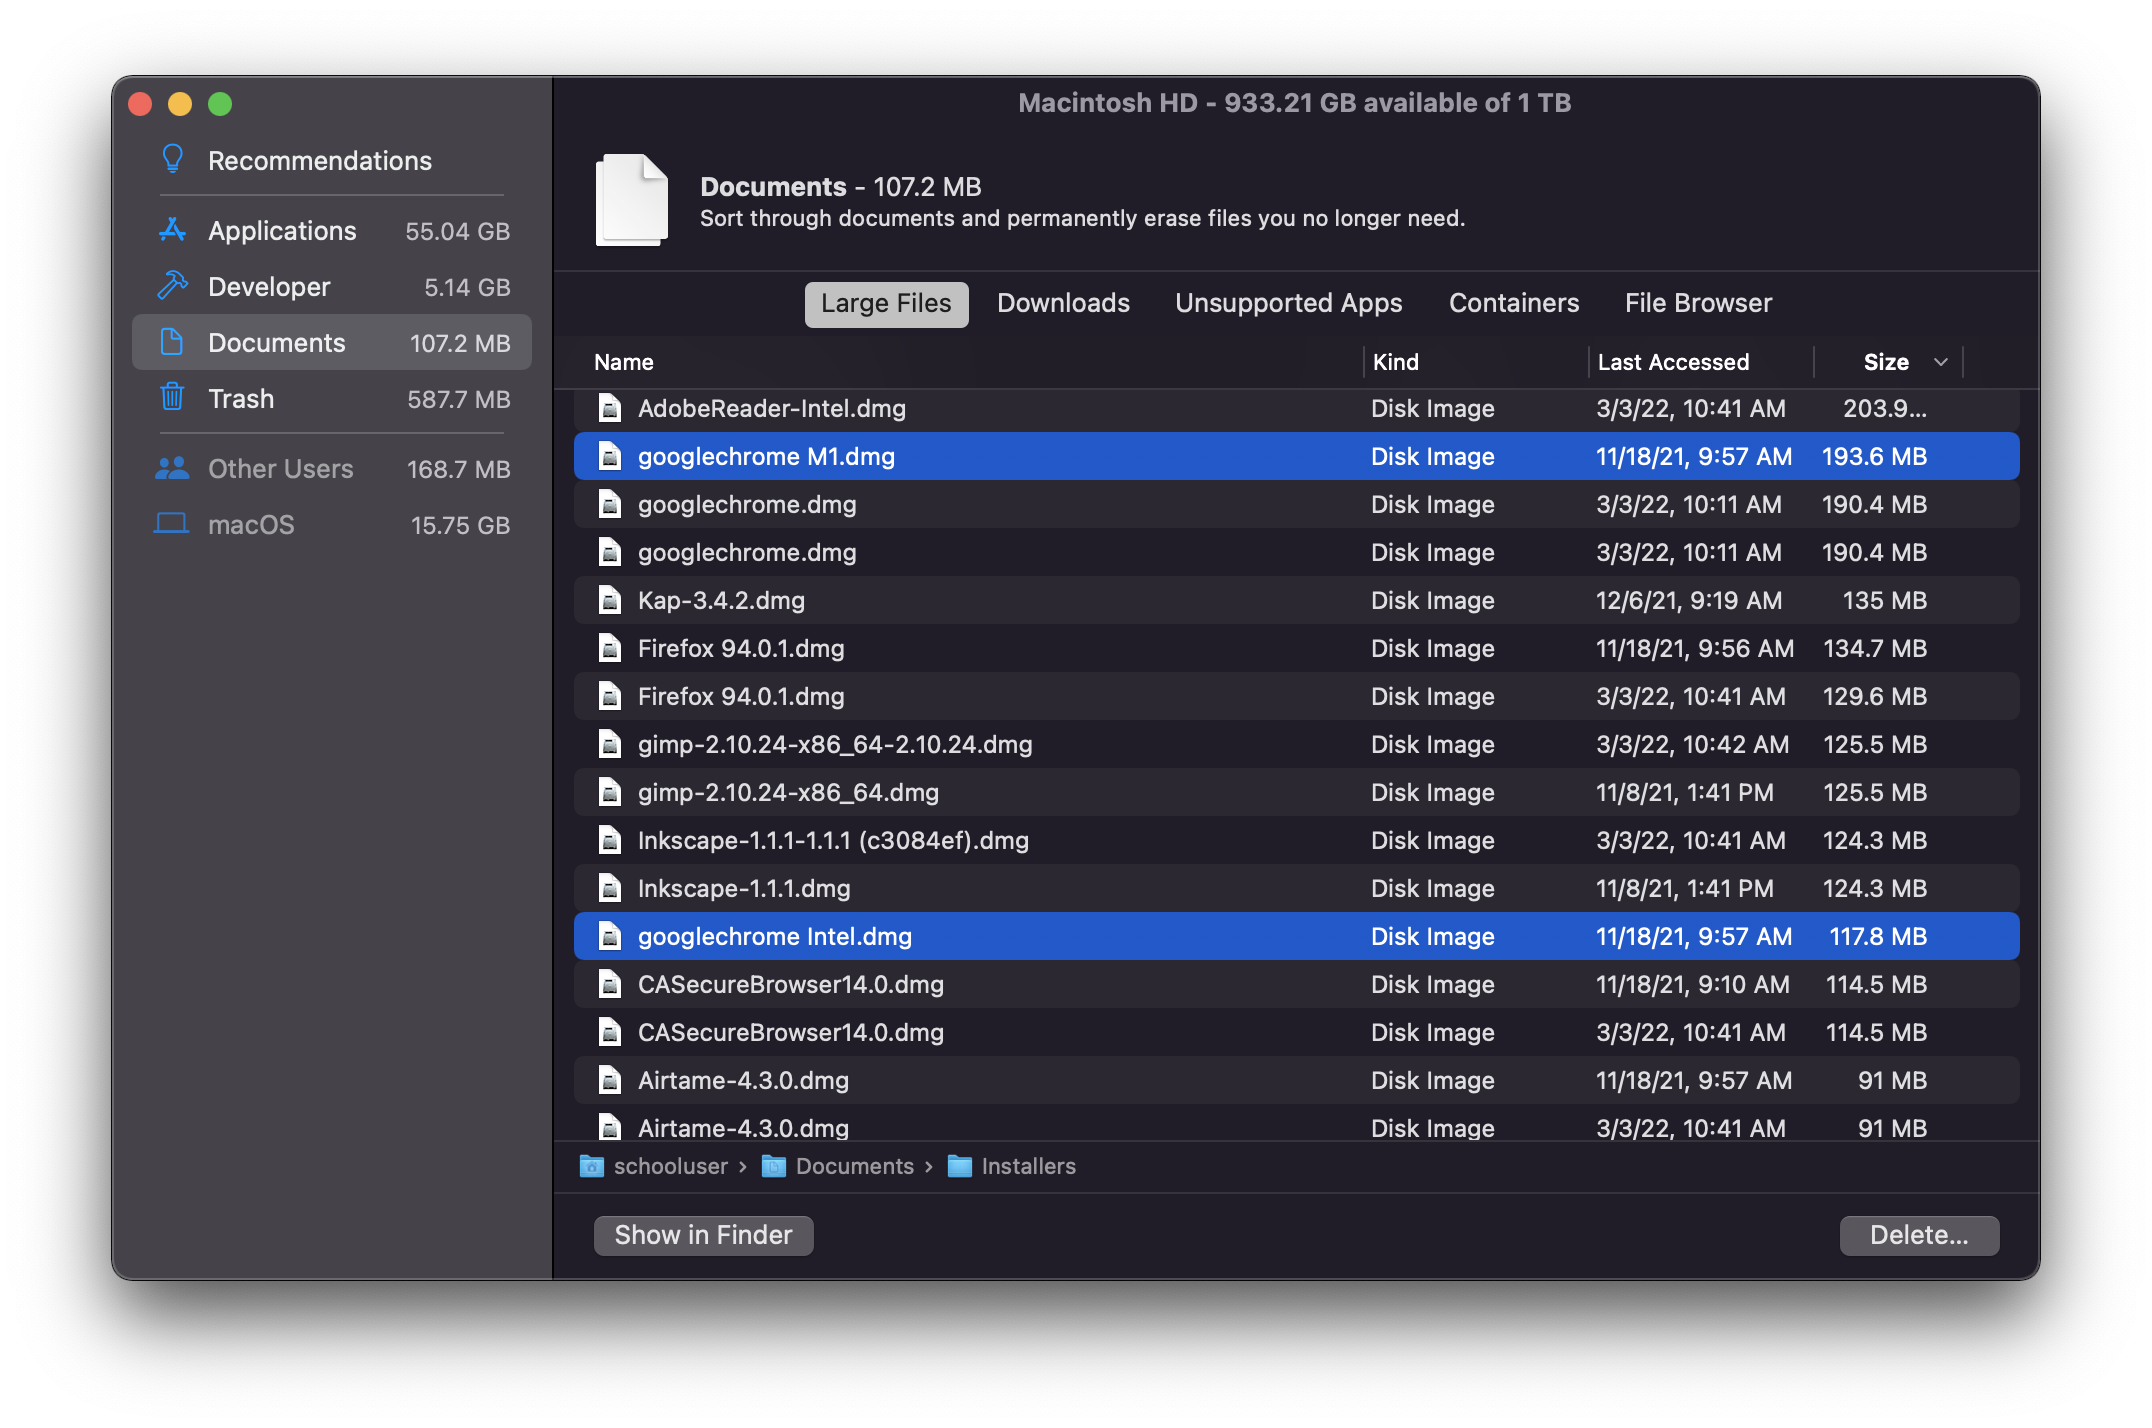
Wait a few moments for files to be found, then click “Review Files” in the lower-right corner of the window to list all files on your computer
-
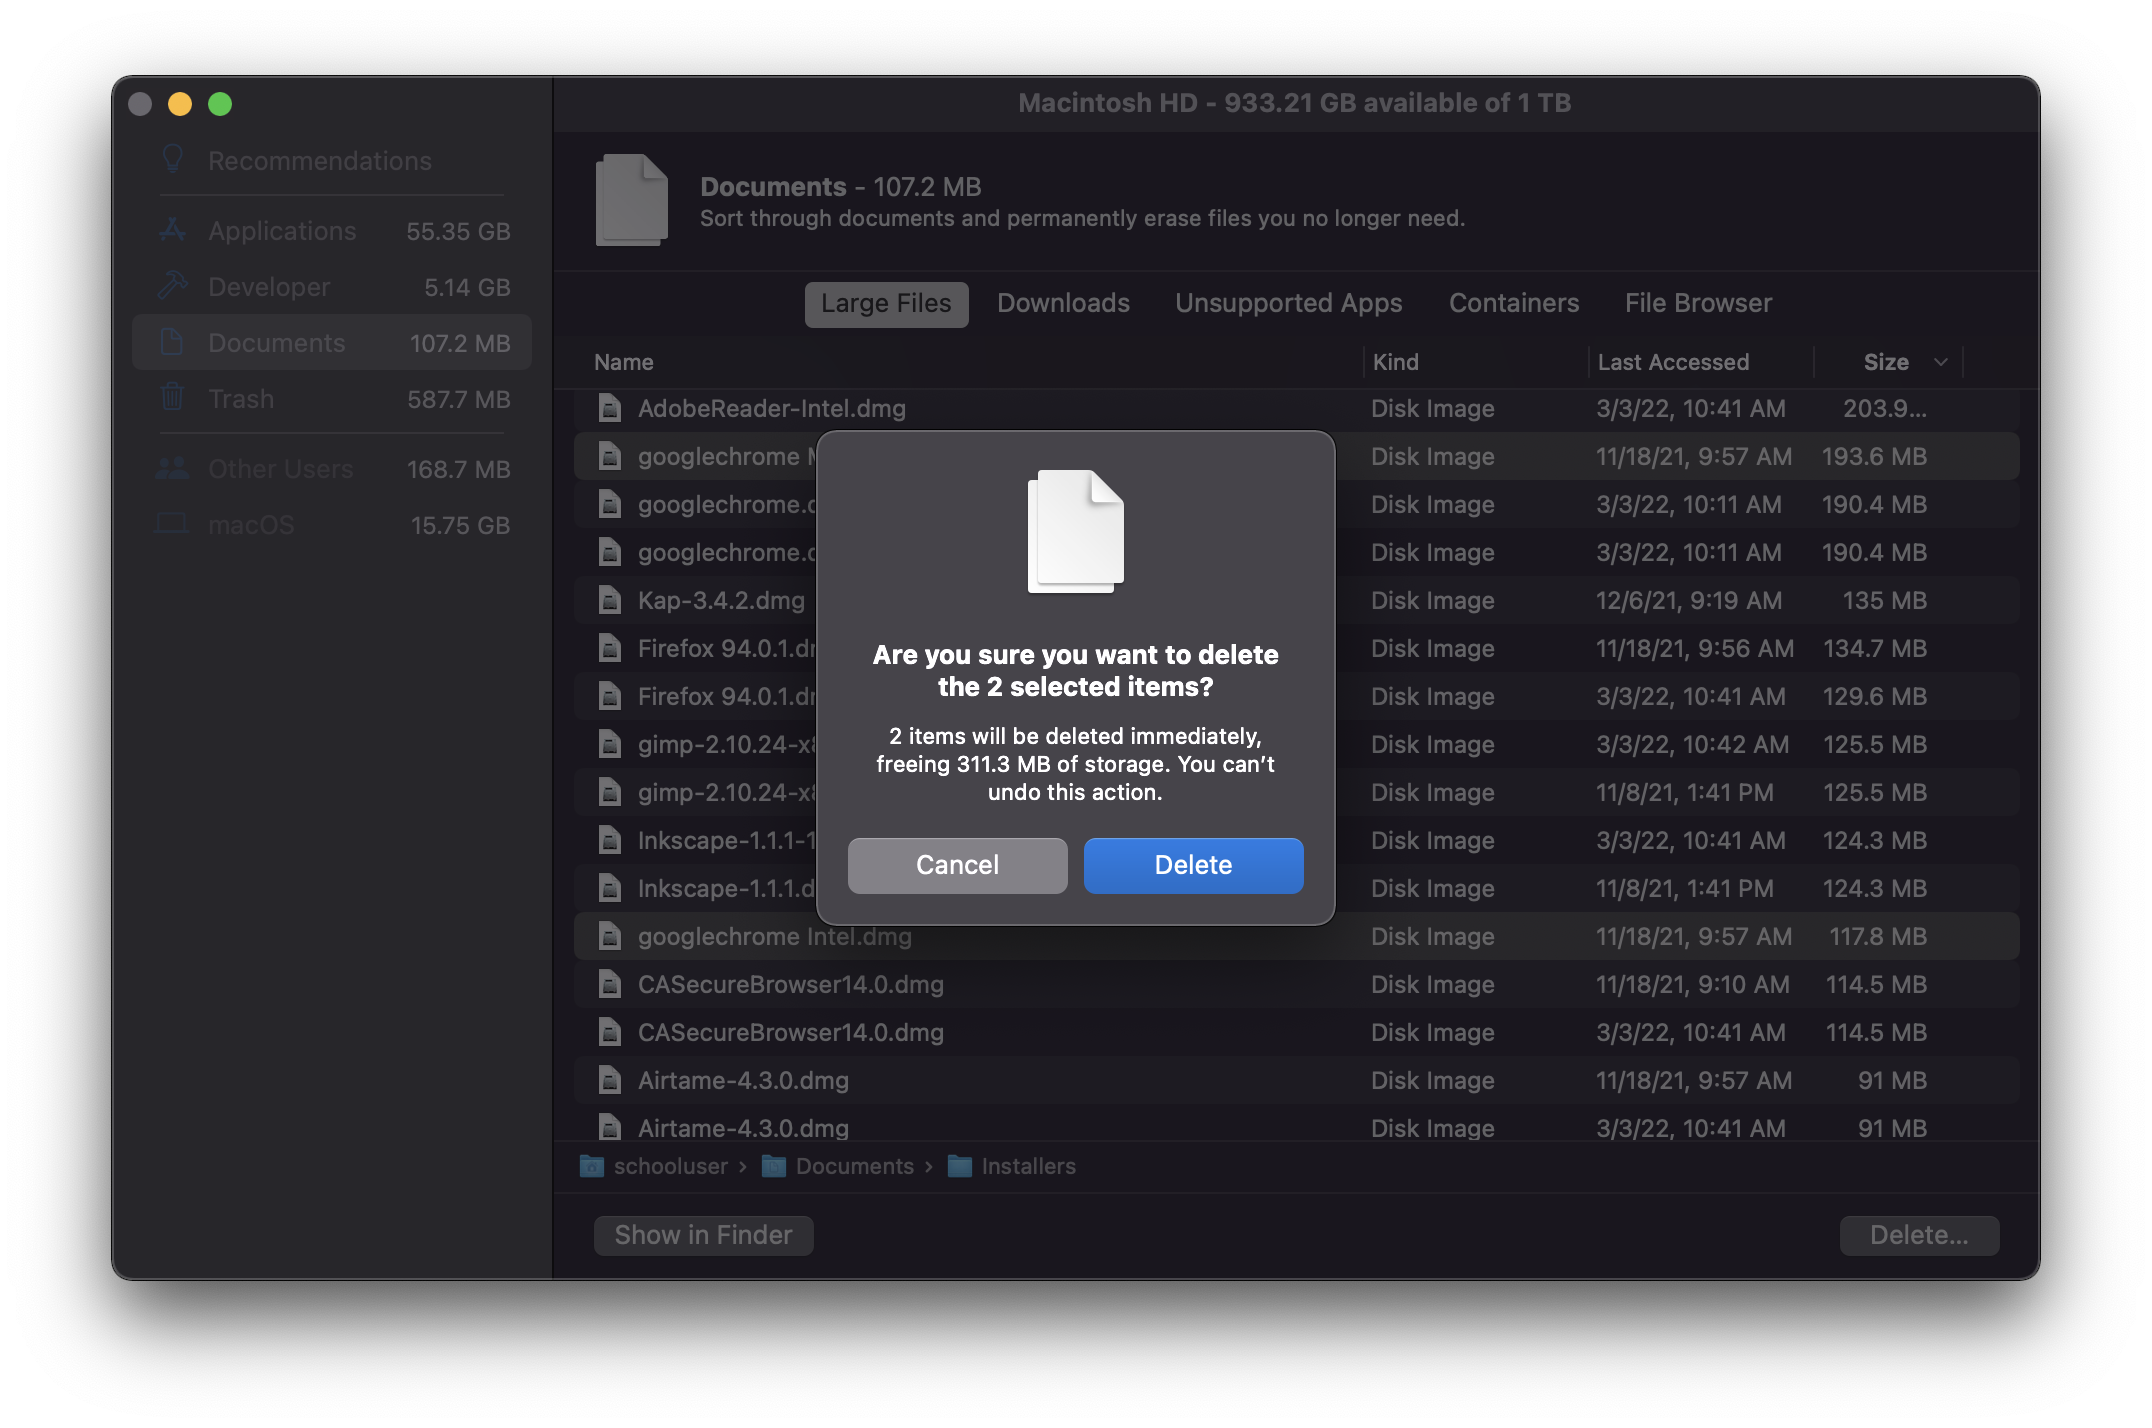
Select one or more files you don’t need and click “Delete…” in the lower-right corner of the window
-
Confirm the process by clicking “Delete” in the confirmation window that pops up
-
-
iCloud & iMessage Removal
Background: Many staff use the iCloud and iMessage sync features with their personal devices and their LVUSD issued Macintosh Laptop. While this may help provide you a unified experience, you may be unaware of potential issues.
When you use iCloud sync, it may copy the following to ALL of your devices:
Browser History / Documents / Photos / Saved passwords / Calendars / Contacts / SMS/iMessages
Should someone visit, send, or add inappropriate content to one of your personal devices, that content will automatically add to your LVUSD issued Macintosh Laptop. Depending on the nature of the content added, it can be a violation of staff policy.
As always, please use your professional judgement. Below are instructions on how to sign-out of your iCloud and your iMessage accounts on your LVUSD issued Macintosh Laptop.
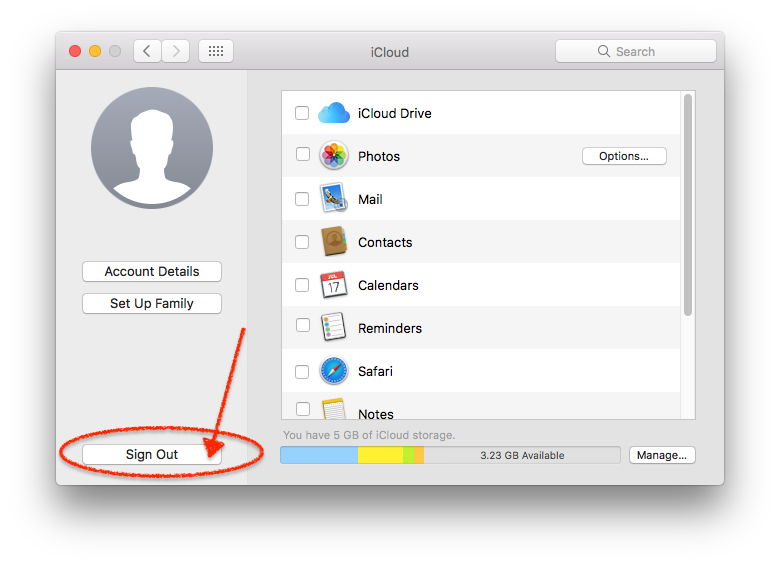
Sign Out of iCloud
-
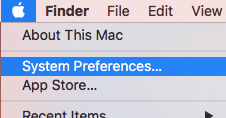
Click the Apple icon in the upper left corner of your screen and click on System Preferences
-
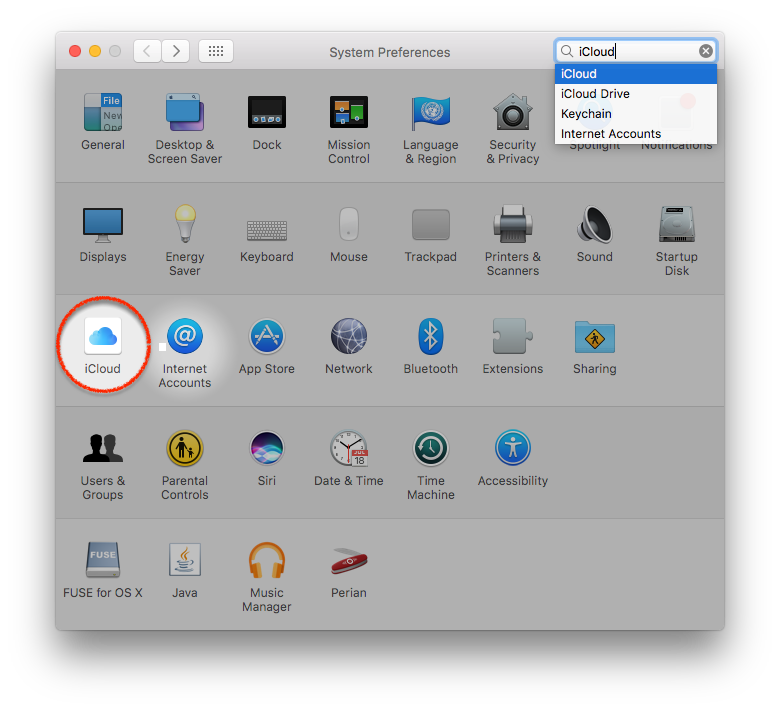
Click on the iCloud icon
-
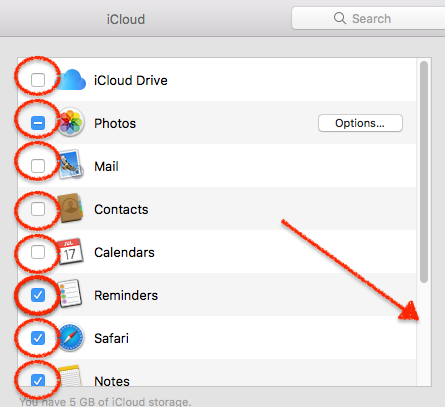
Uncheck all of the services listed. You have to scroll down to uncheck every option.
-
After un-checking the options, click on the Sign Out button on the left
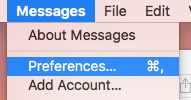
Sign Out of iMessage
-
Click to open Messages application

-
In the top menu bar, select Messages and click on Preferences
-
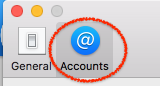
Click on Accounts
-
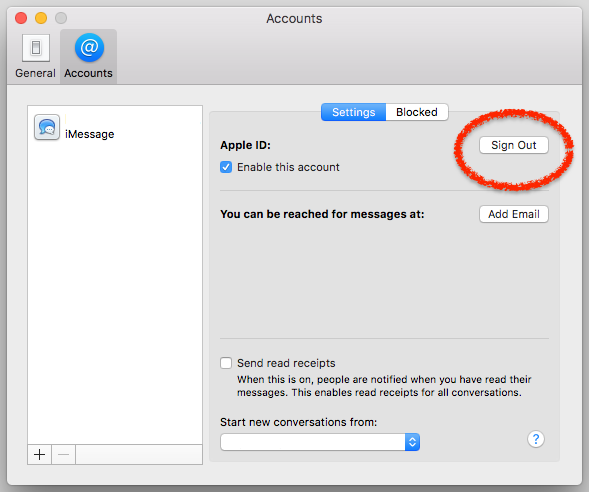
Select your iMessage Account in the left menu bar, and click on Sign Out
-
-
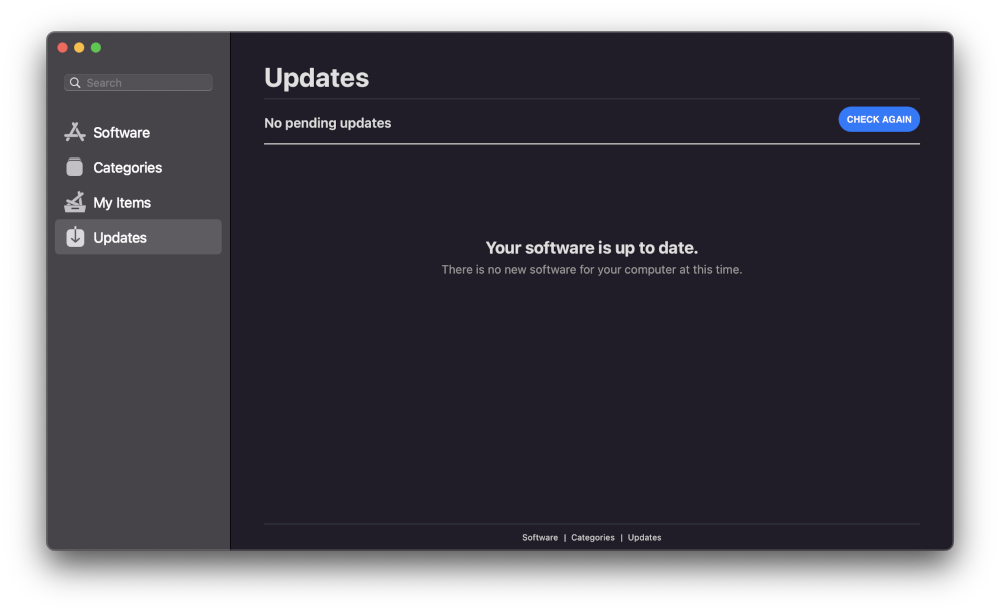
Managed Software Center
-
Open the ‘Managed Software Center’ app
-
From here you can use the menu on the left to navigate between:
- Software: displays applications available for install
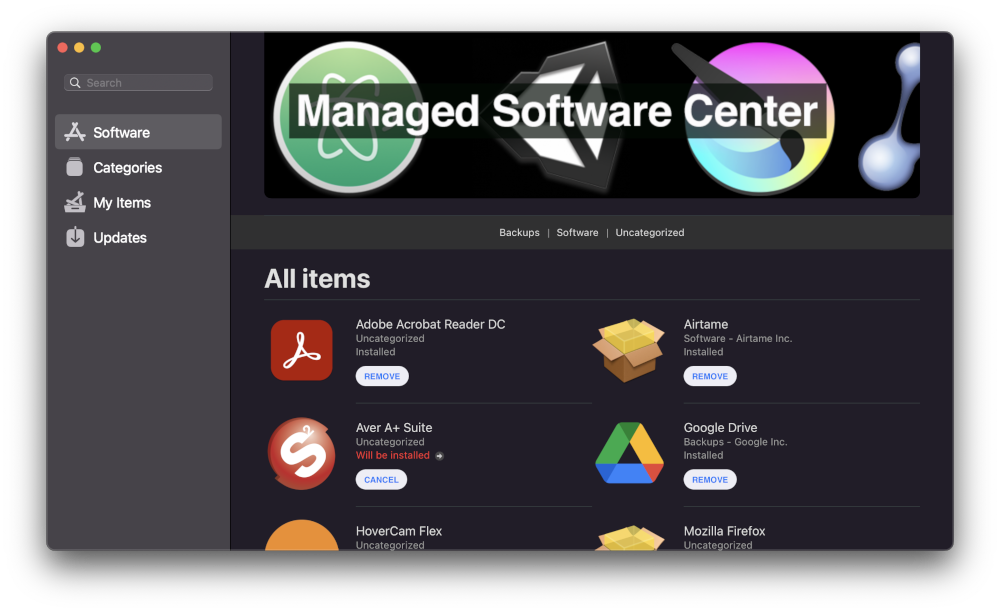
- Updates: displays updates available for installed apps
-
Windows
-
Change Default PDF Viewer
- Right-click on any PDF file and select “Properties”
- Next to “Opens with”, click on “Change”
- Scroll down the list and select the PDF Viewer of your choice usually Adobe Acrobat Reader DC)
- If the app is not in the list, click on “More apps”
- If it still doesn’t show up, click on “Look for another app on this PC”, and locate the program manually
-
Running Updates
-
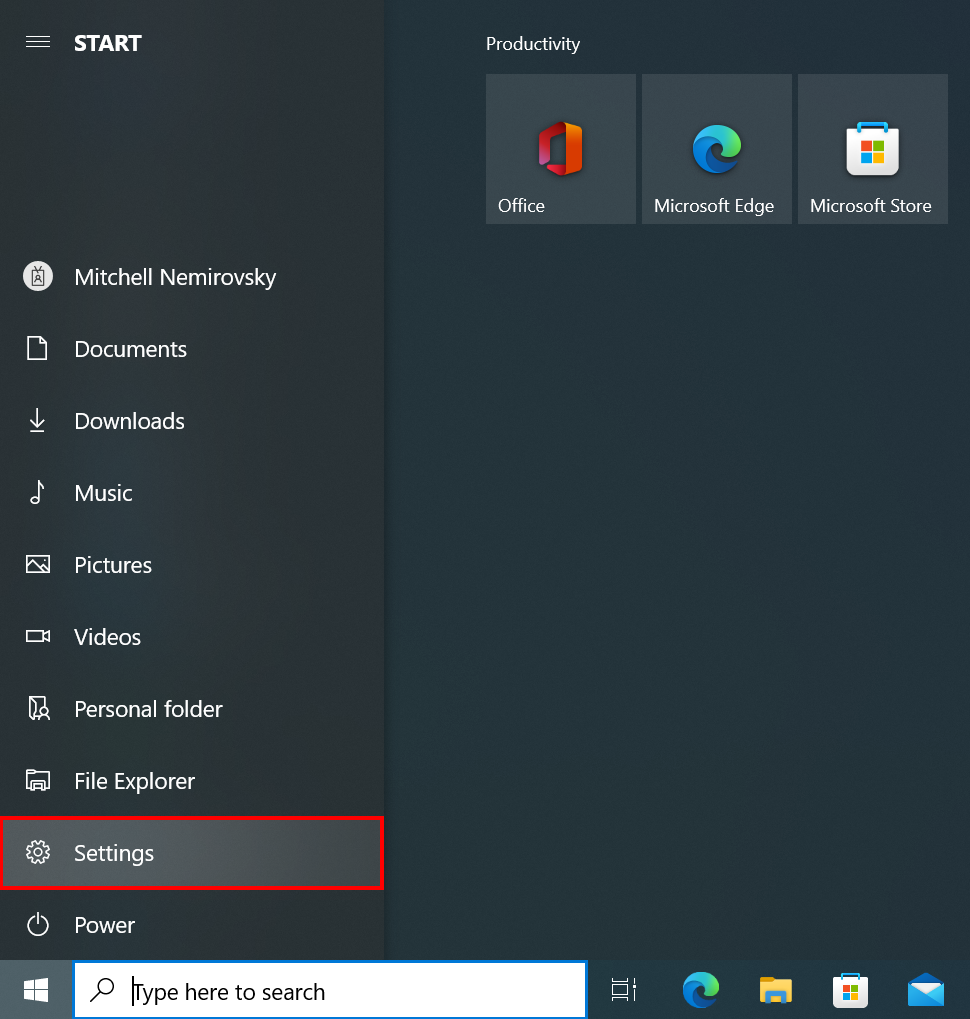
Open the Start Menu and click on the gear icon to open Settings
-
Find and click on “Update & Security”
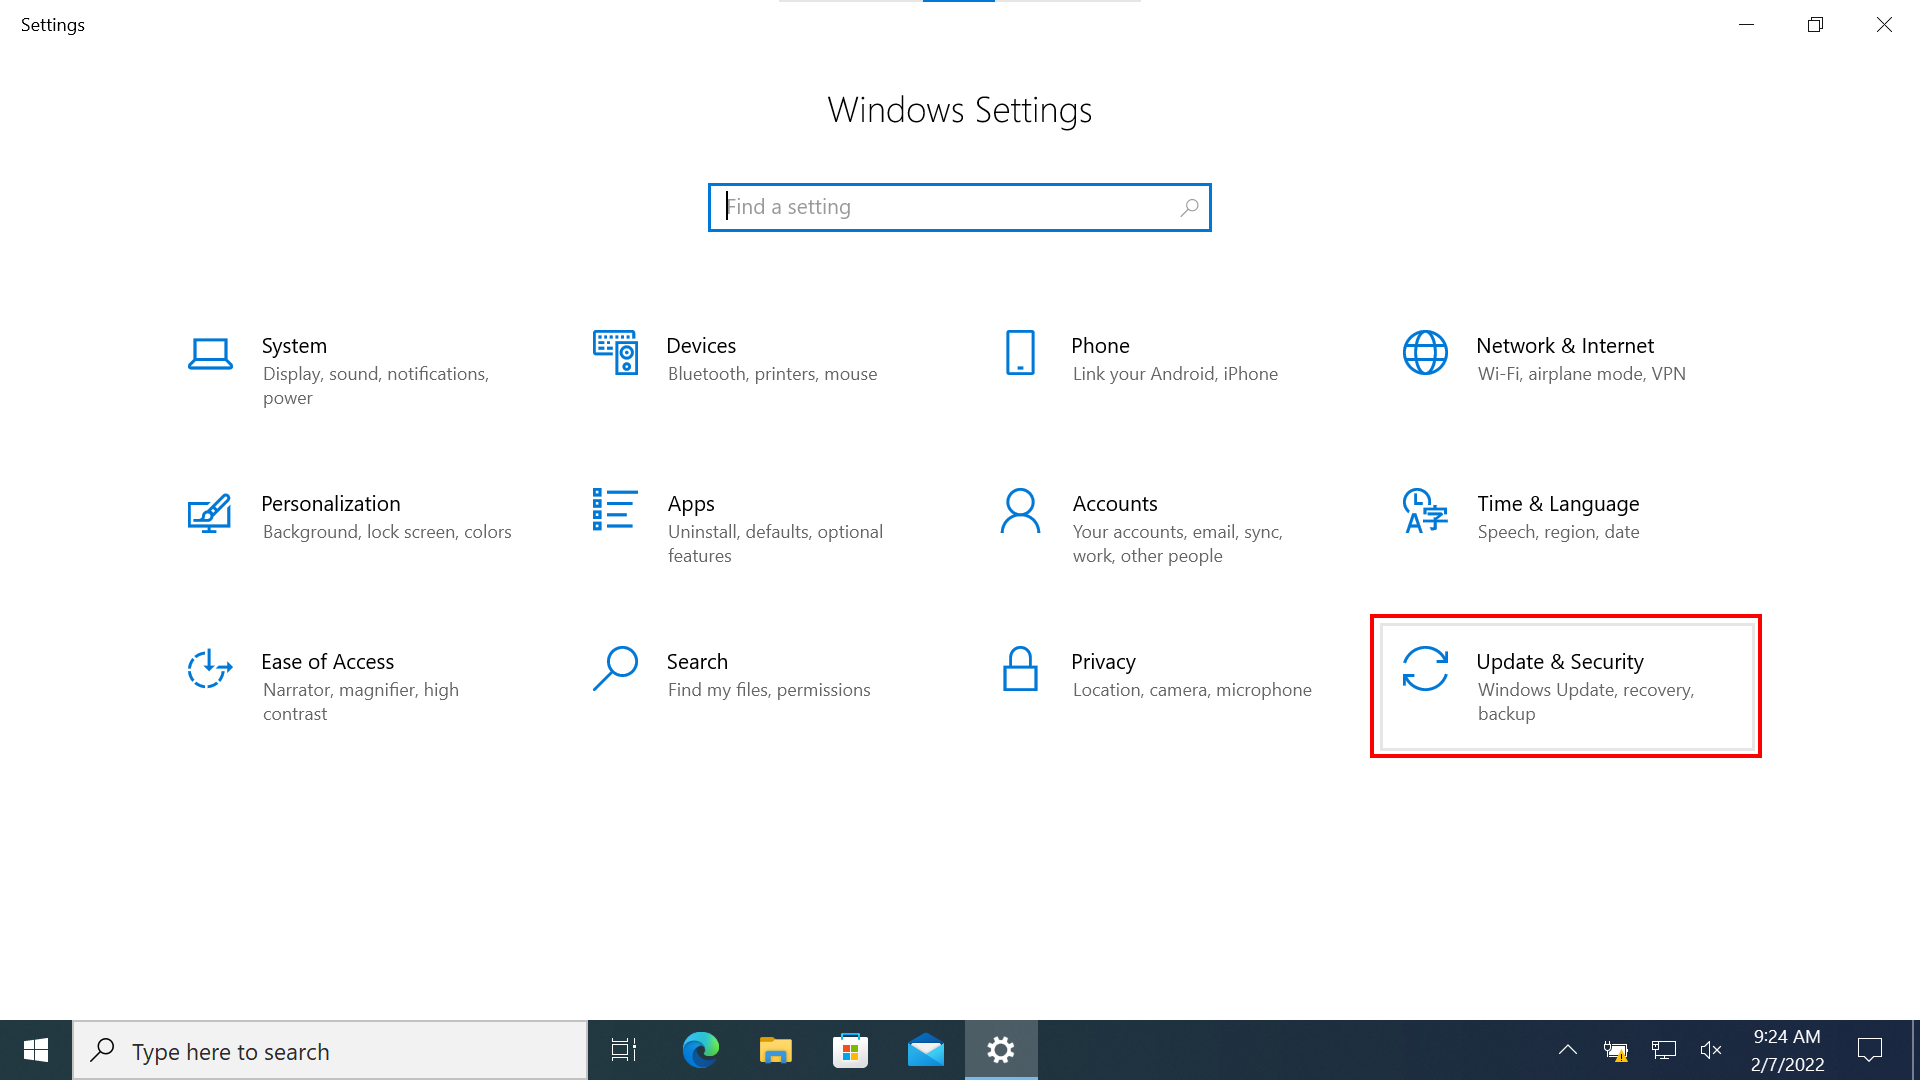
-
Click on “Check for Updates” and allow any listed updates to download and install
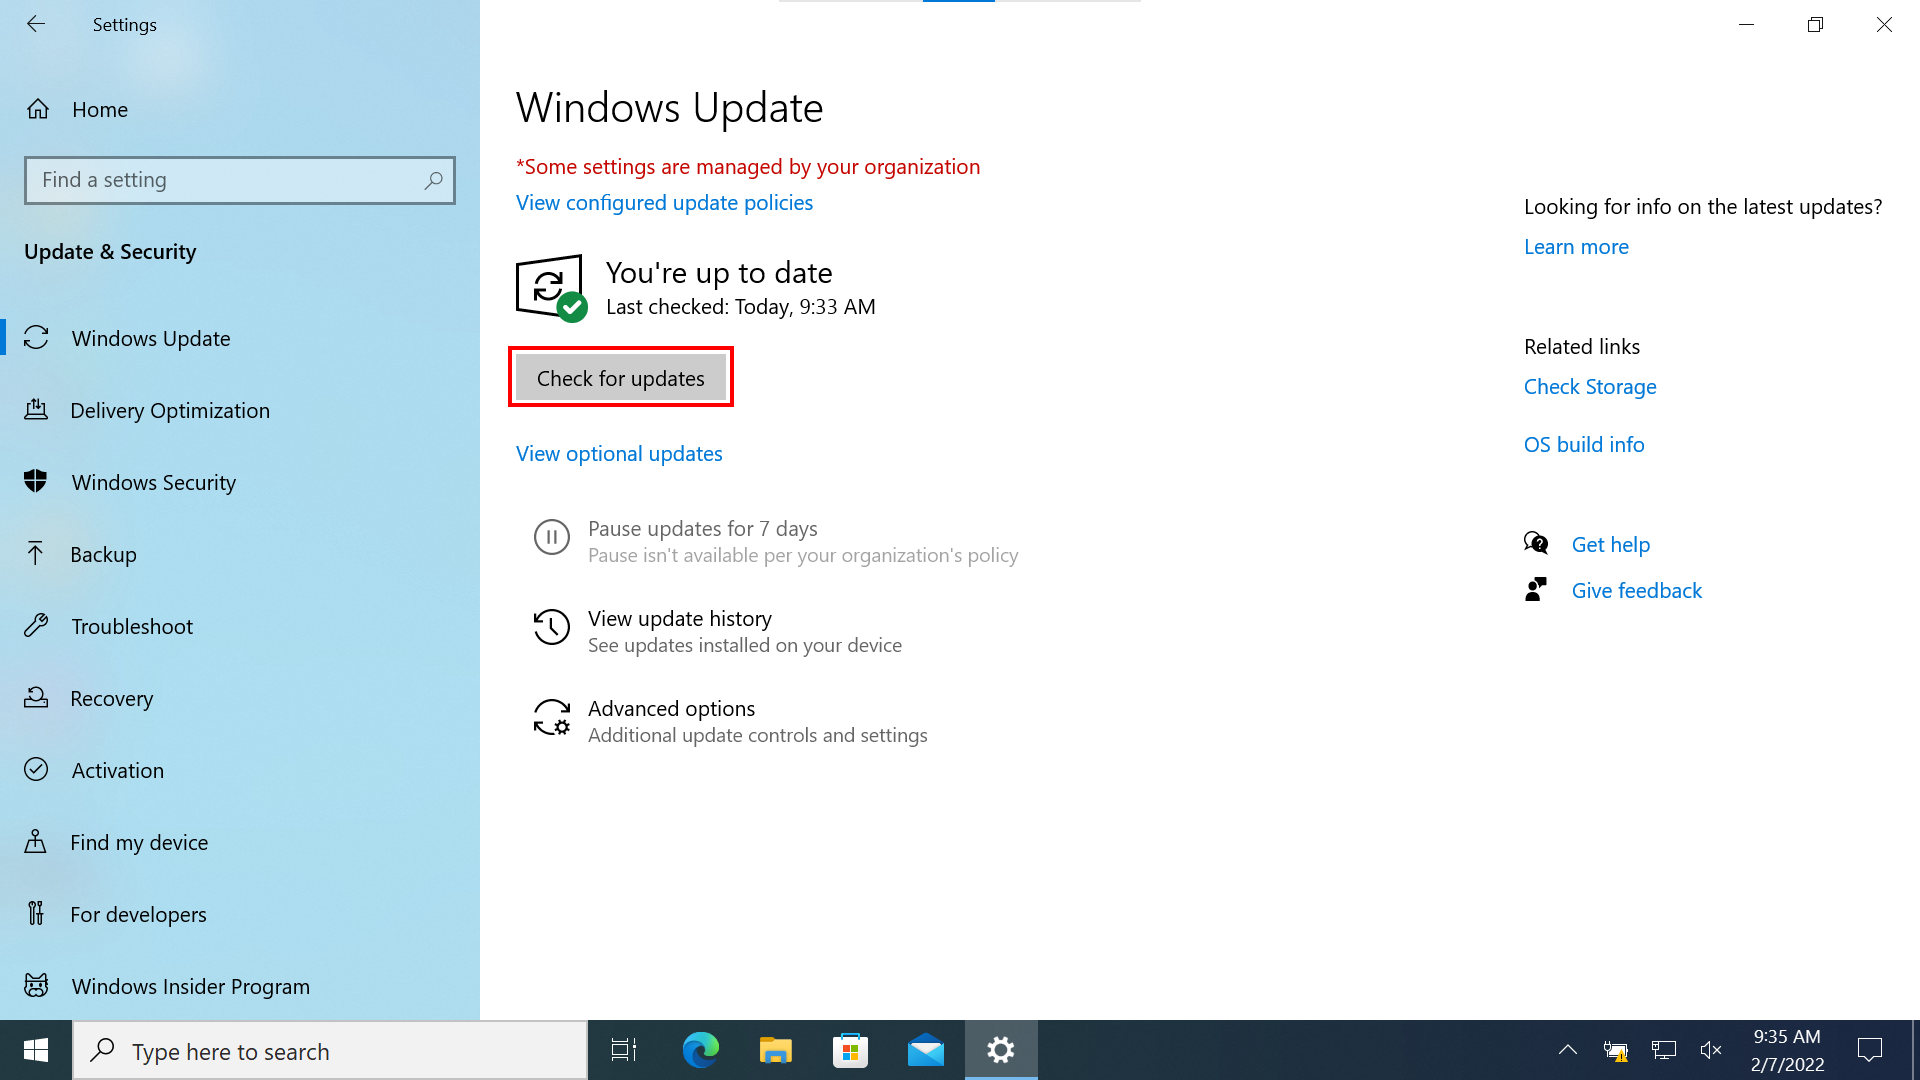
- You can continue working while updates download, but a restart is (usually) necessary to finalize the installation
-
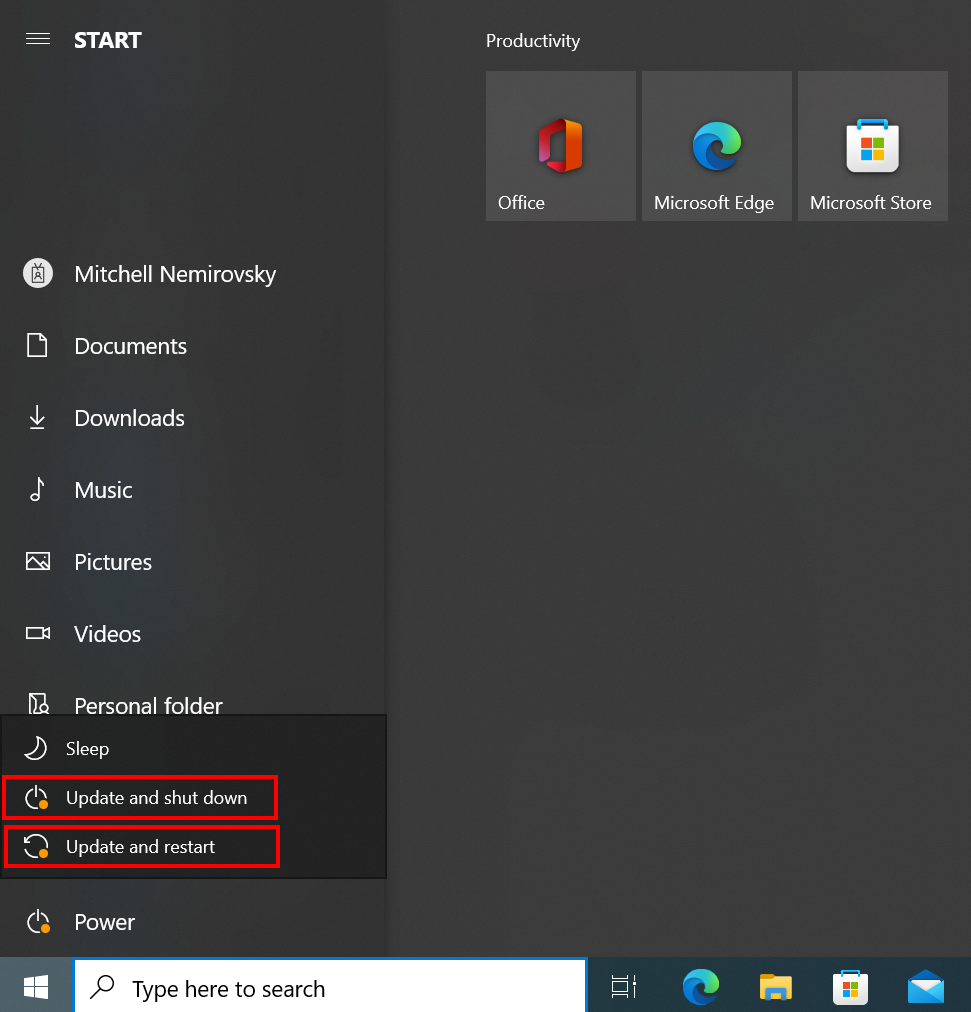
When prompted, or when suitable (after school, at home, etc.), either “Update and restart” or “Update and shut down”
Rolling Back Updates
Only do this if asked to by a District Technician
-
Open the Start Menu and click on the Settings gear
-
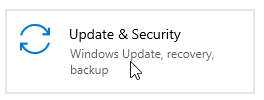
Go to “Update & Security”
-
In the “Windows Update” tab, click on “View update history”
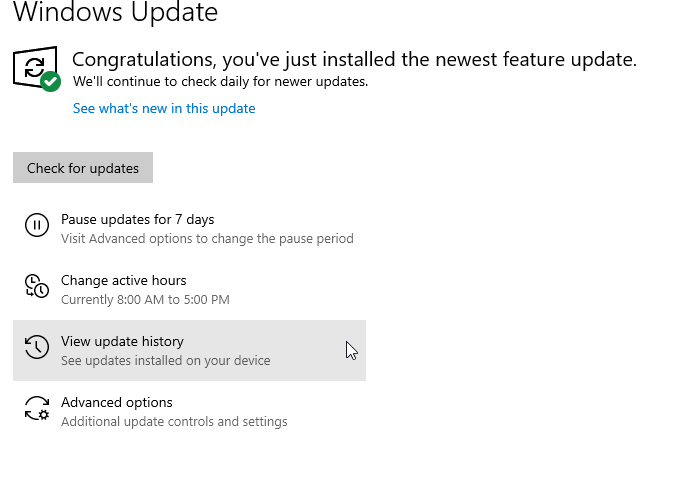
-
At the very top, click “Uninstall updates”
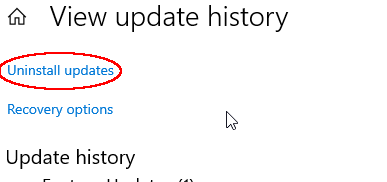
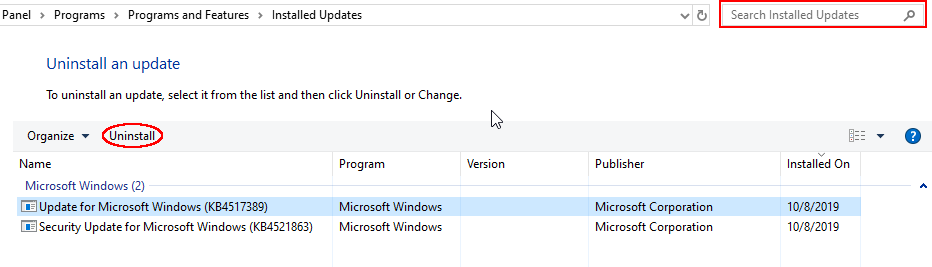
-
In the new window, either search by Update ID (KB#) or scroll through the list
-
Restart your computer
-
-
Uninstalling Programs
-
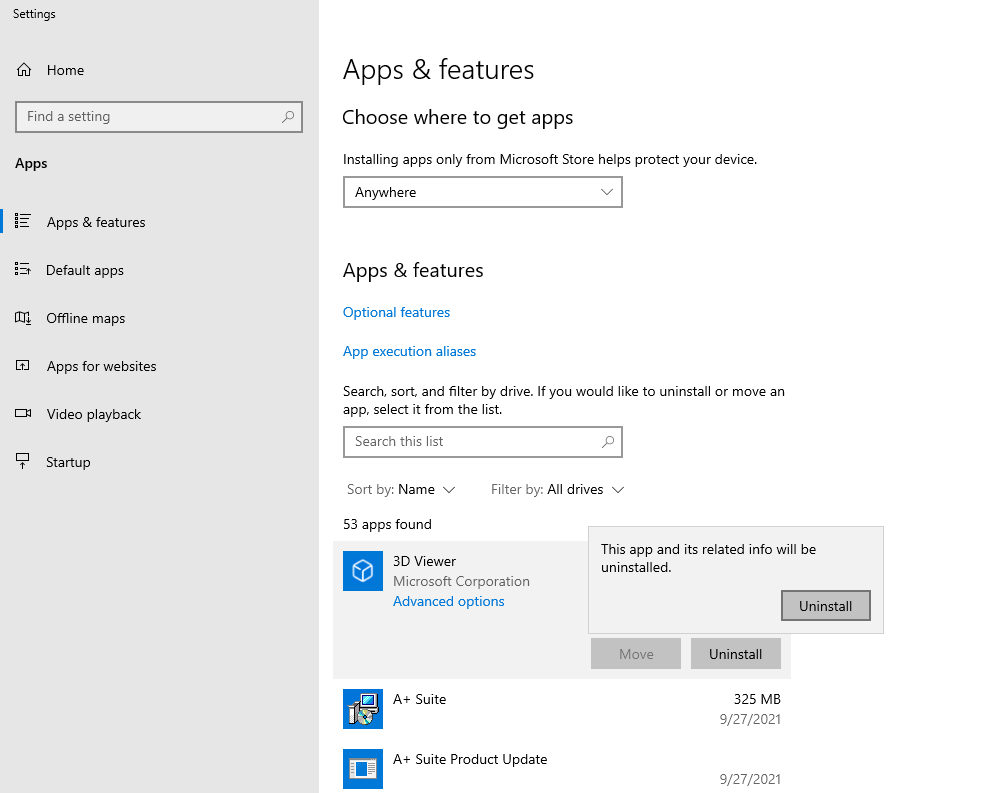
Open the Start Menu or Search and type: “add or remove programs”
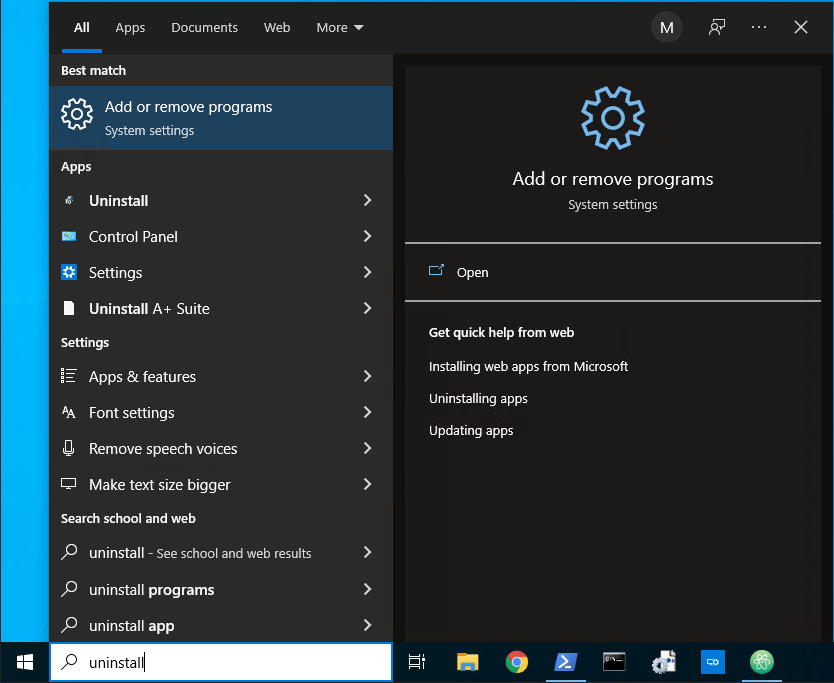
- Hit Enter or click on the first entry: “Add or remove programs”
-
Scroll down or search for the program you want to uninstall, click on it, select “Uninstall”, then “Uninstall” again
-
-
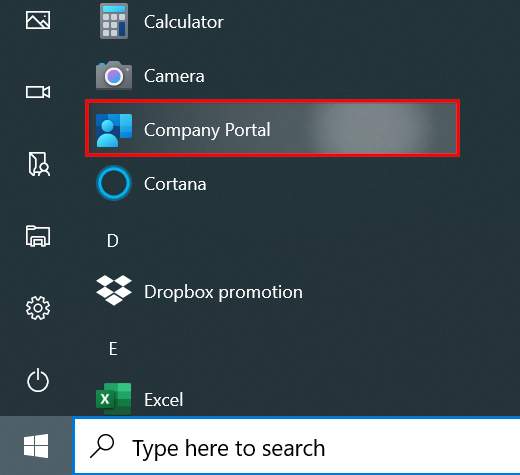
Company Portal
These guides only apply to laptops where you have signed into the device using your LVUSD credentials (email & password).
-
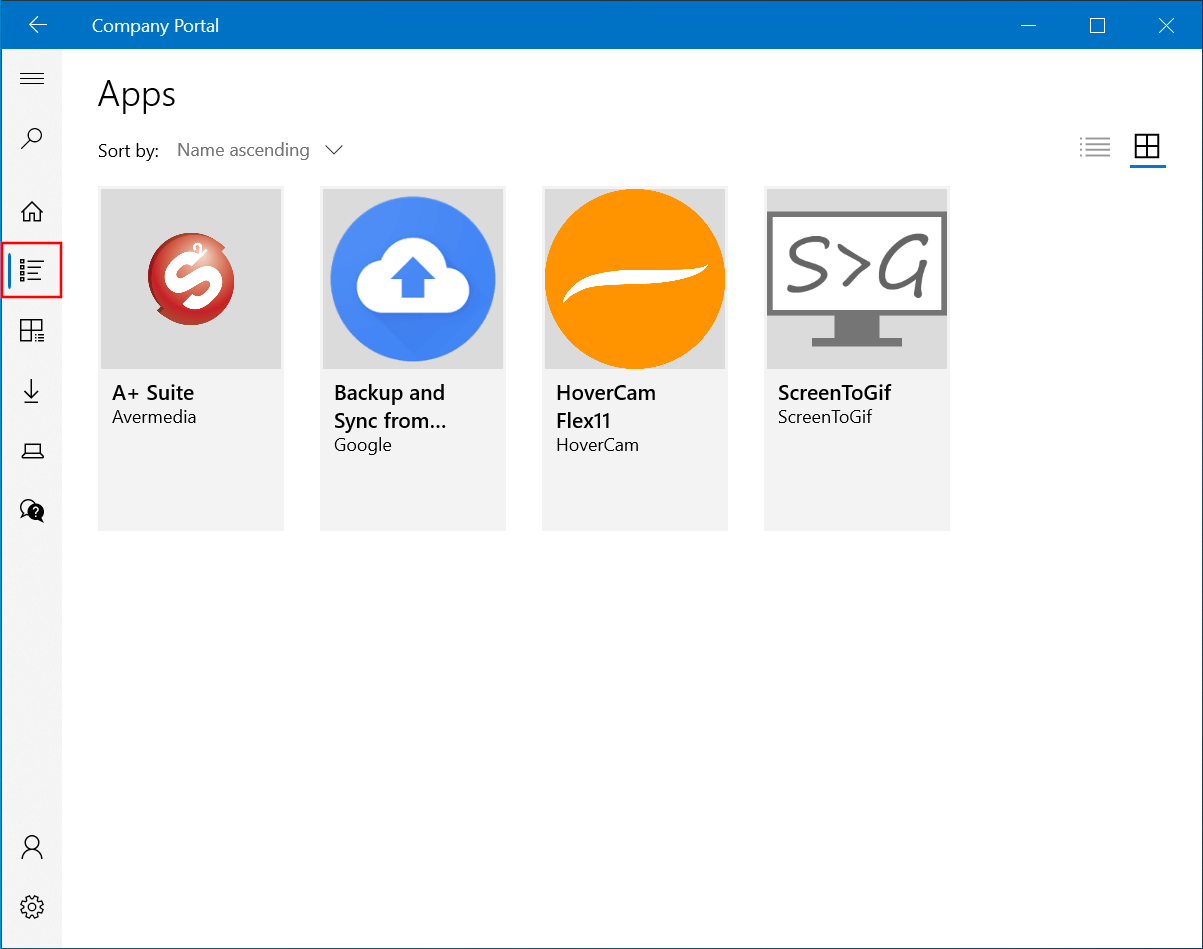
Open the ‘Company Portal’ app
- From here, you can use the menu on the left to navigate between:
-
Apps: displays applications available for install
-
Settings: allows you to force a sync to our Windows MDM and displays Portal app version

Installing Available Apps
-
Navigate to the Apps page
-
Click on the application you want to install, then click the “Install” button

-
The application will download and install automatically in the background
-