OneScreen
If you would like to schedule a schoolsite training with OneScreen, please have your Principal reach out to EdTech to get in touch with OneScreen support.
- Screen Sharing / Casting
- Displaying from a Document Camera
- NFC Badge
- Running Updates
- On-Demand Support
- T7 Training Videos
- Additional Links
- Two-Page Guide
Screen Sharing / Casting
Casting
- Use AirPlay if you have an Apple device
- Use Chromecast if you have a Windows, ChromeOS, or Linux (Ubermix) device
- For advanced casting features you can try the OneScreen Share app
Configuring the Cast Settings
-
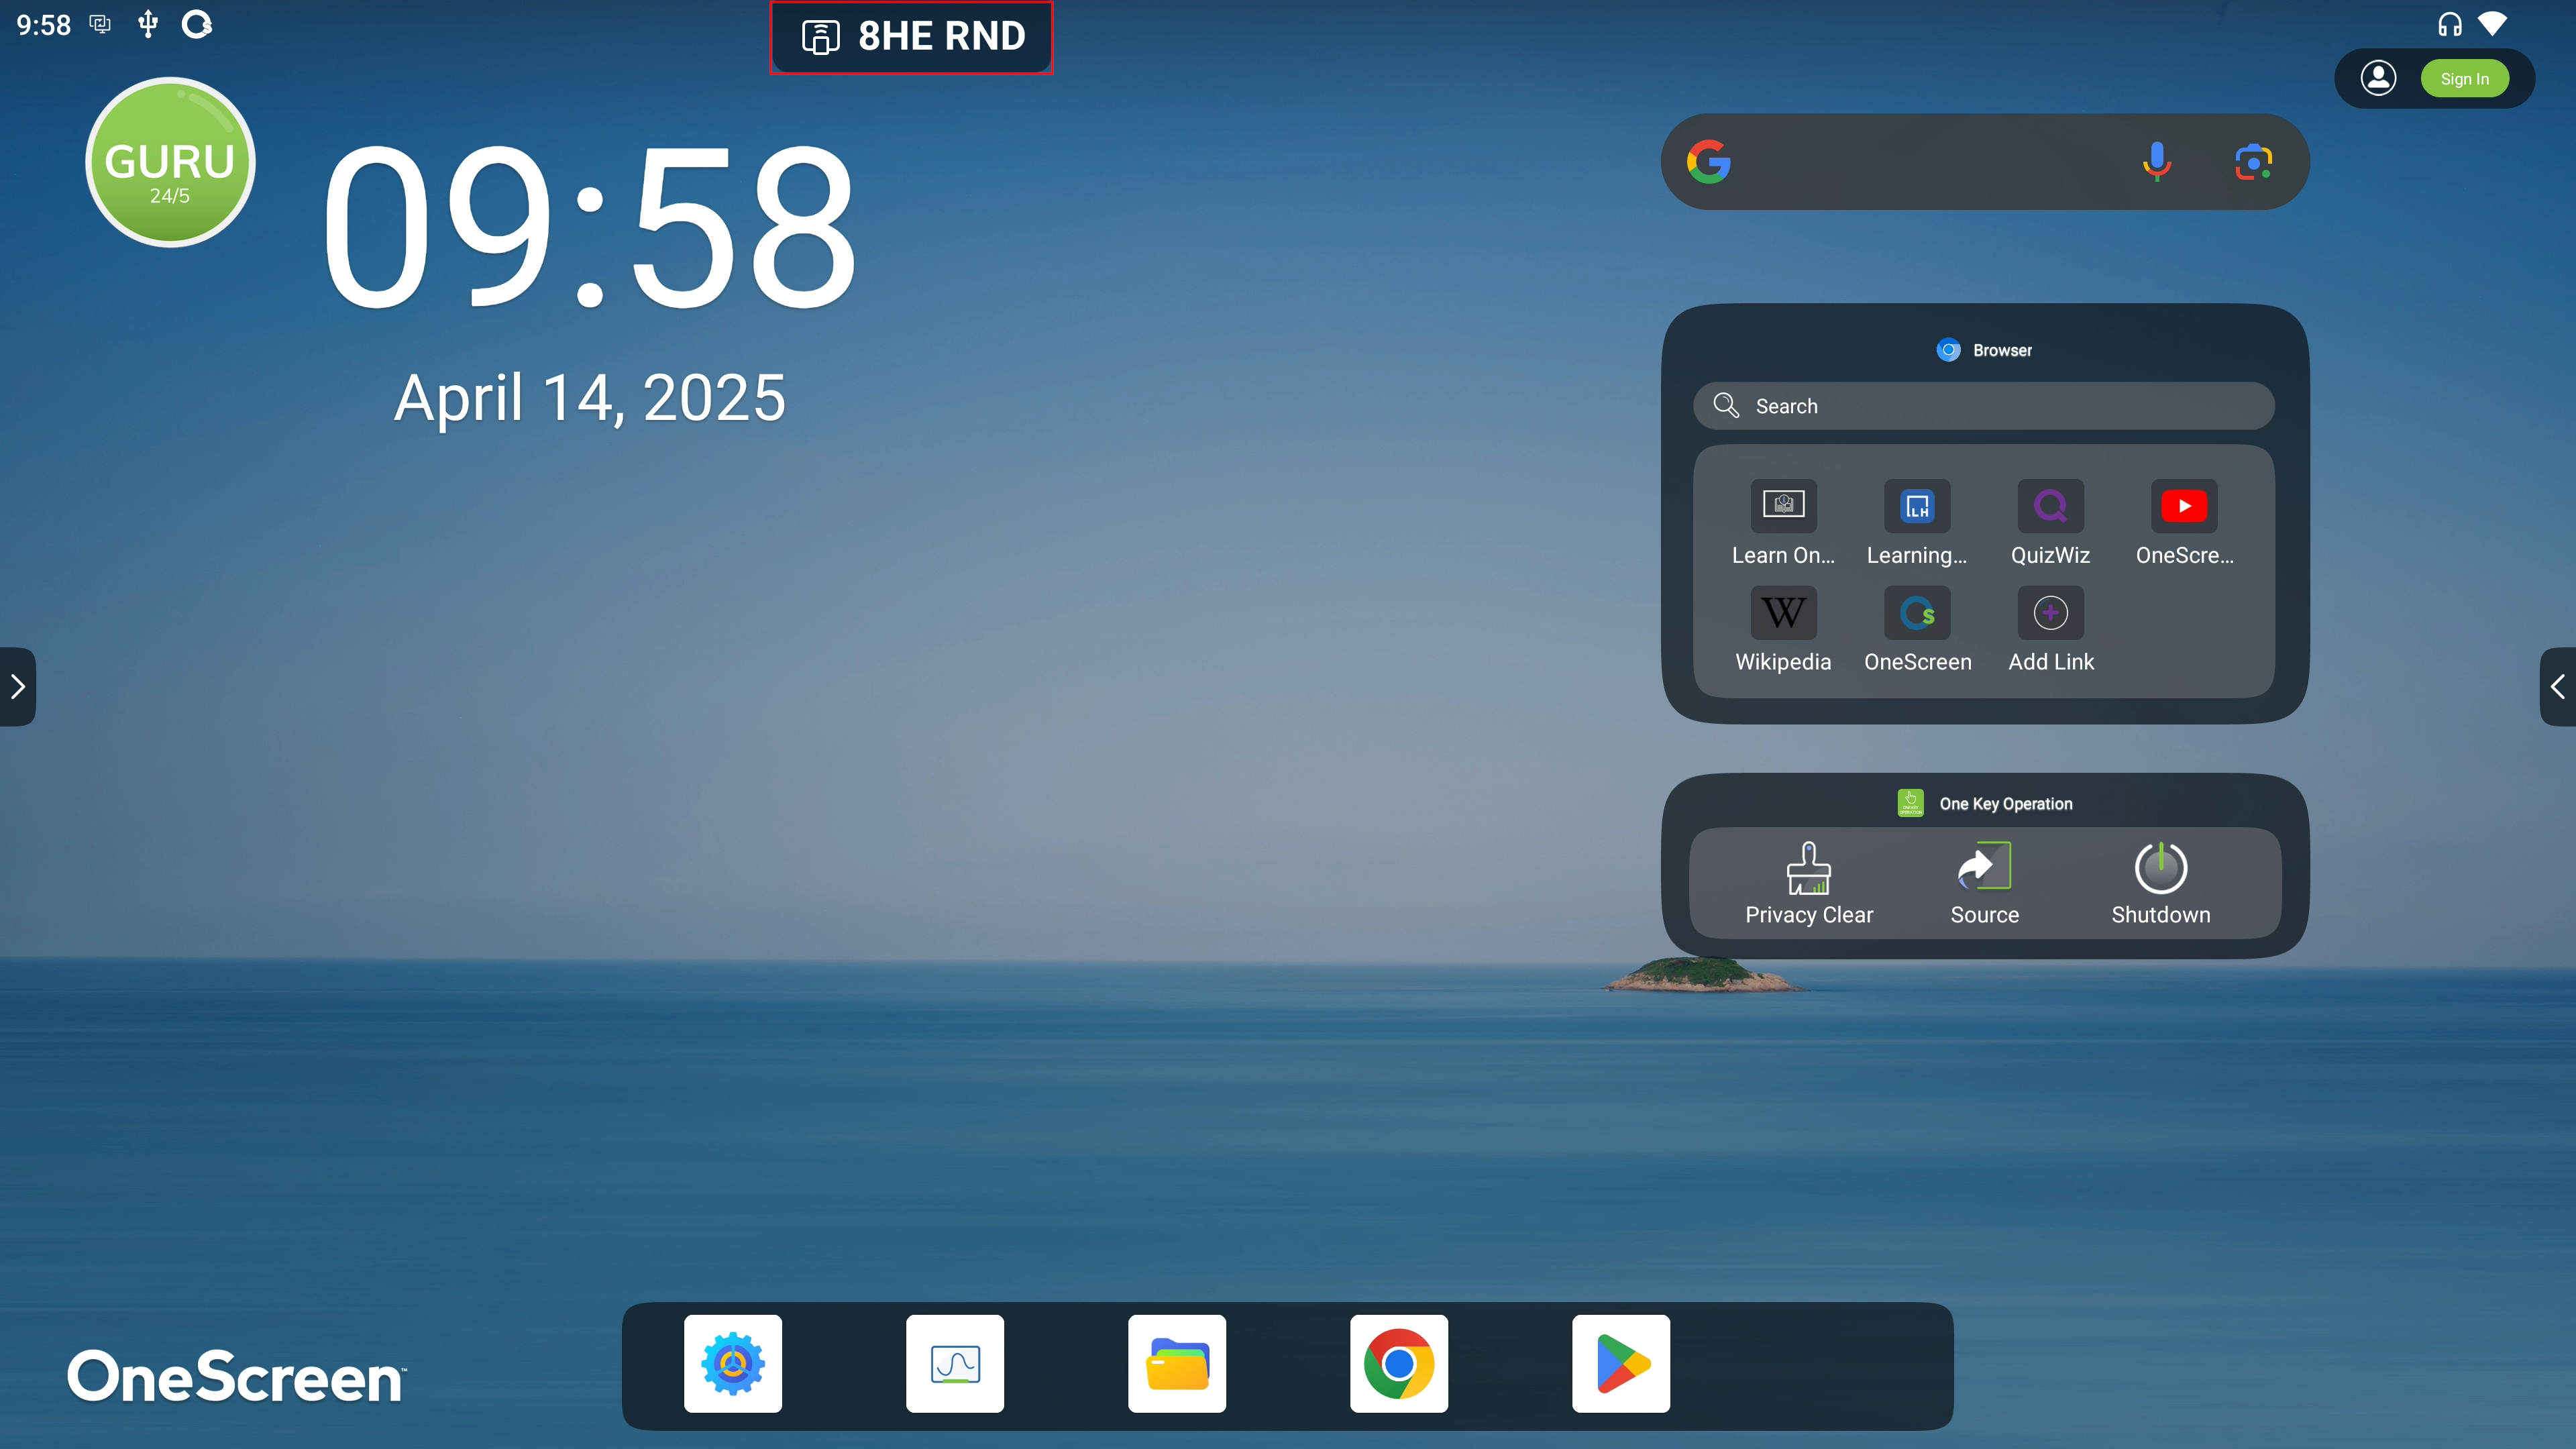
Tap the wireless casting tab in the top-left of the OneScreen display to expand it
-
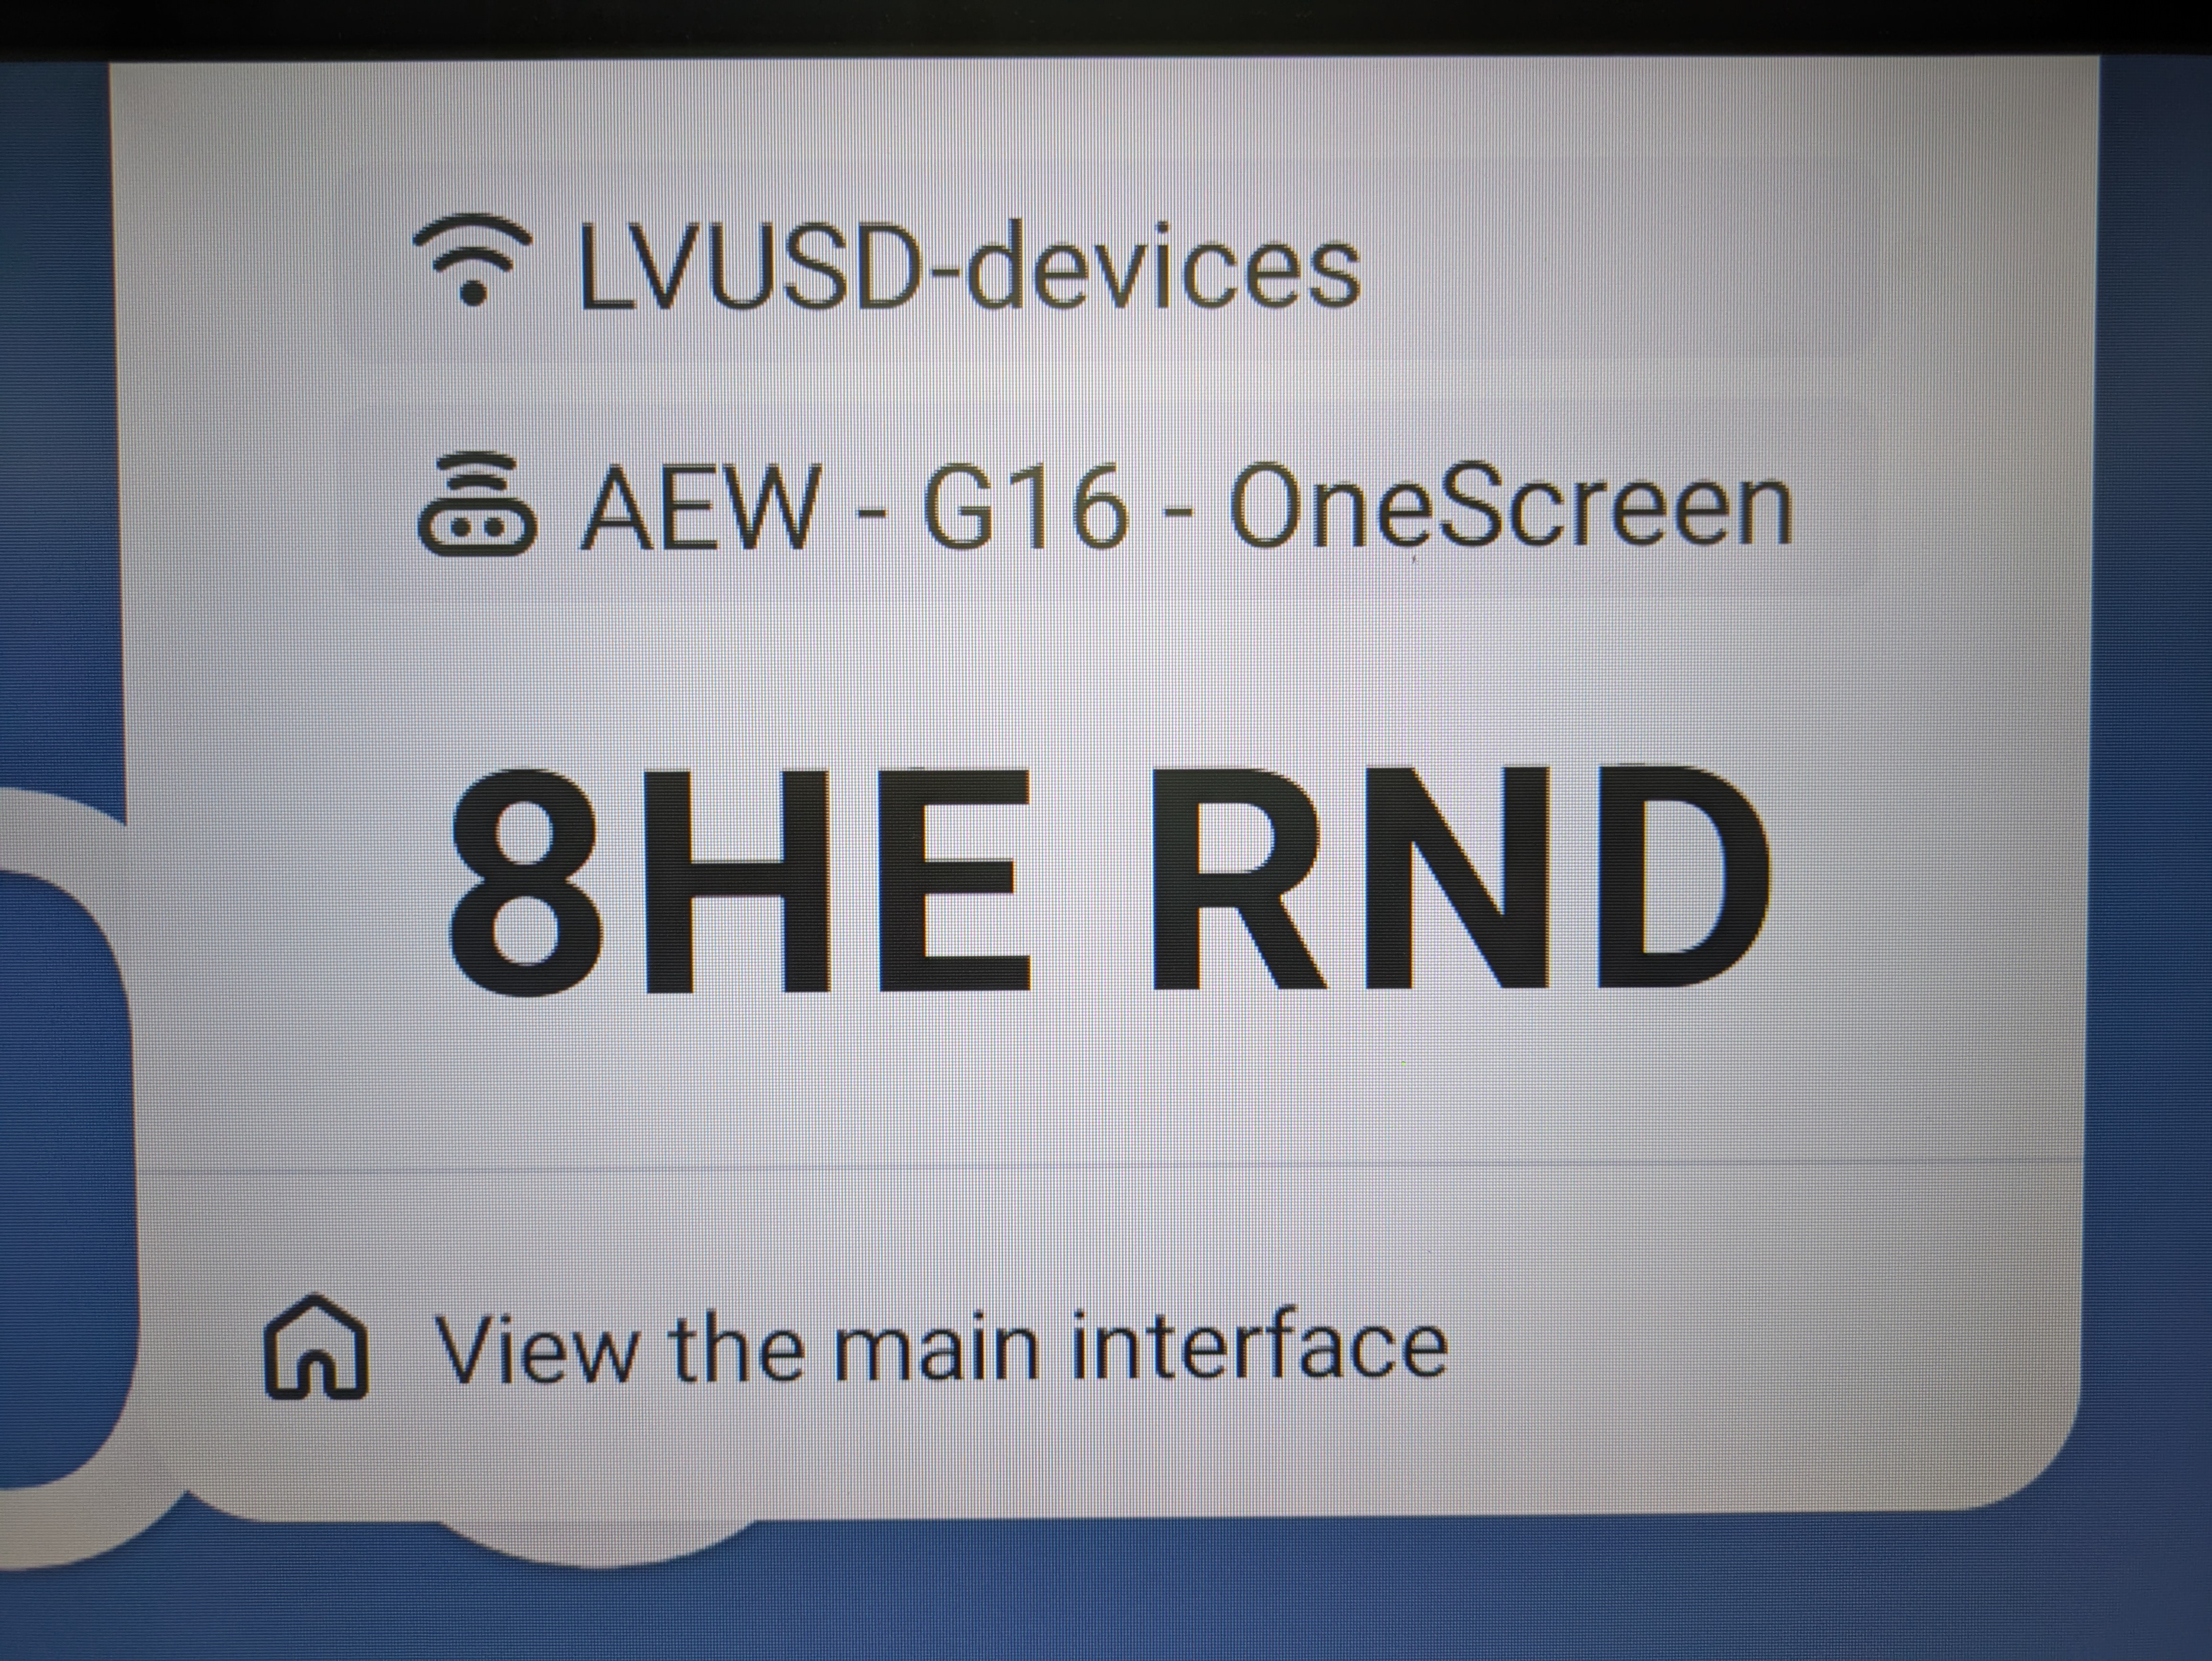
Tap on “View the main interface”
-
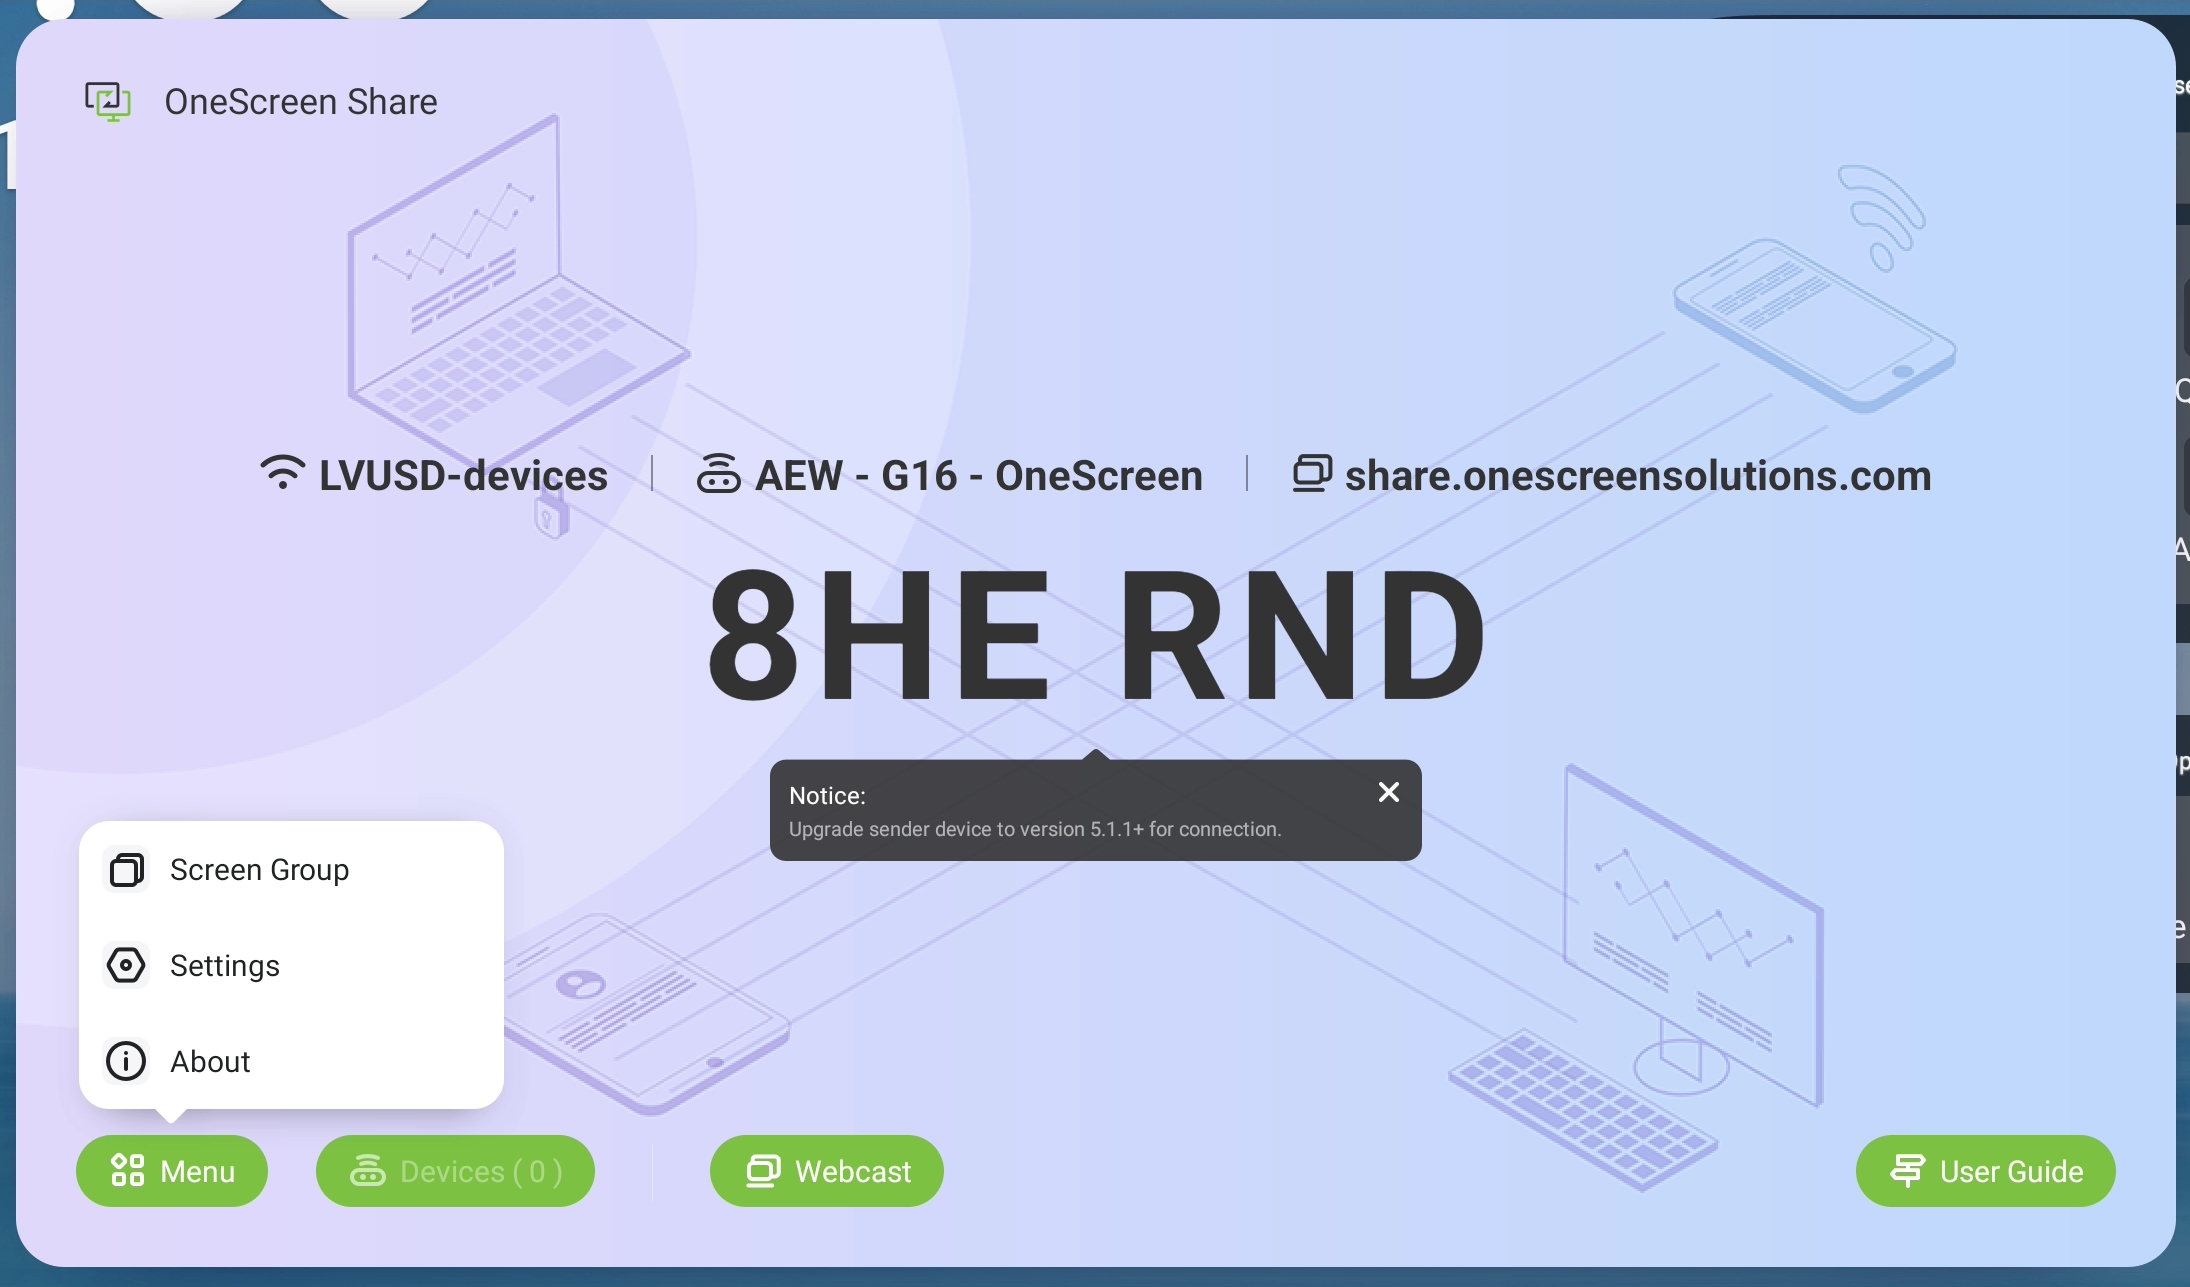
Tap on “Menu” and select “Settings”
-
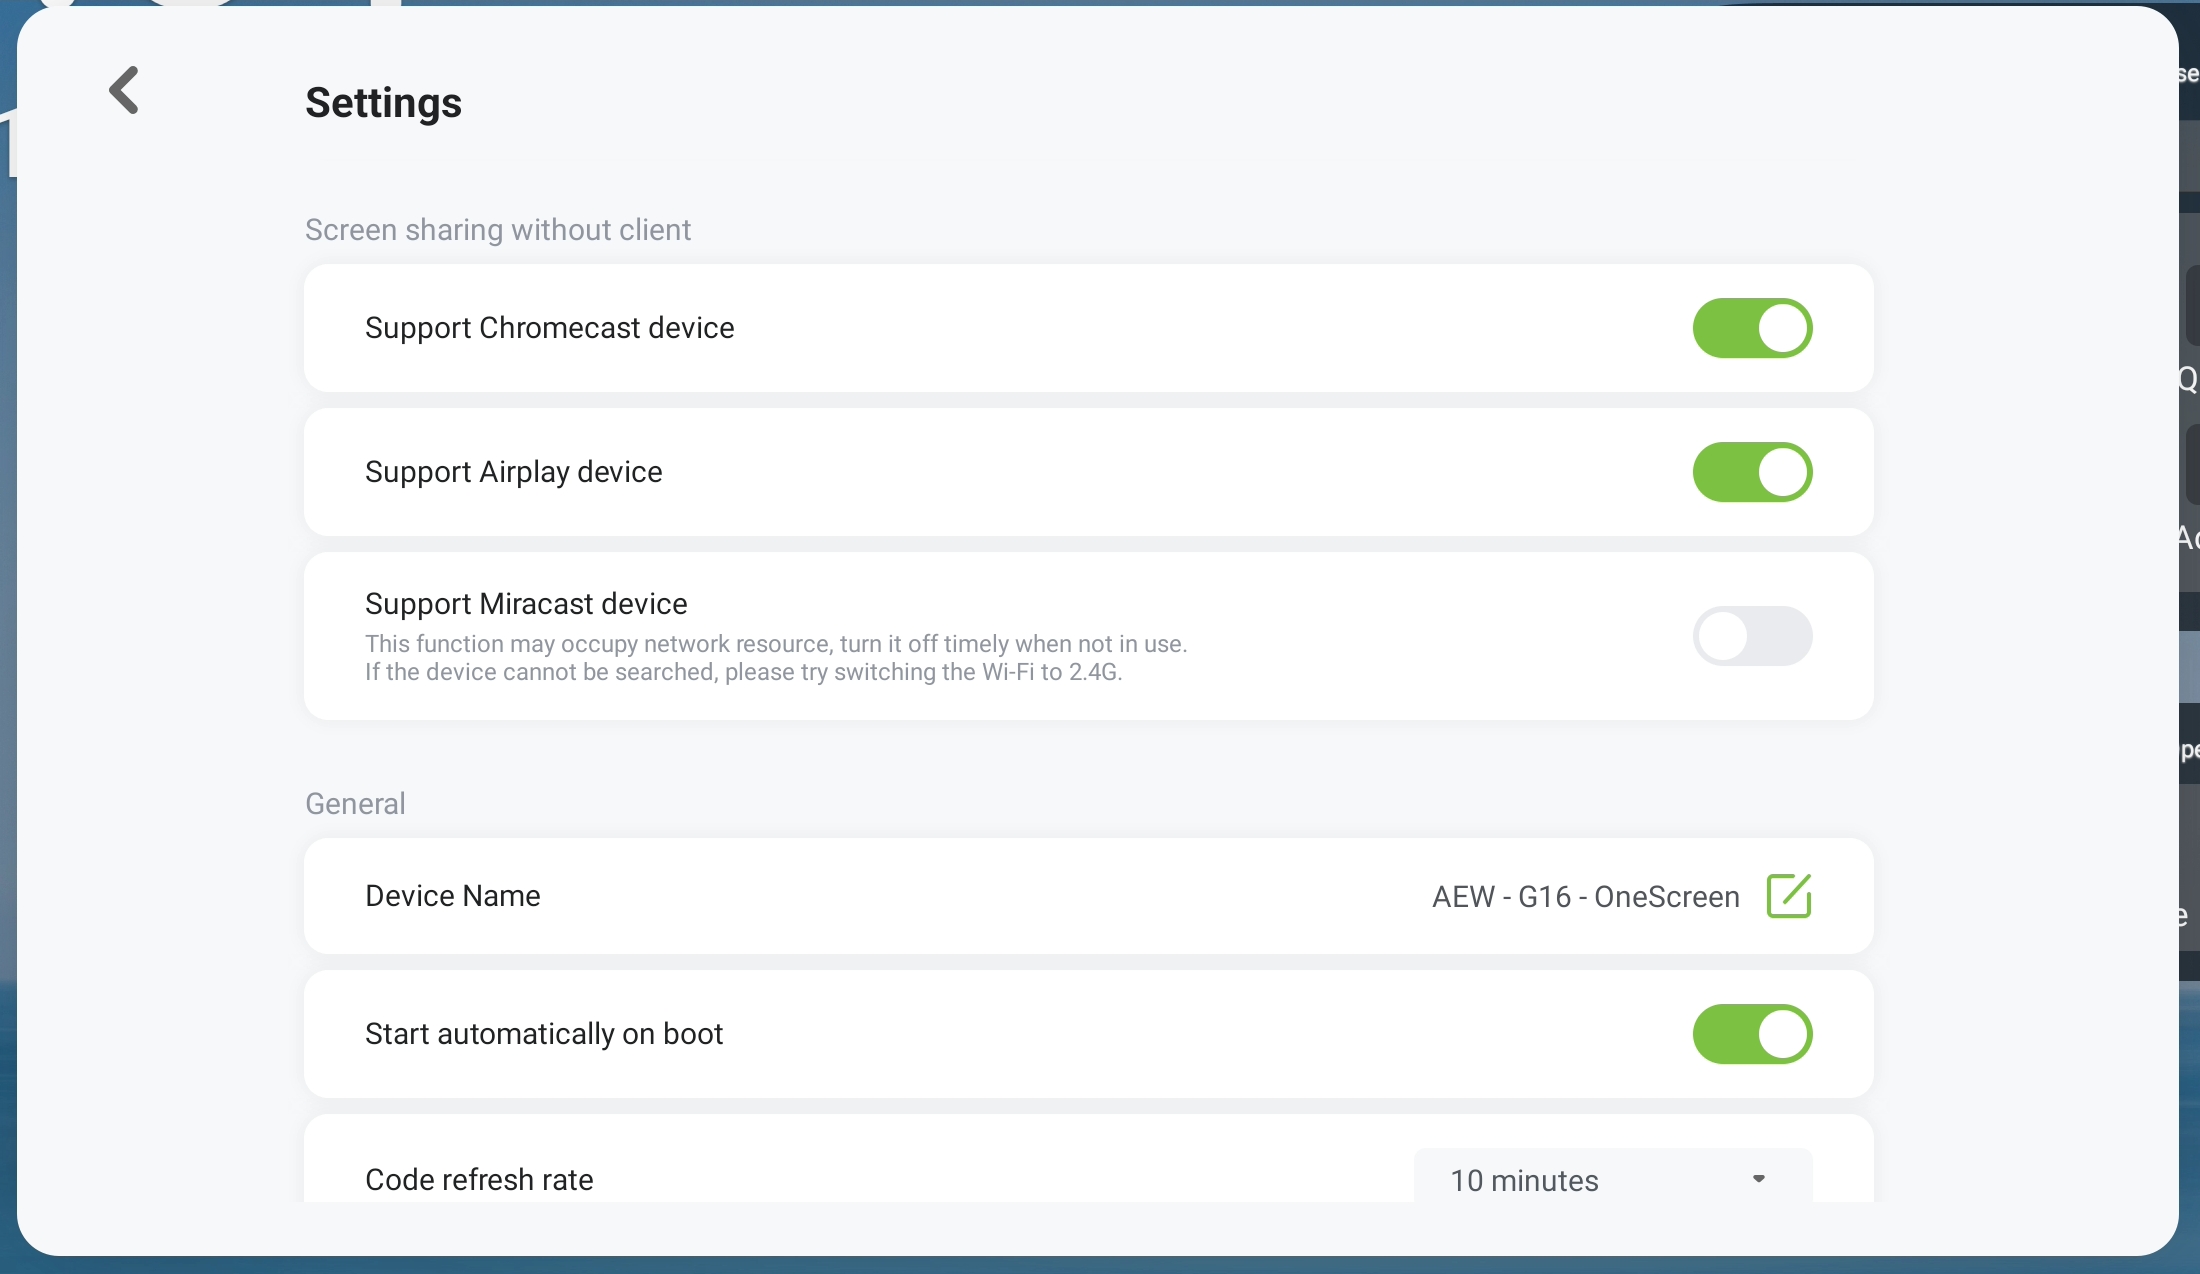
Update the settings:
- Enable the Chromecast and AirPlay options
- Update the Device Name to match your room
- Enable “Start automatically on boot”
Displaying from a Document Camera
IPEVO Document Camera
- Plug IPEVO document camera into OneScreen using a USB-C-to-USB-C cable and turn it on
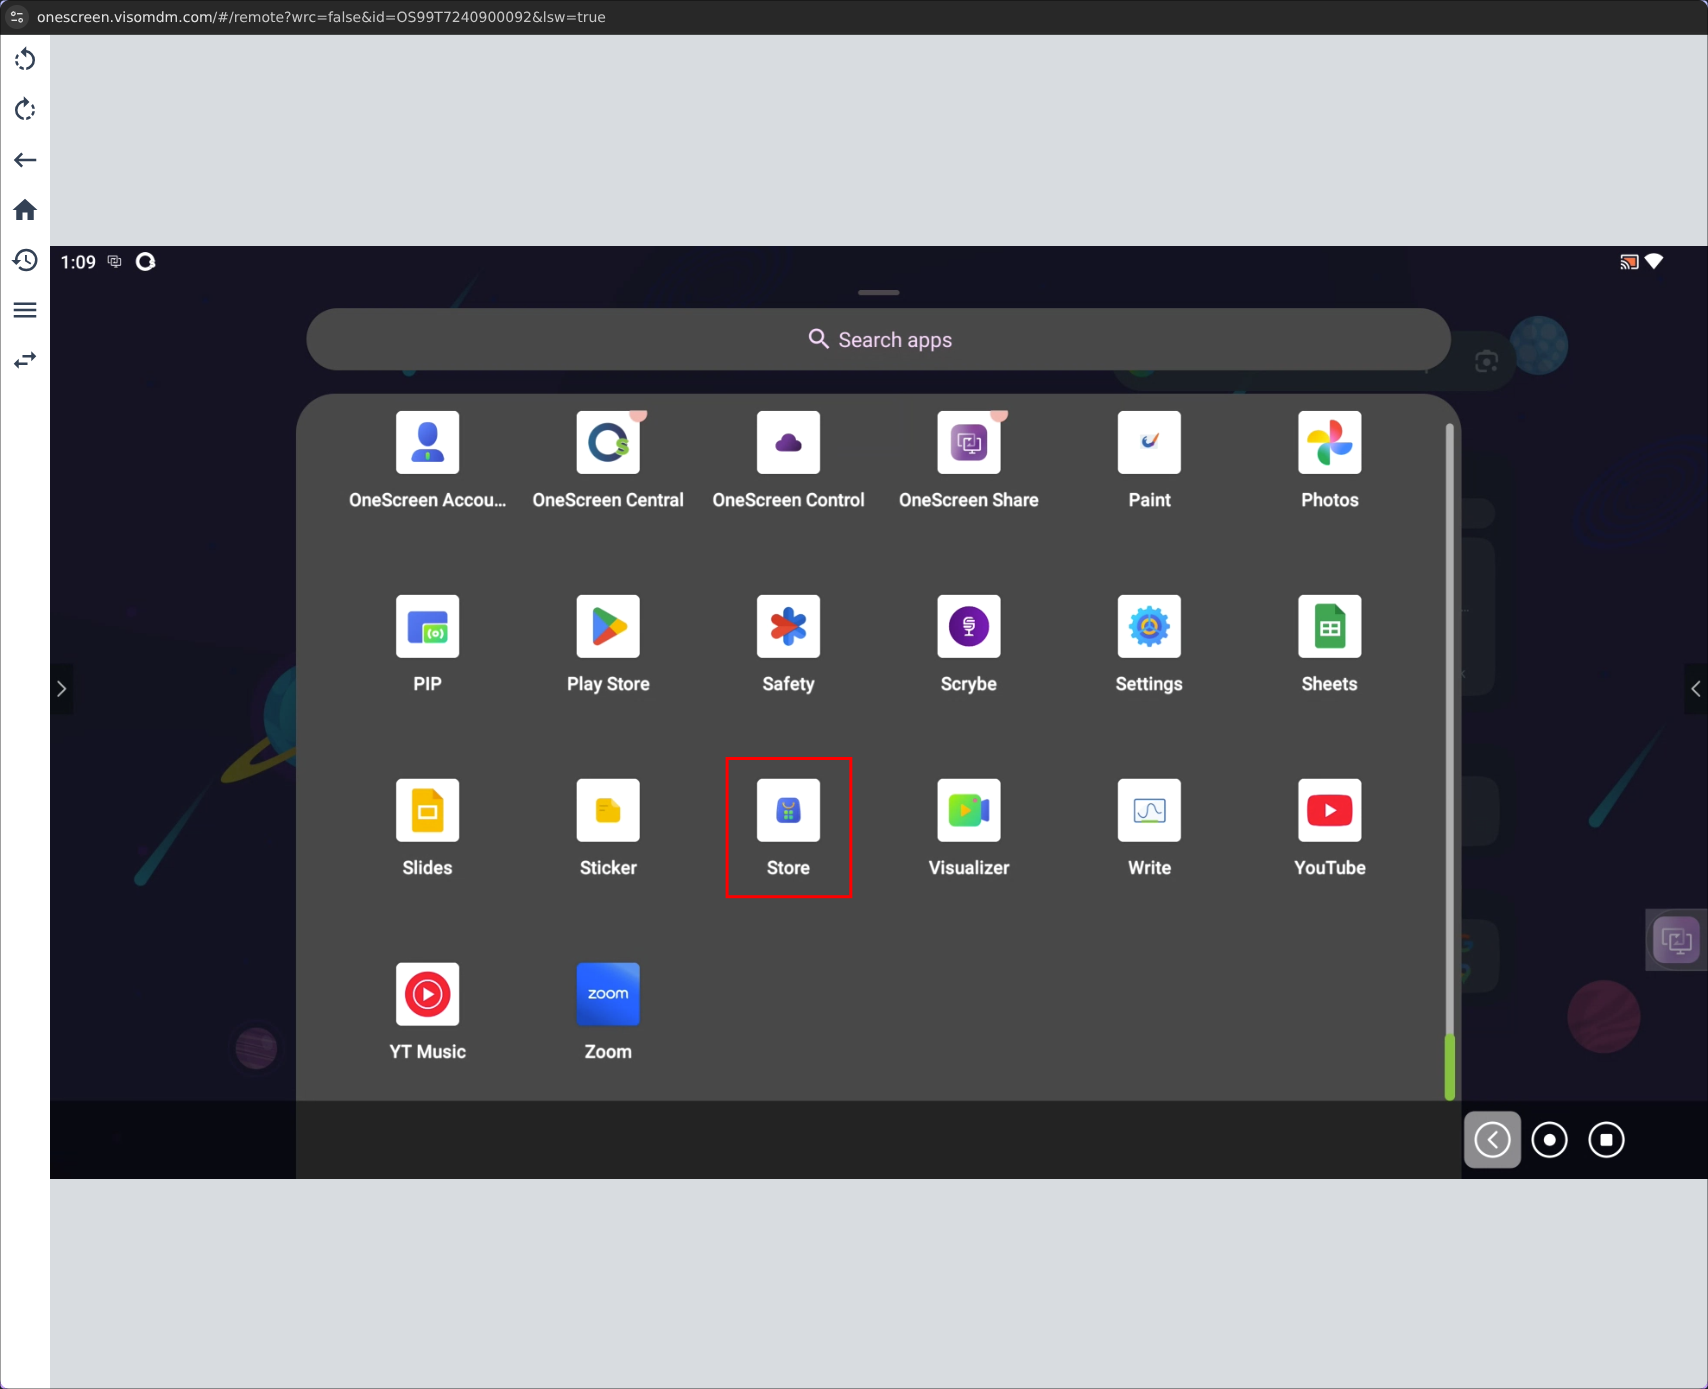
- Swipe up from the bottom of the screen to open the app list
-
Find and tap on “Store”
-
Find the “Visualizer” app and tap “Install”
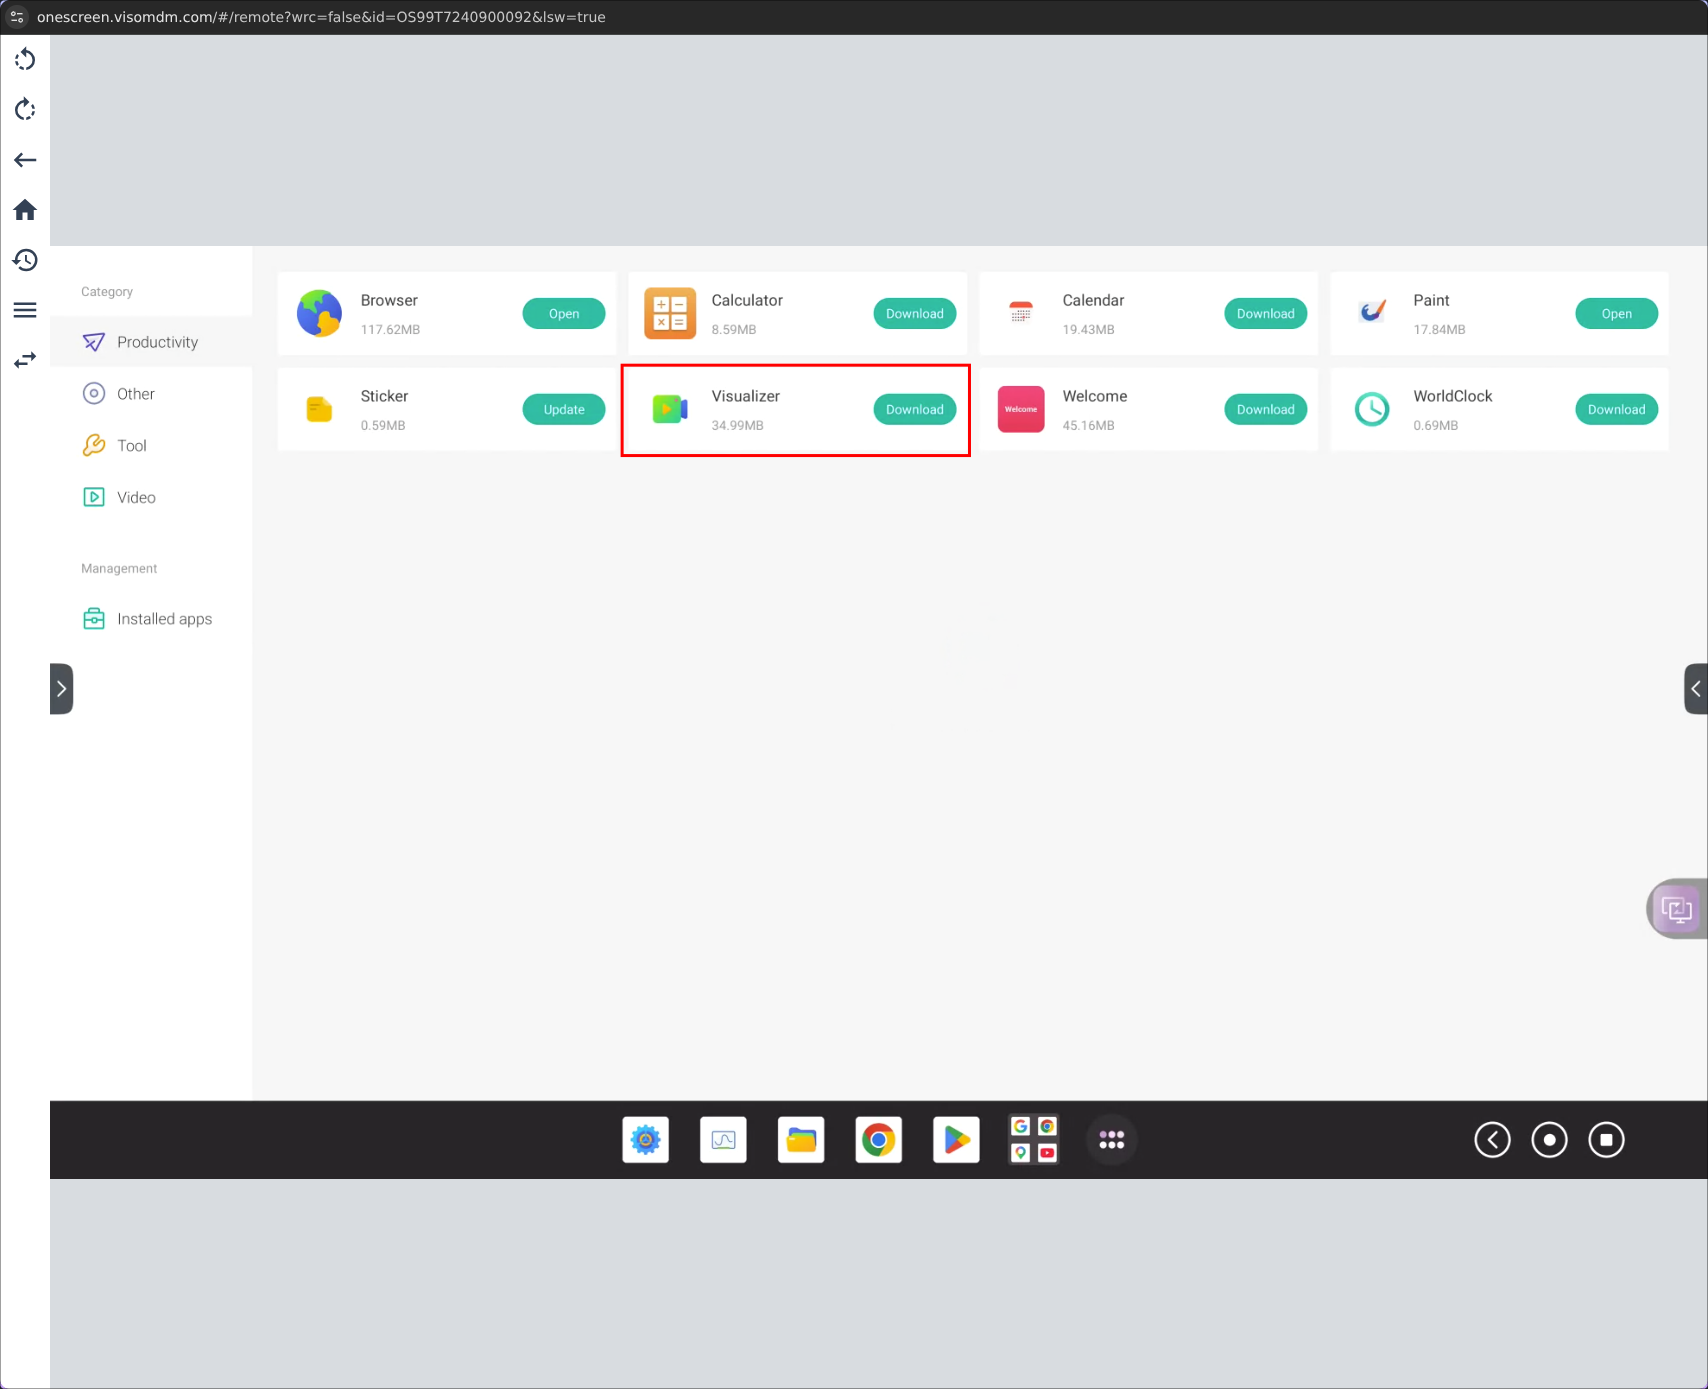
- The Visualizer app will now appear in the app list
- Use the Back or Home buttons to get back to the home screen
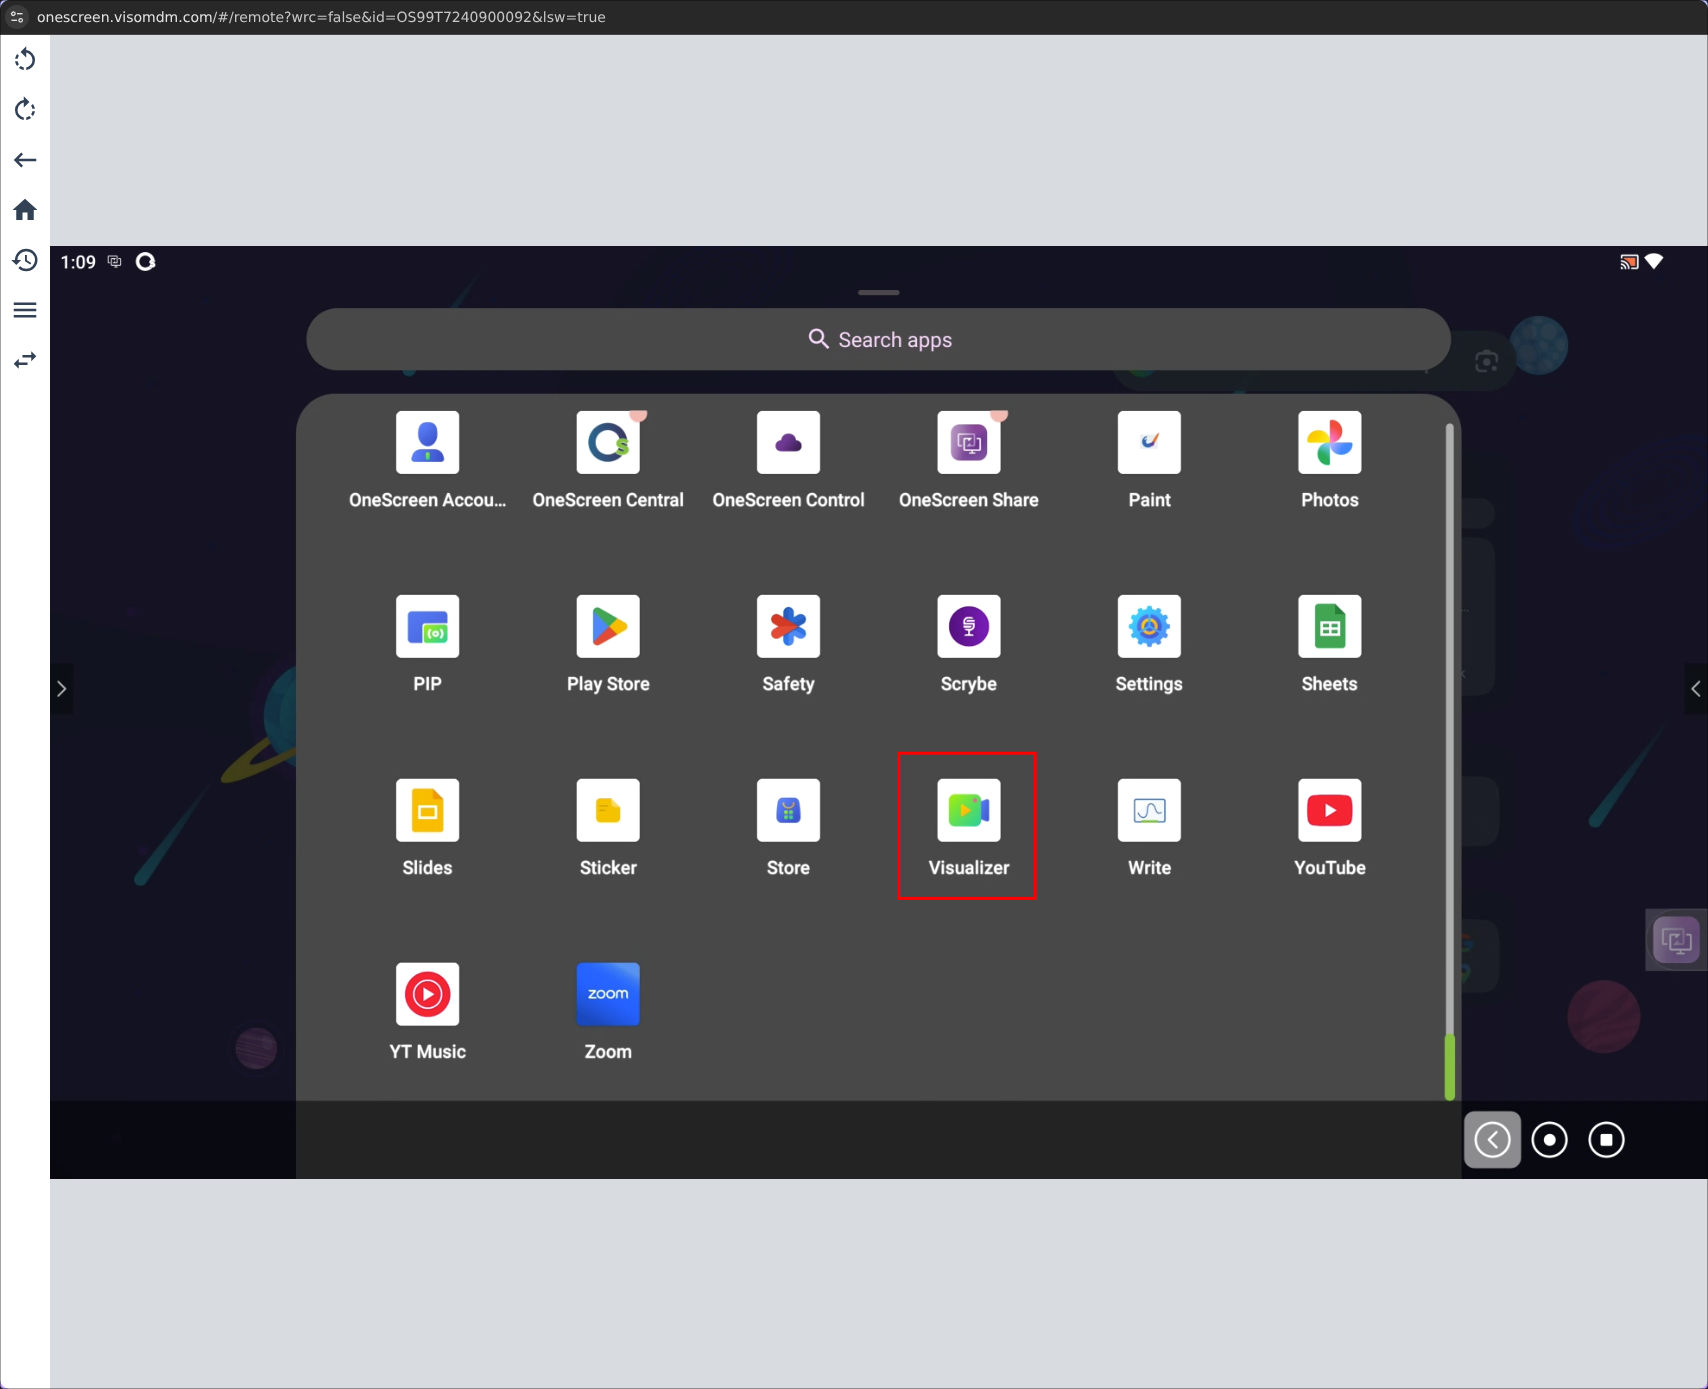
- Swipe up from the bottom of the screen to open the app list
-
Find and tap on “Visualizer”
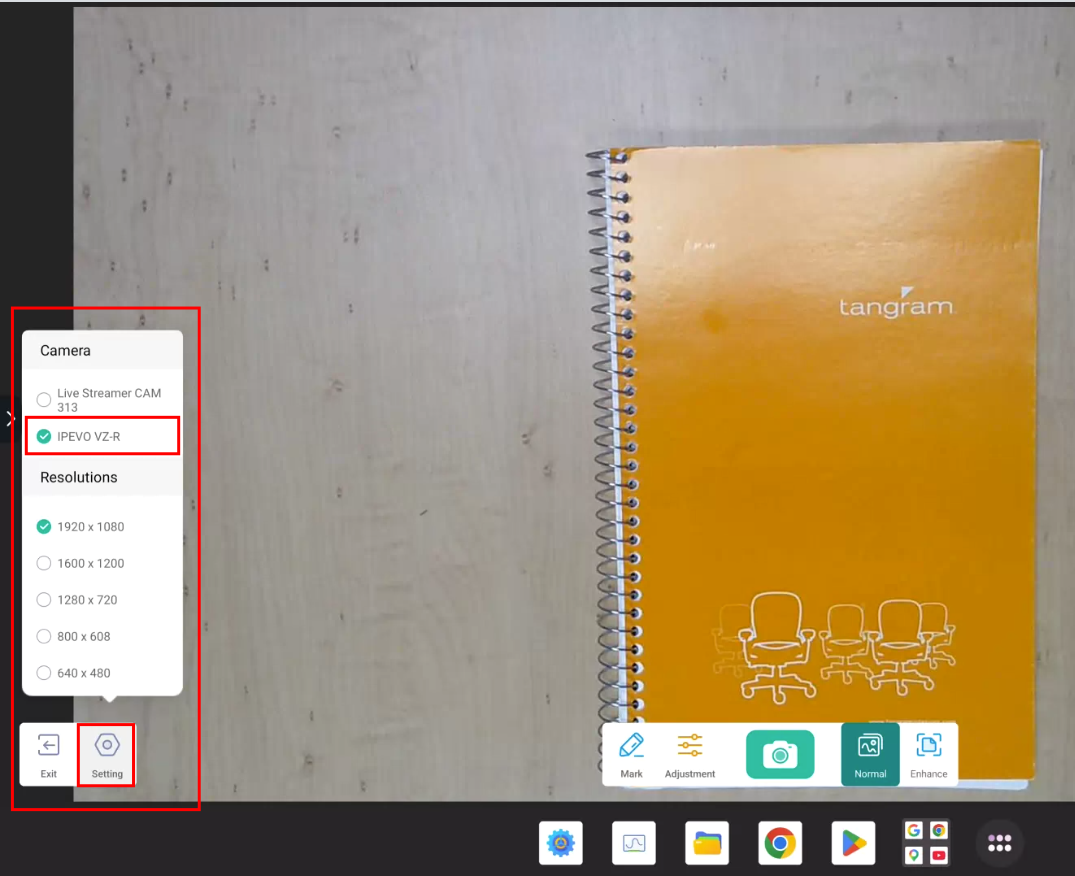
- If the IPEVO camera feed doesn’t show up automatically:
- Tap the settings gear icon in the bottom-left
- Select the “IPEVO VZ-R” from the list of devices
NFC Badge
Bind Badge to Account
-
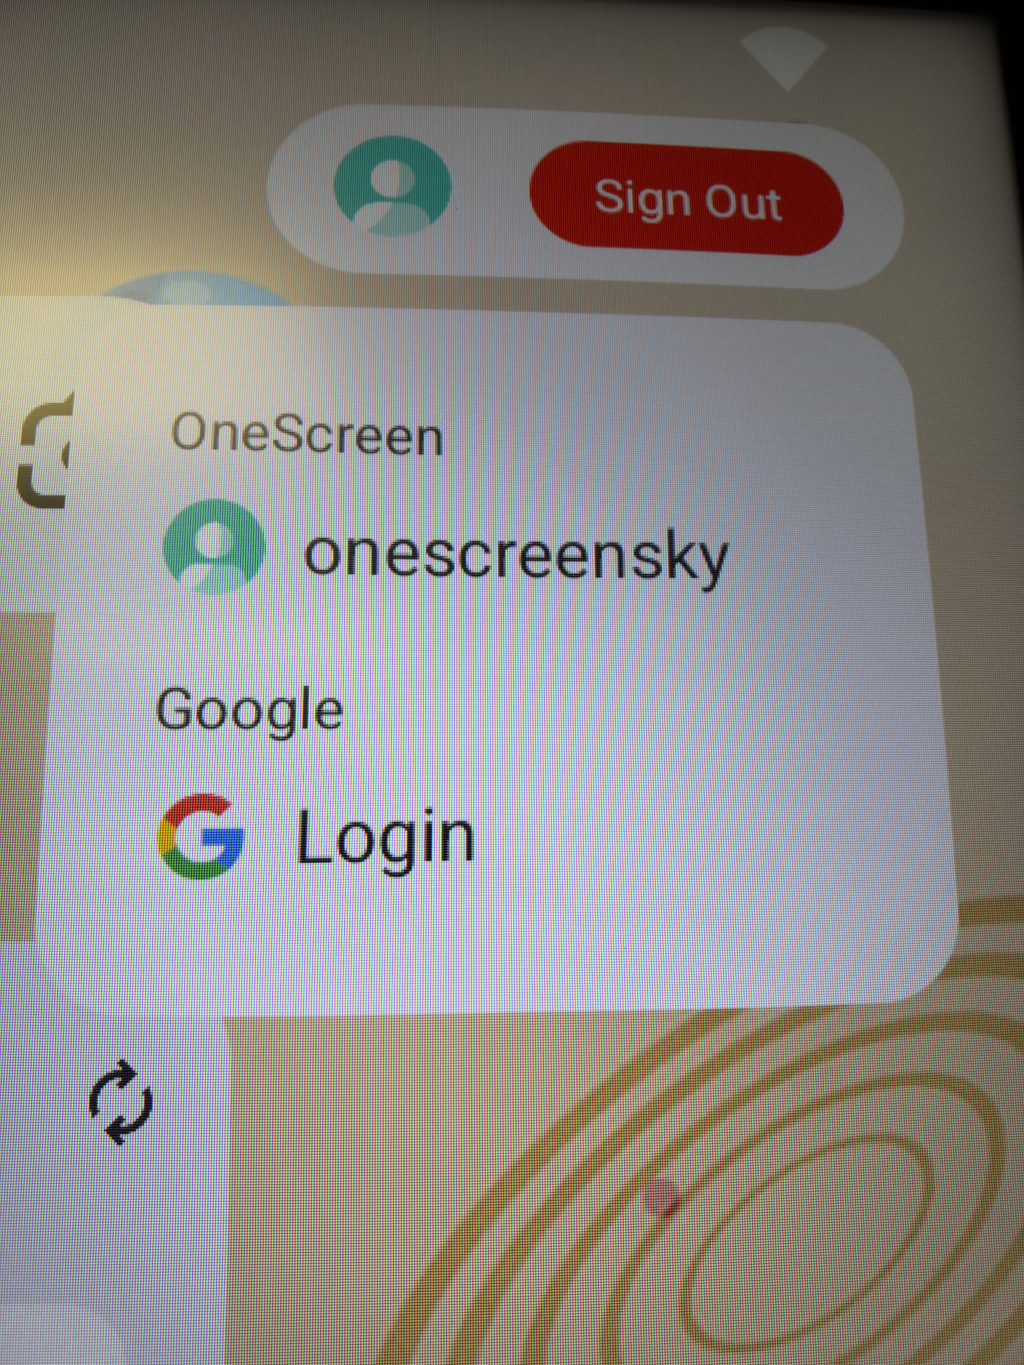
While signed in, tap on the user icon in the top-right corner, then select your username
-
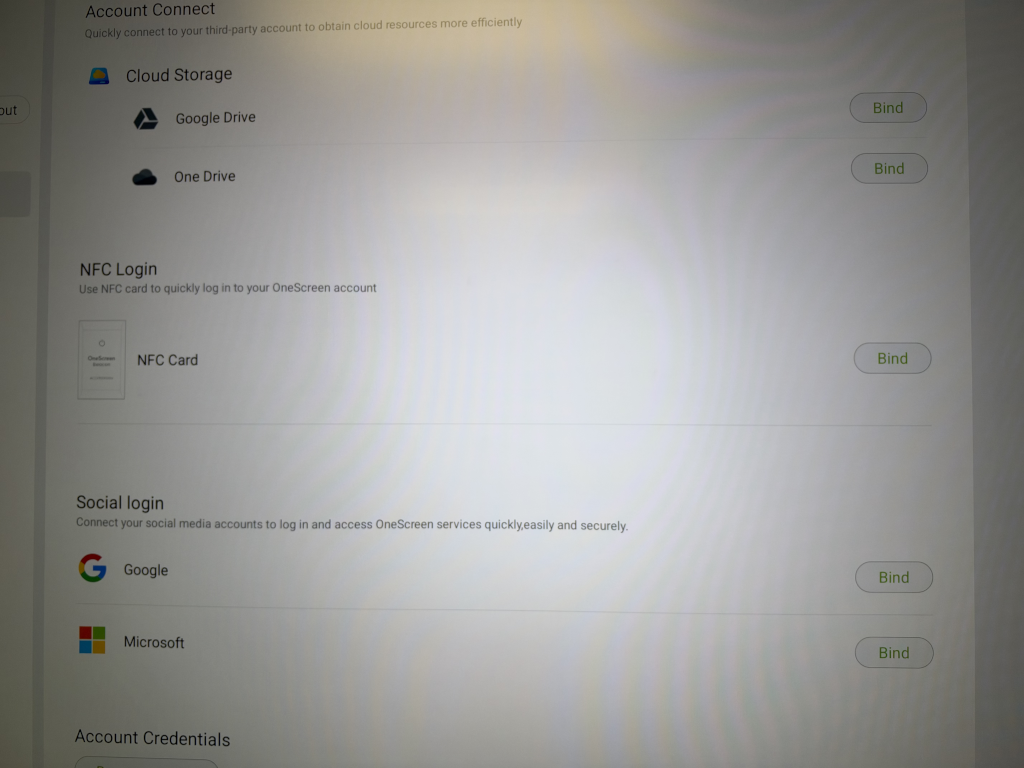
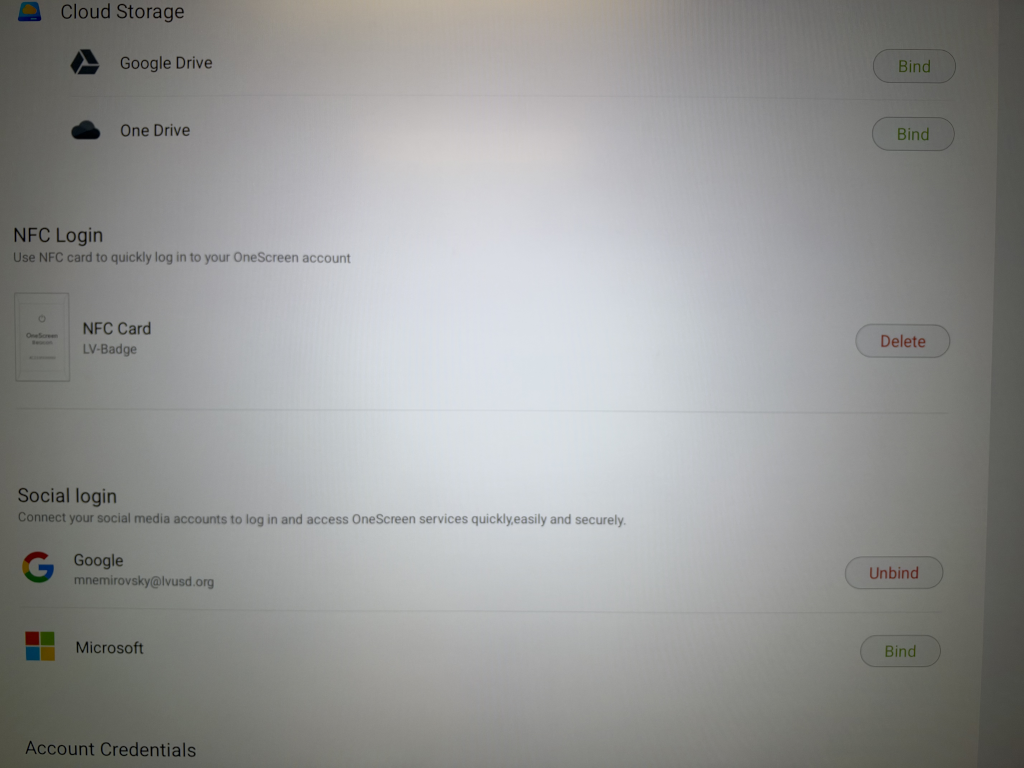
Locate the NFC Login section and press the Bind button to the right of the NFC Card
-
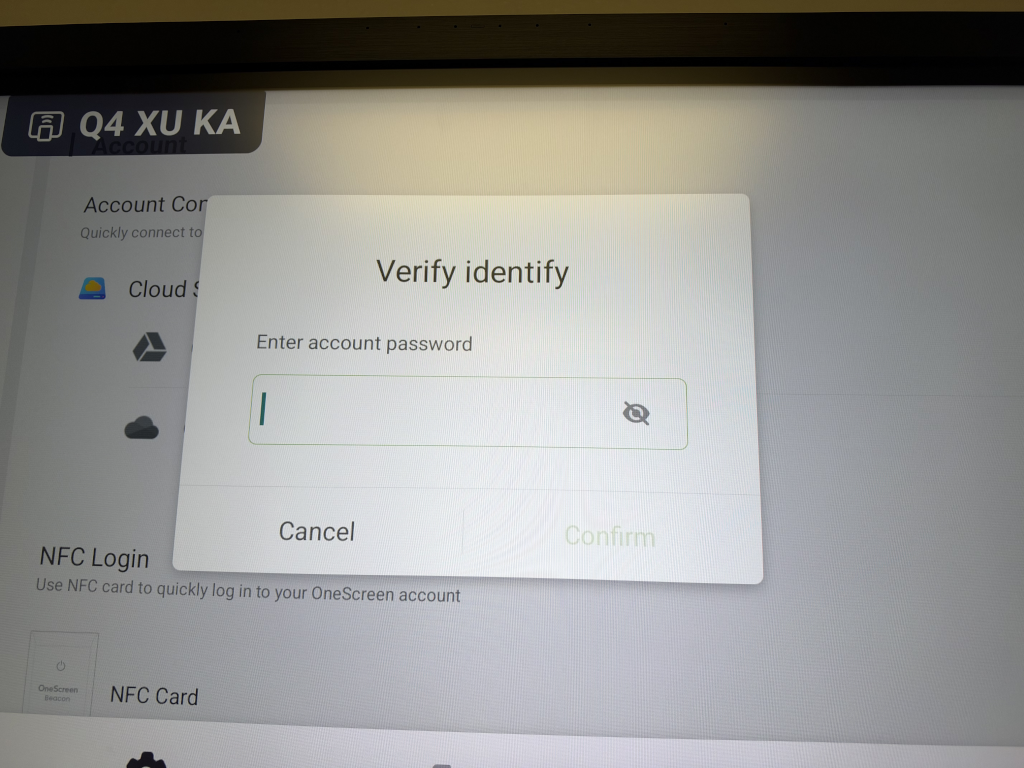
Enter your password if prompted
-
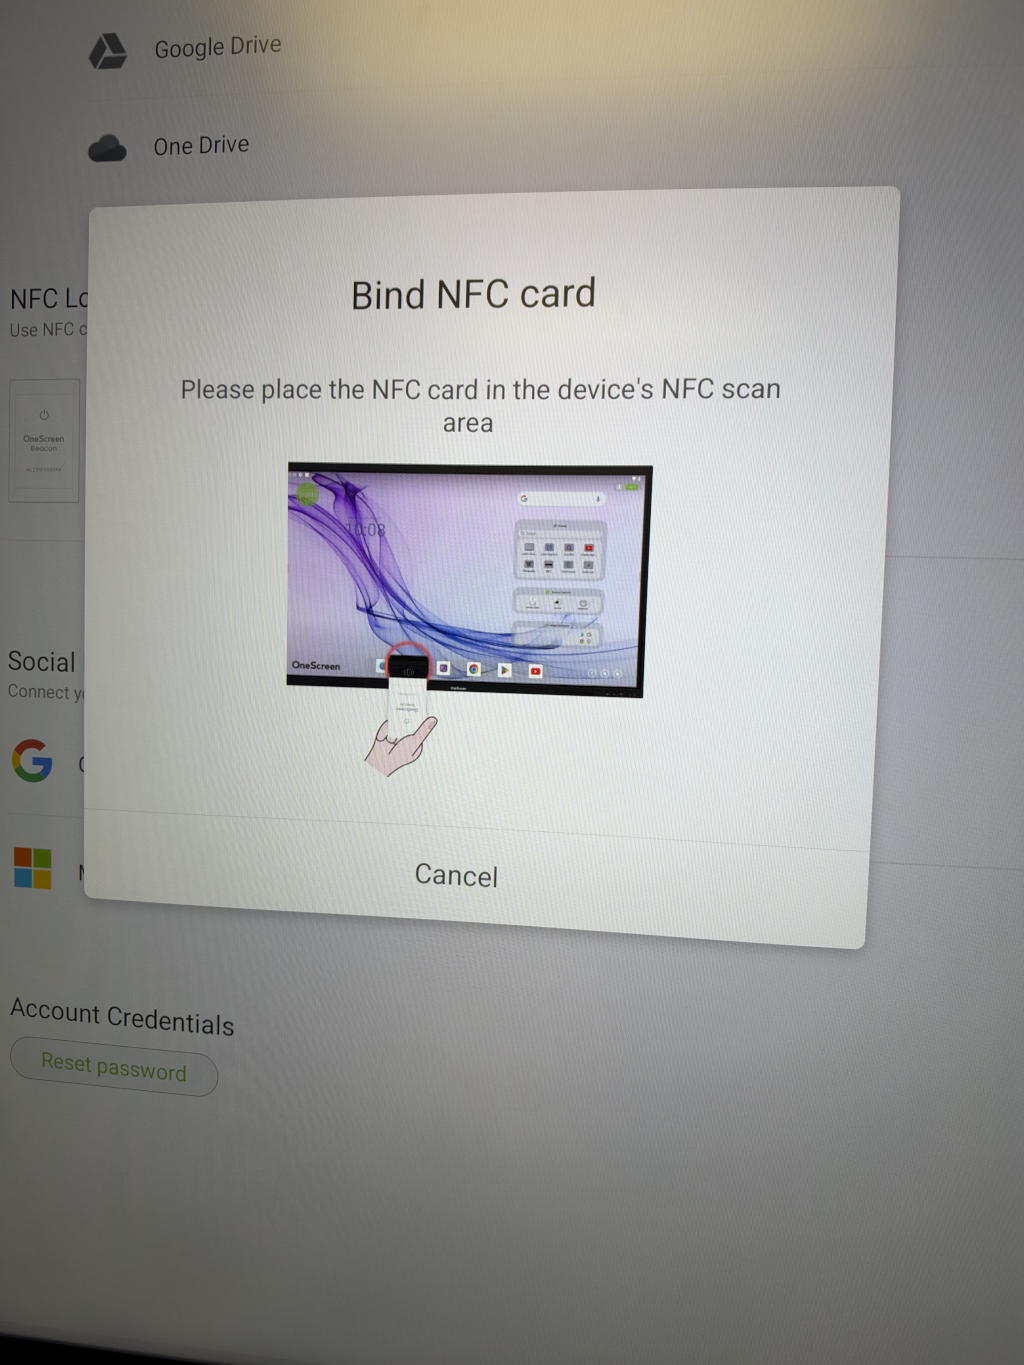
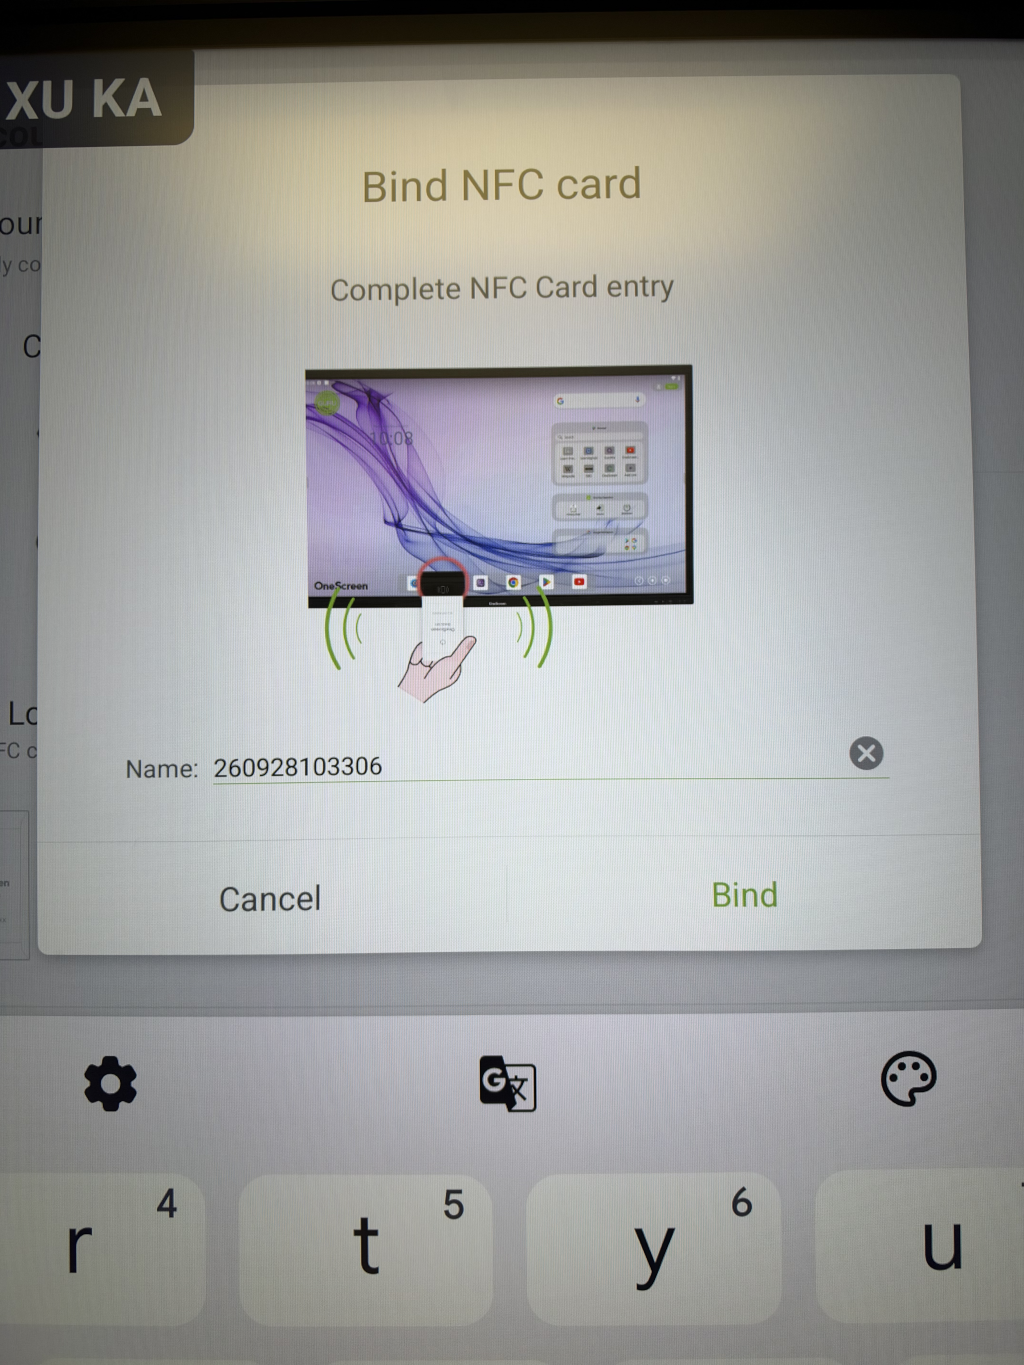
Hold your LVUSD badge on the NFC scan area until the display registers it
-
(Optional) Give the card a custom name
Remove Badge from Account
-
While signed in, tap on the user icon in the top-right corner, then select your username
-
Locate the NFC Login section and press the Delete button to the right of the NFC Card
-
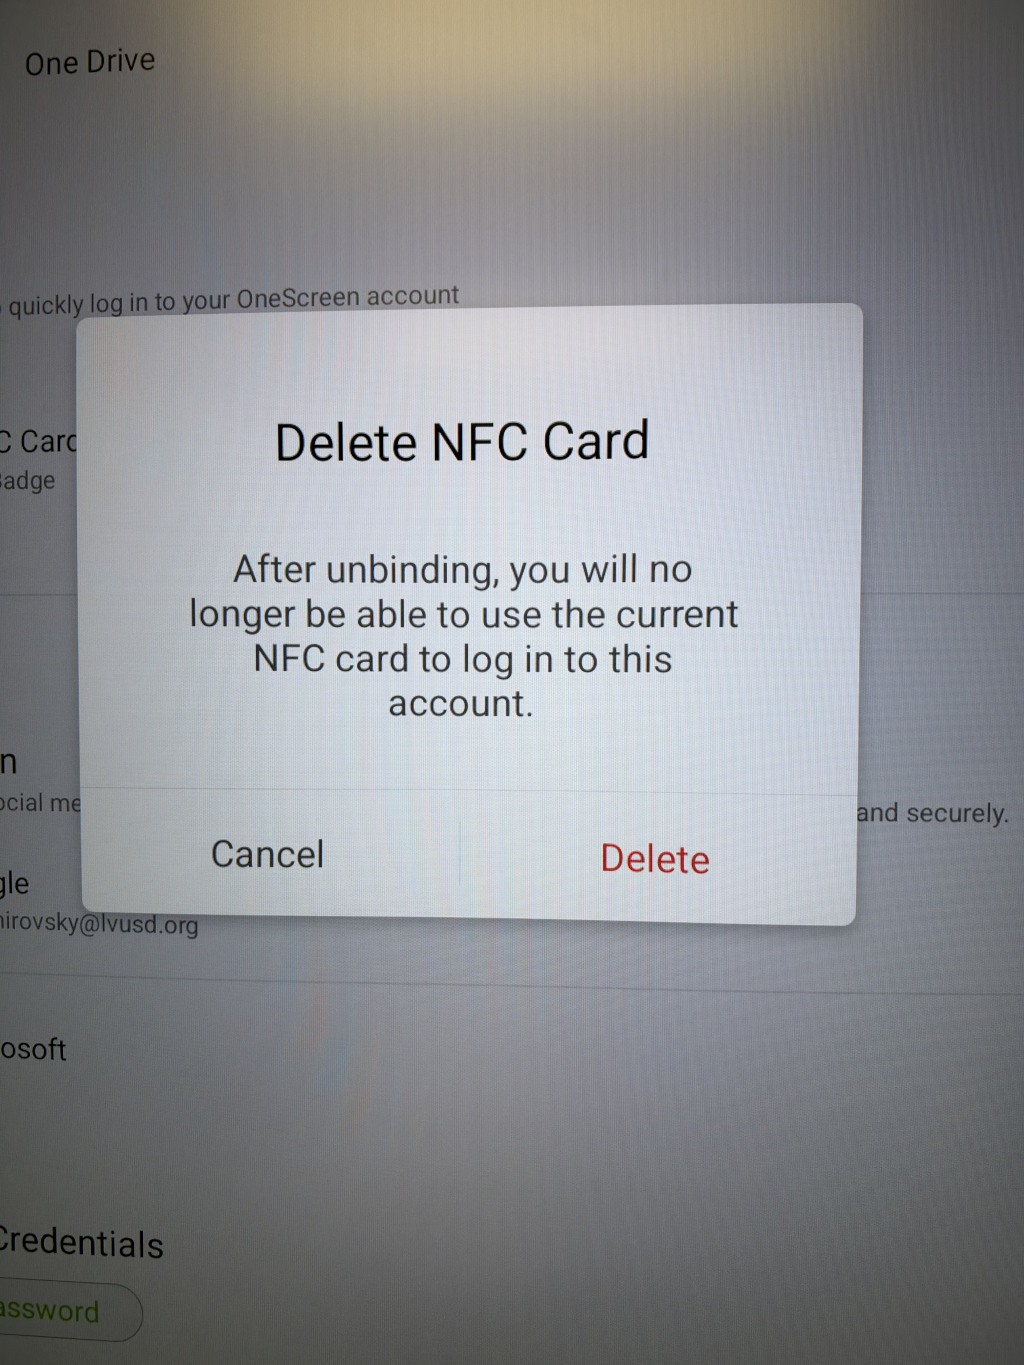
Press Delete again to confirm deletion
Running Updates
-
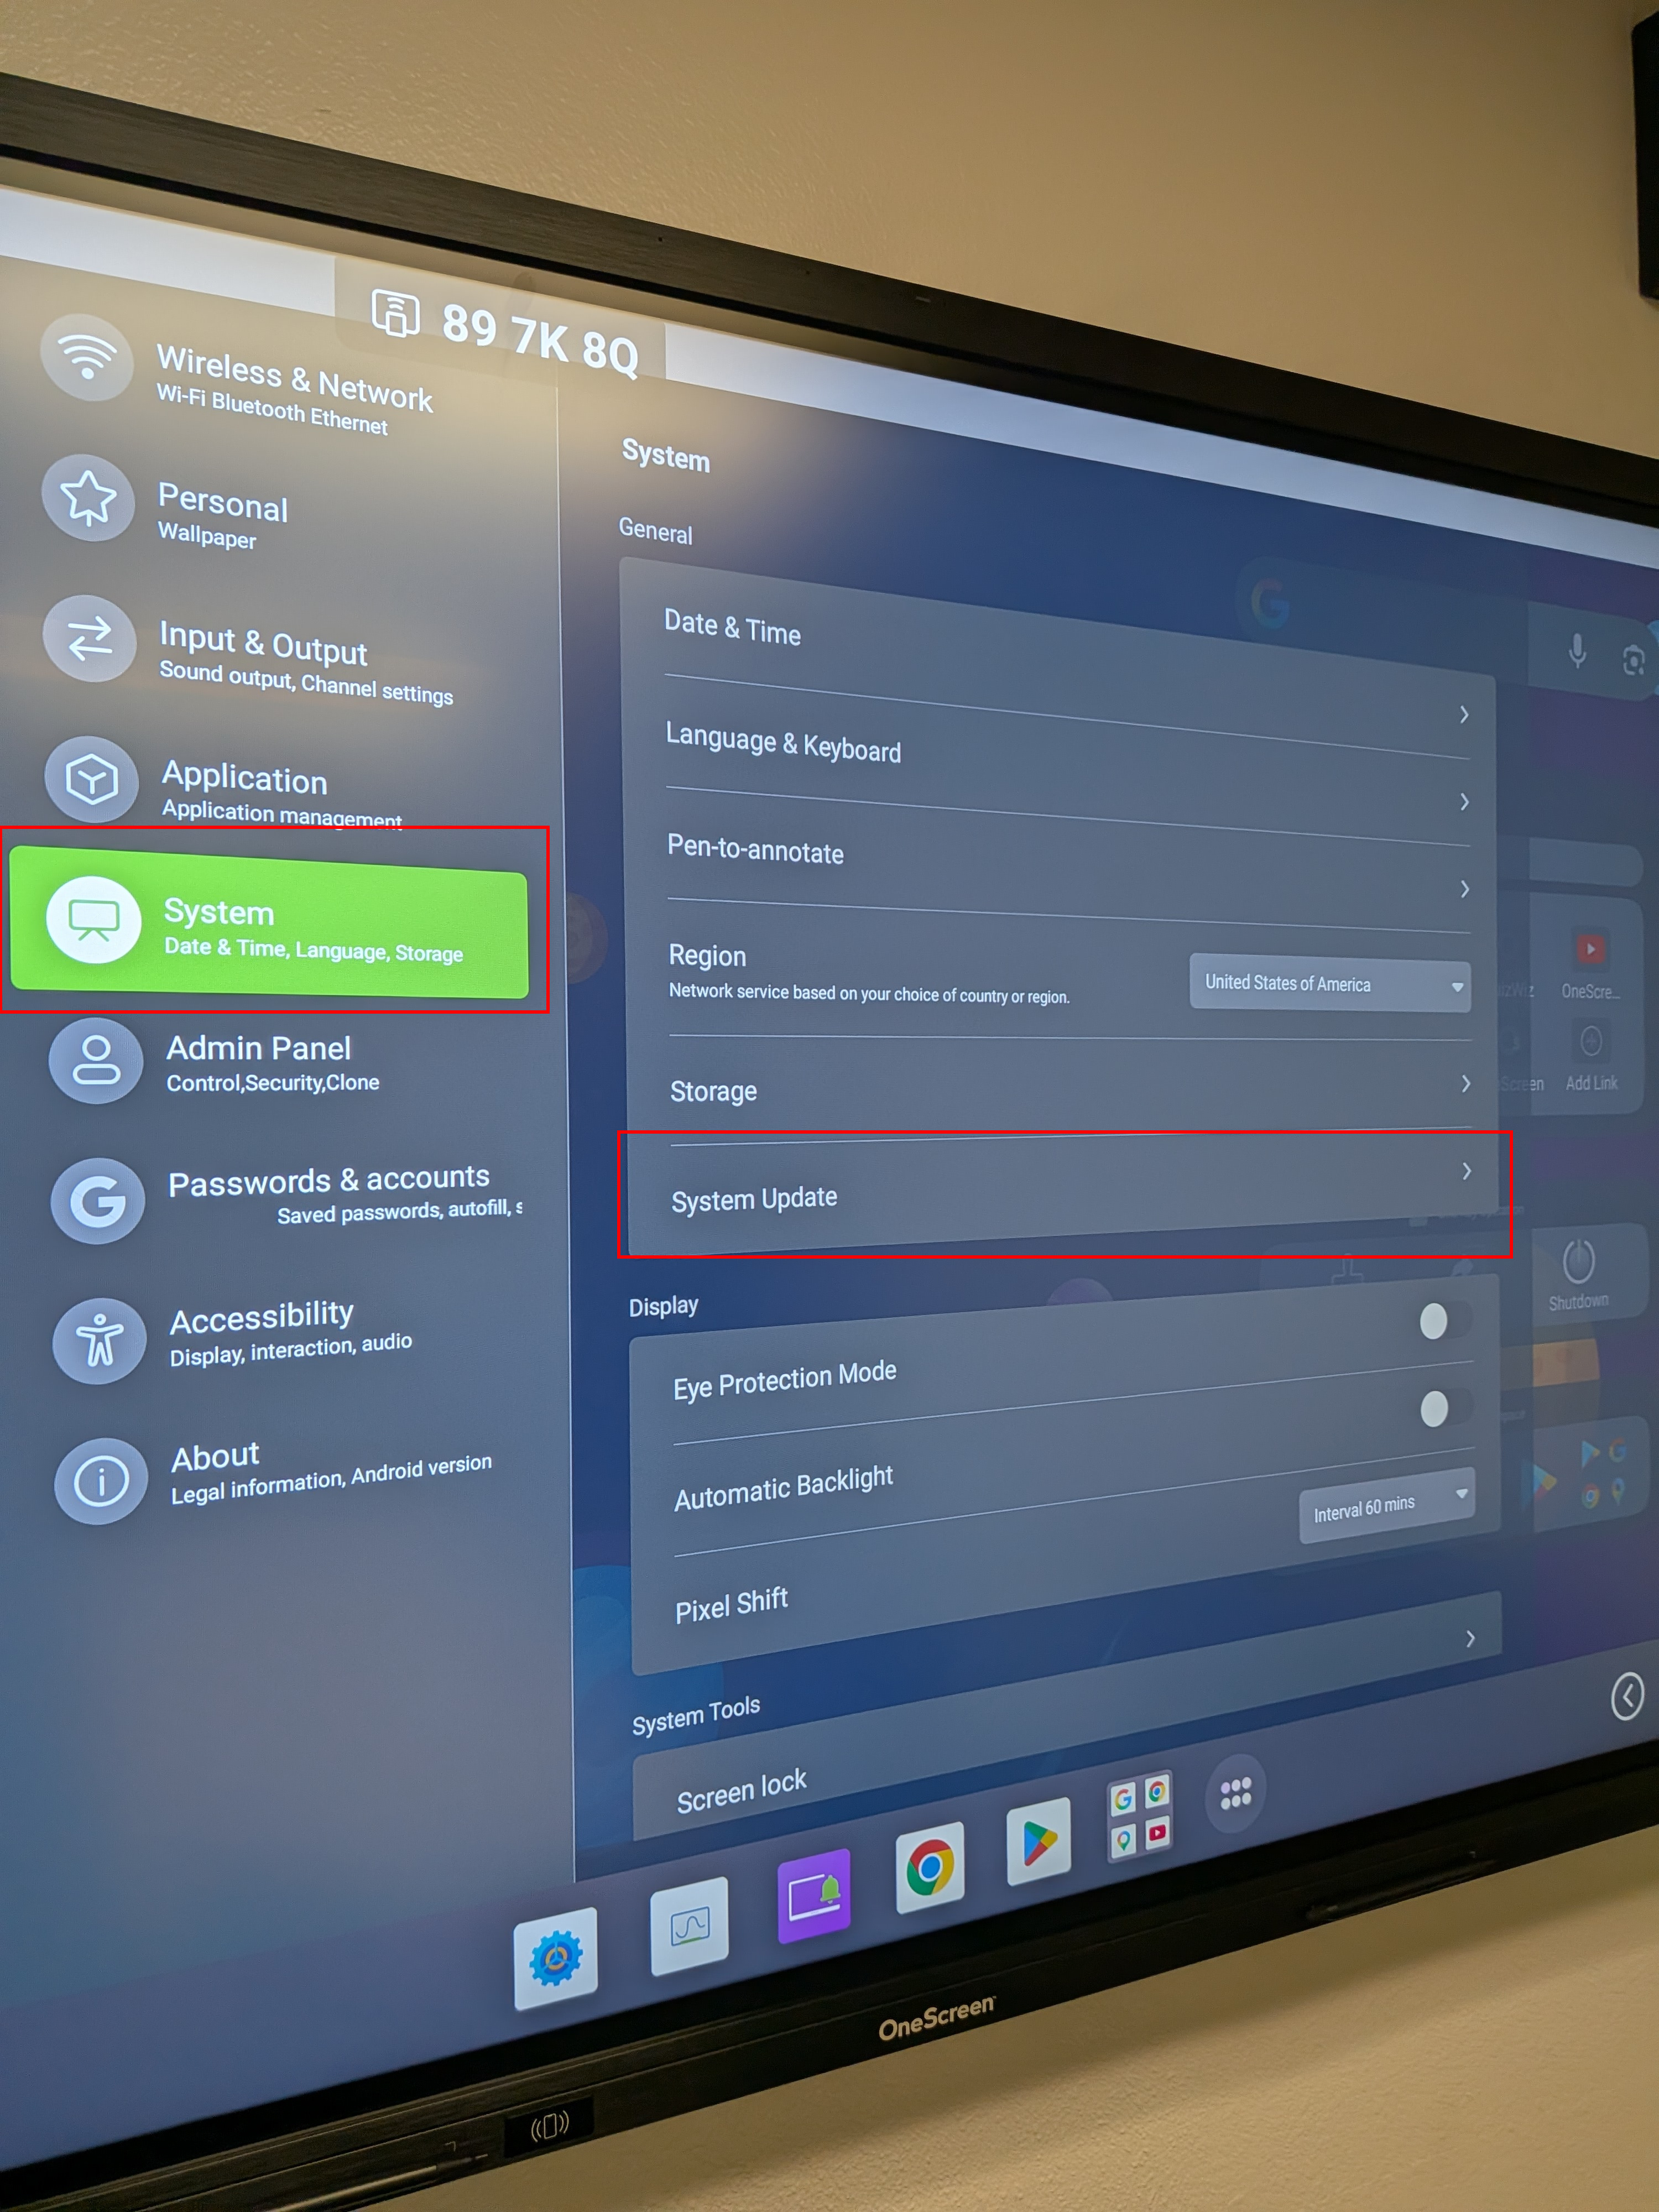
Open Settings
- Navigate to the ‘System’ page
-
Select ‘System Update’
-
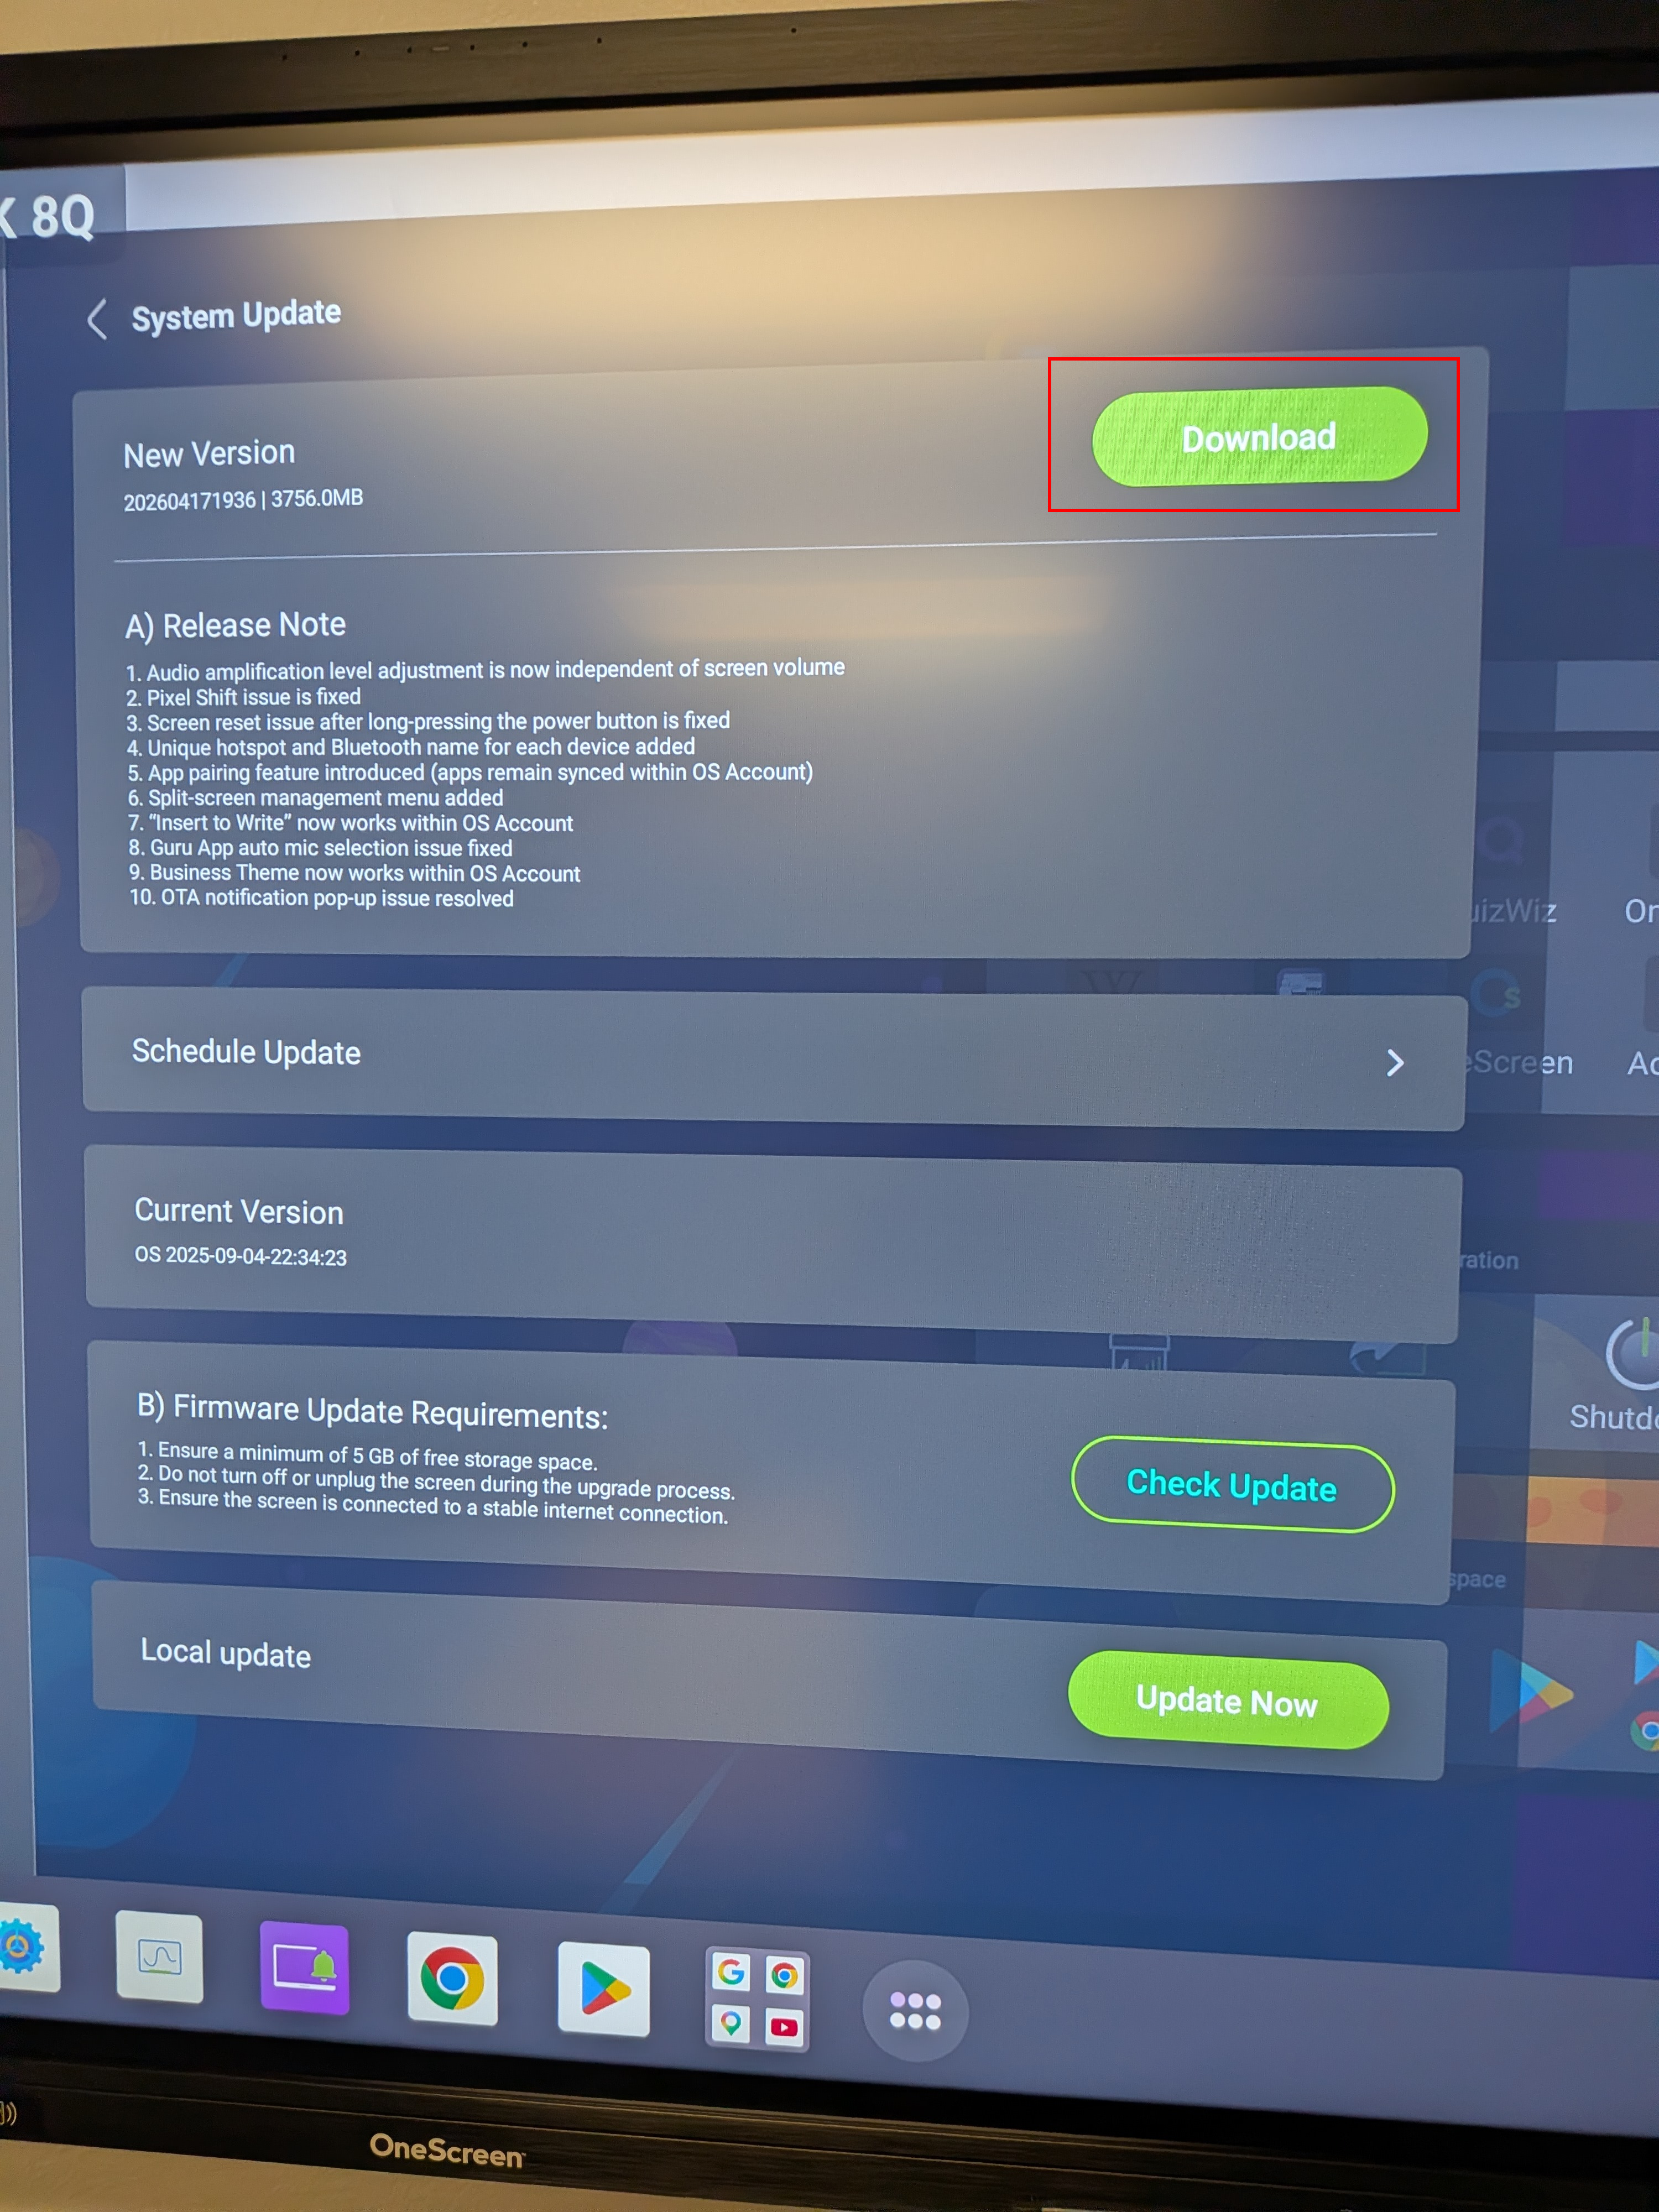
If ‘New Version’ shows at the top, select ‘Download’
-
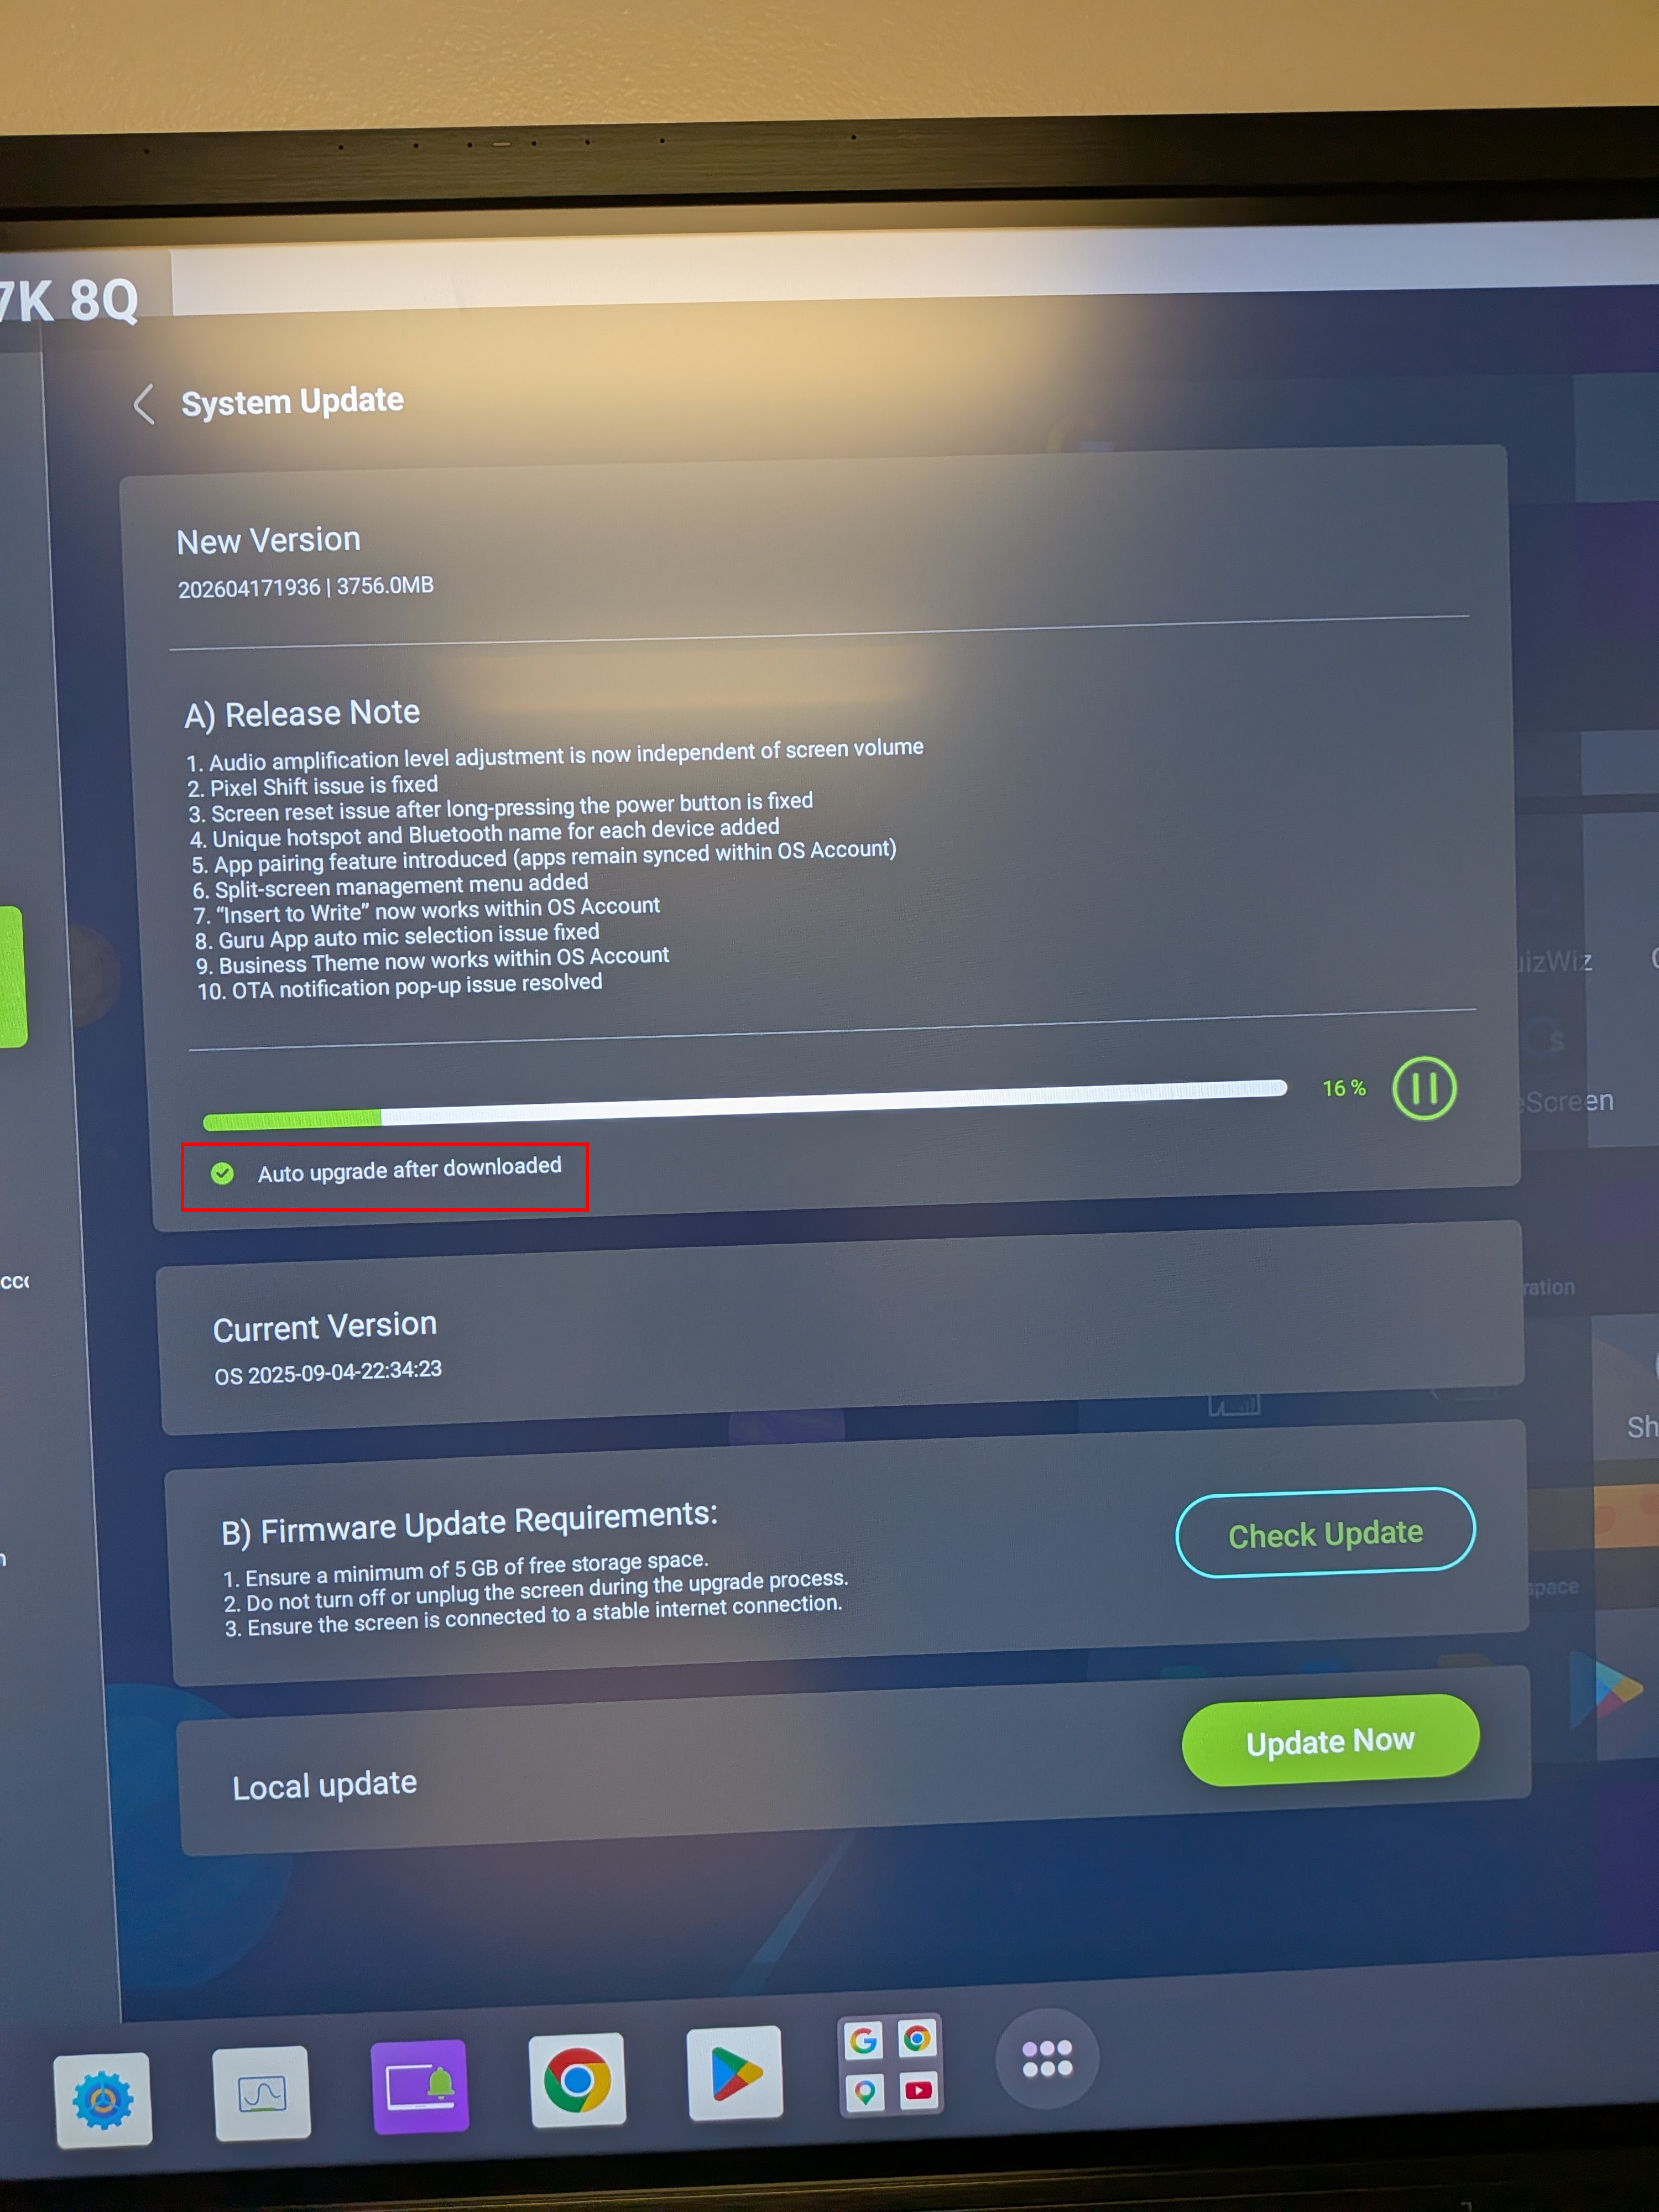
Tick the checkbox next to ‘Auto update after downloaded’
On-Demand Support
Clicking on the green “Guru” button on the display’s homescreen will initiate a live call to OneScreen support, who can provide assistance with basic features and usage of the OneScreen interactive display.