Updating Bell Schedules (Office Staff Only)
Logging In
- Visit your school’s bell scheduler site: https://bell.YOUR-SITE-INITIALS.lvusd.org (e.g. https://bell.acsms.lvusd.org)
- Change the user to “lvusd” and login using the password provided by EdTech

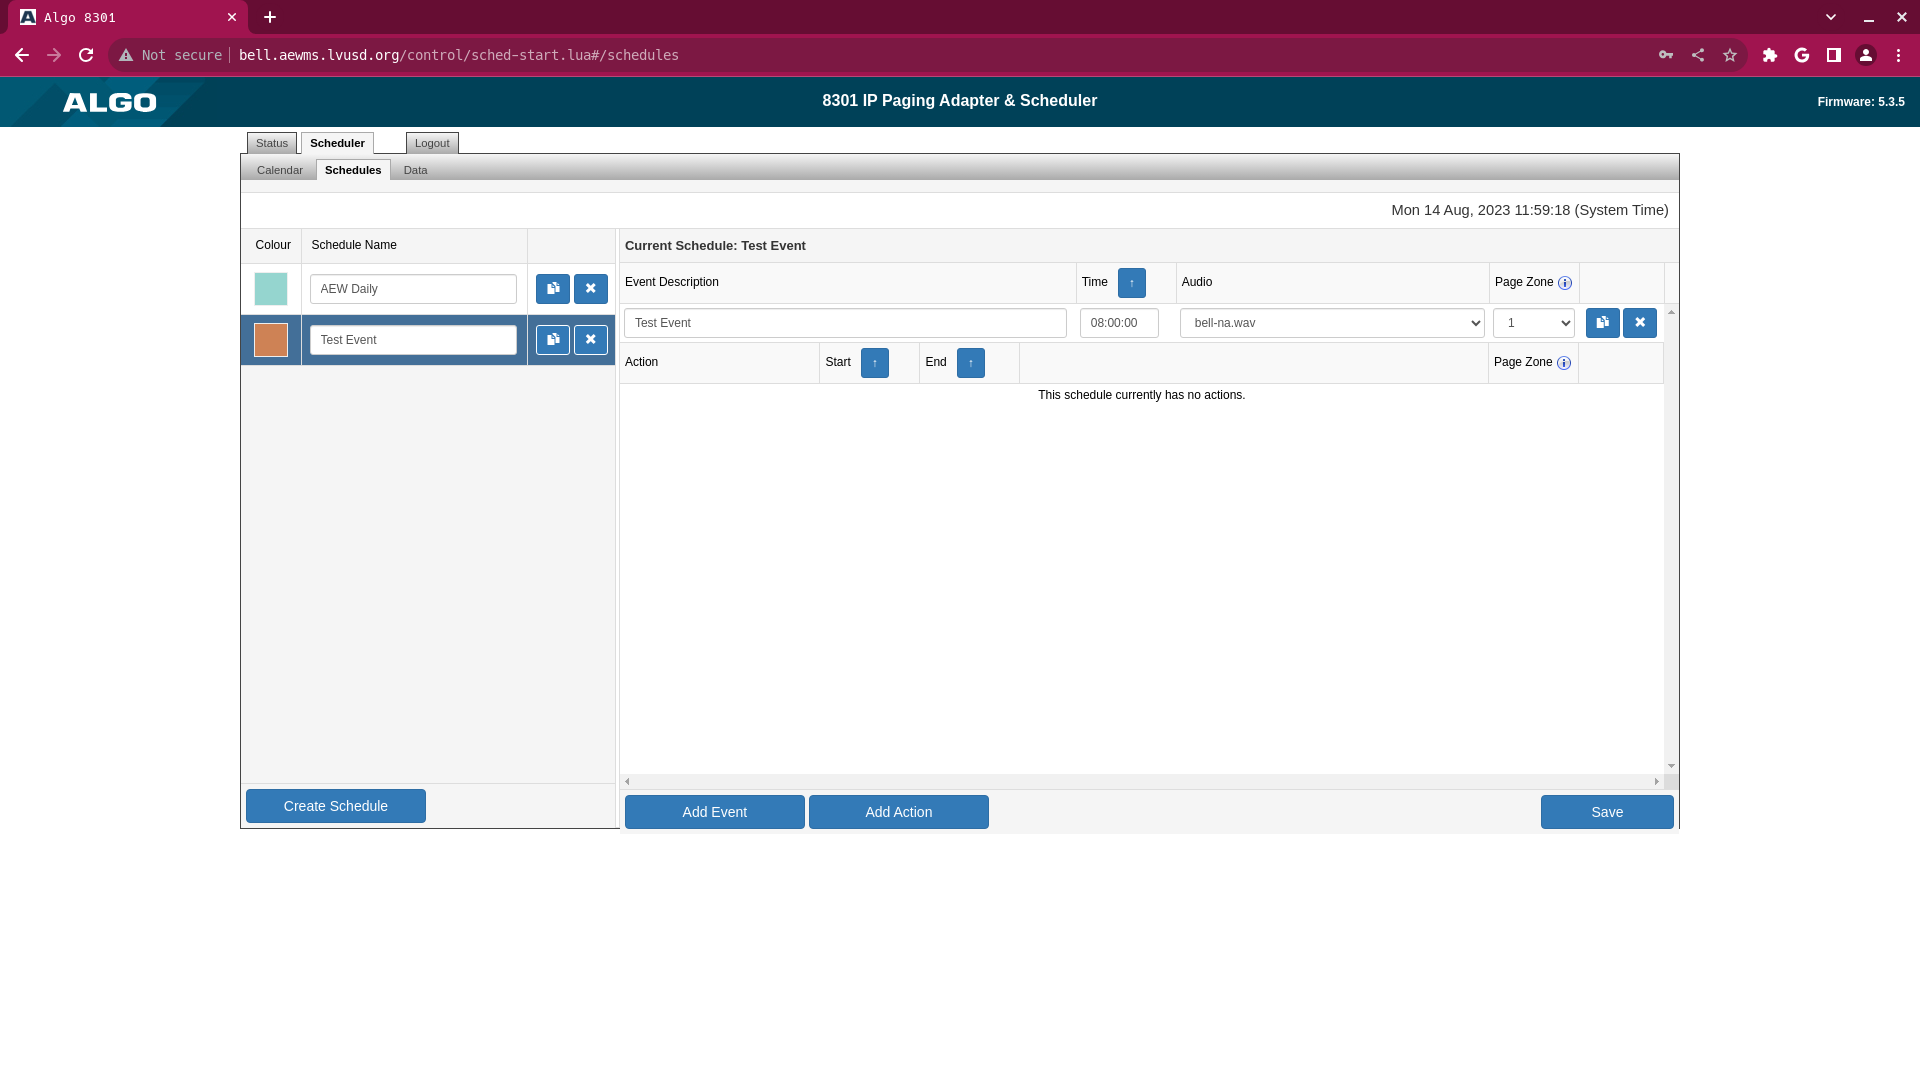
Creating Bells
- Navigate to the “Schedules” tab
- Click “Create Schedule”
- Enter a “Schedule Name”
- Click “Add Event”
- Enter an “Event Description”
- Enter a “Time” in hh:mm:ss format (24 hour time)
- Select a tone in the “Audio” dropdown
- Select the desired “Page Zone”
- This zone must have speakers assigned to it in Algo Groups, on the Network Monitor site under your school devices dashboard (https://network.lvusd.org/locations/YOUR-SITE-INITIALS/algo_groups)
- The All Call zone is a safe default to use
- Click “Save”
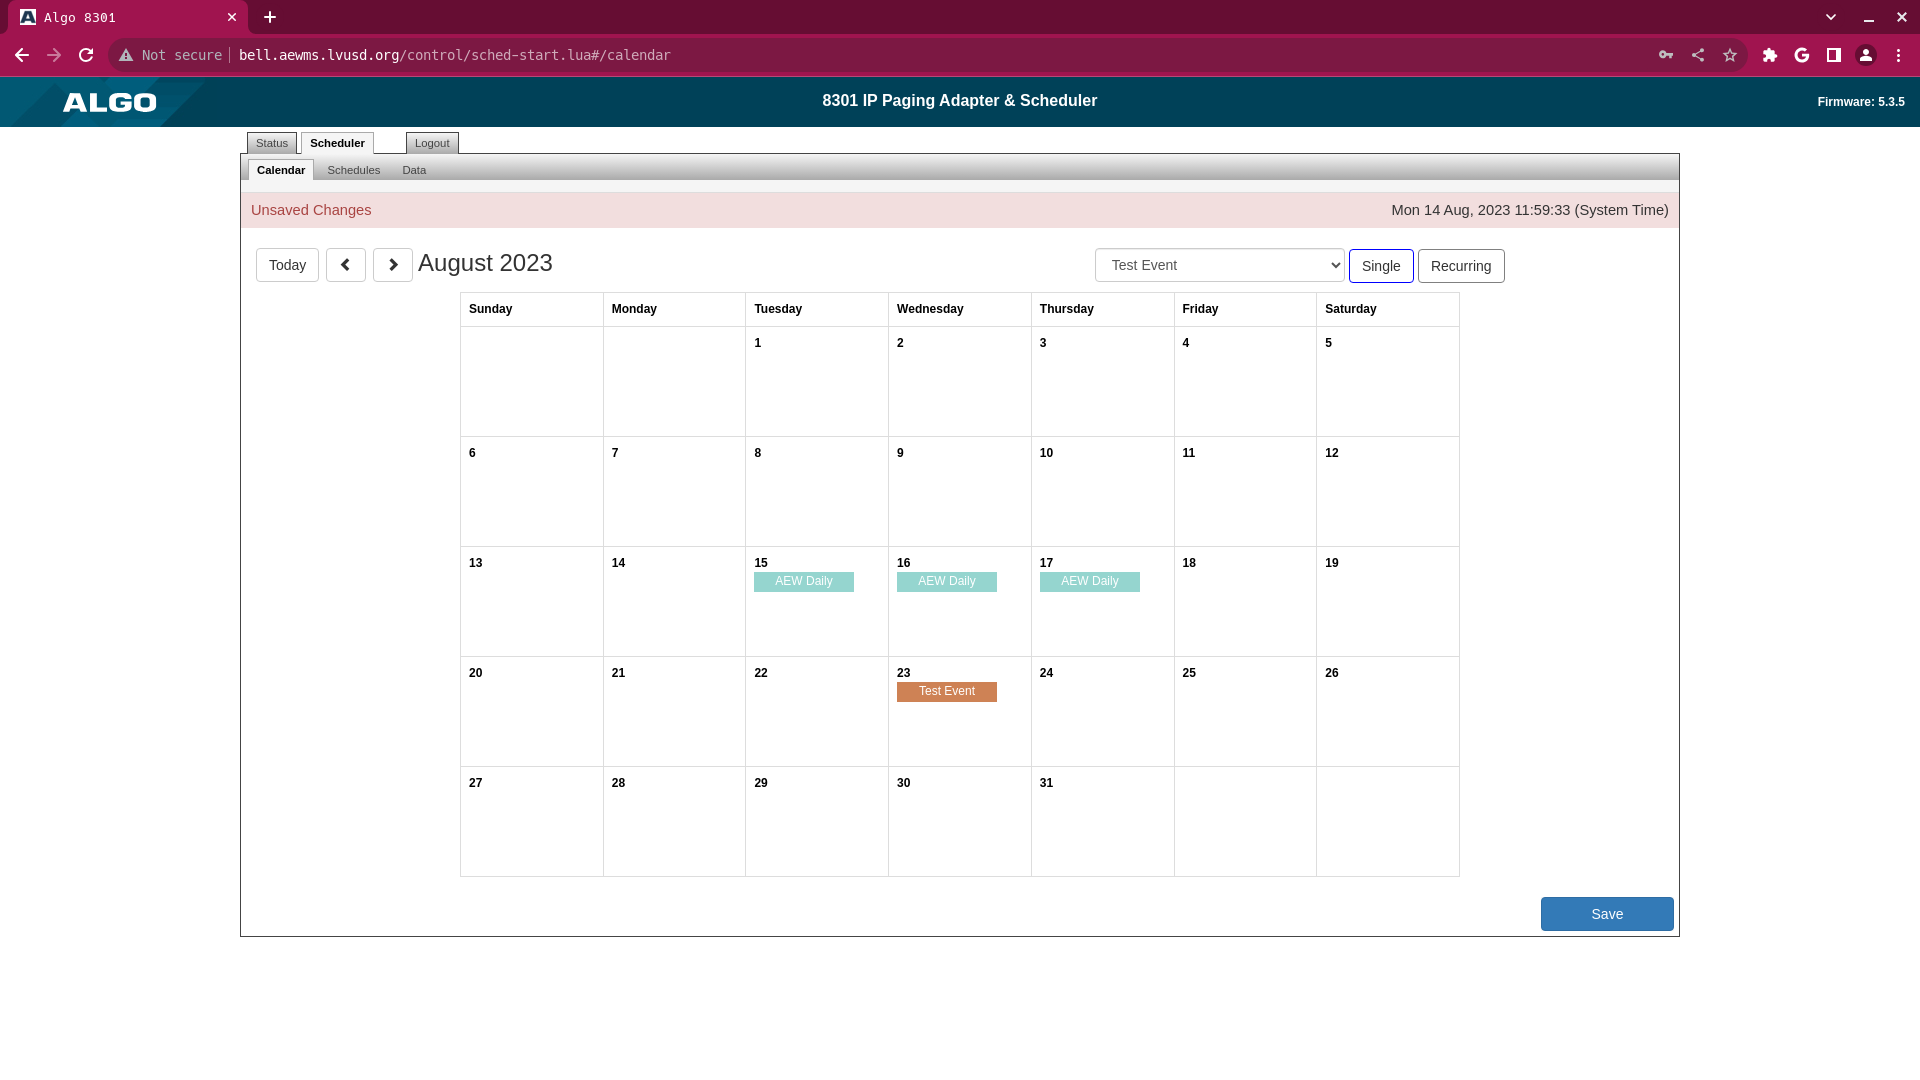
Scheduling Bells
- Navigate to “Calendar” tab
- Select the new “Event” from the dropdown
- Choose the type of event
- Select “Single” to create a singular or one-off schedule
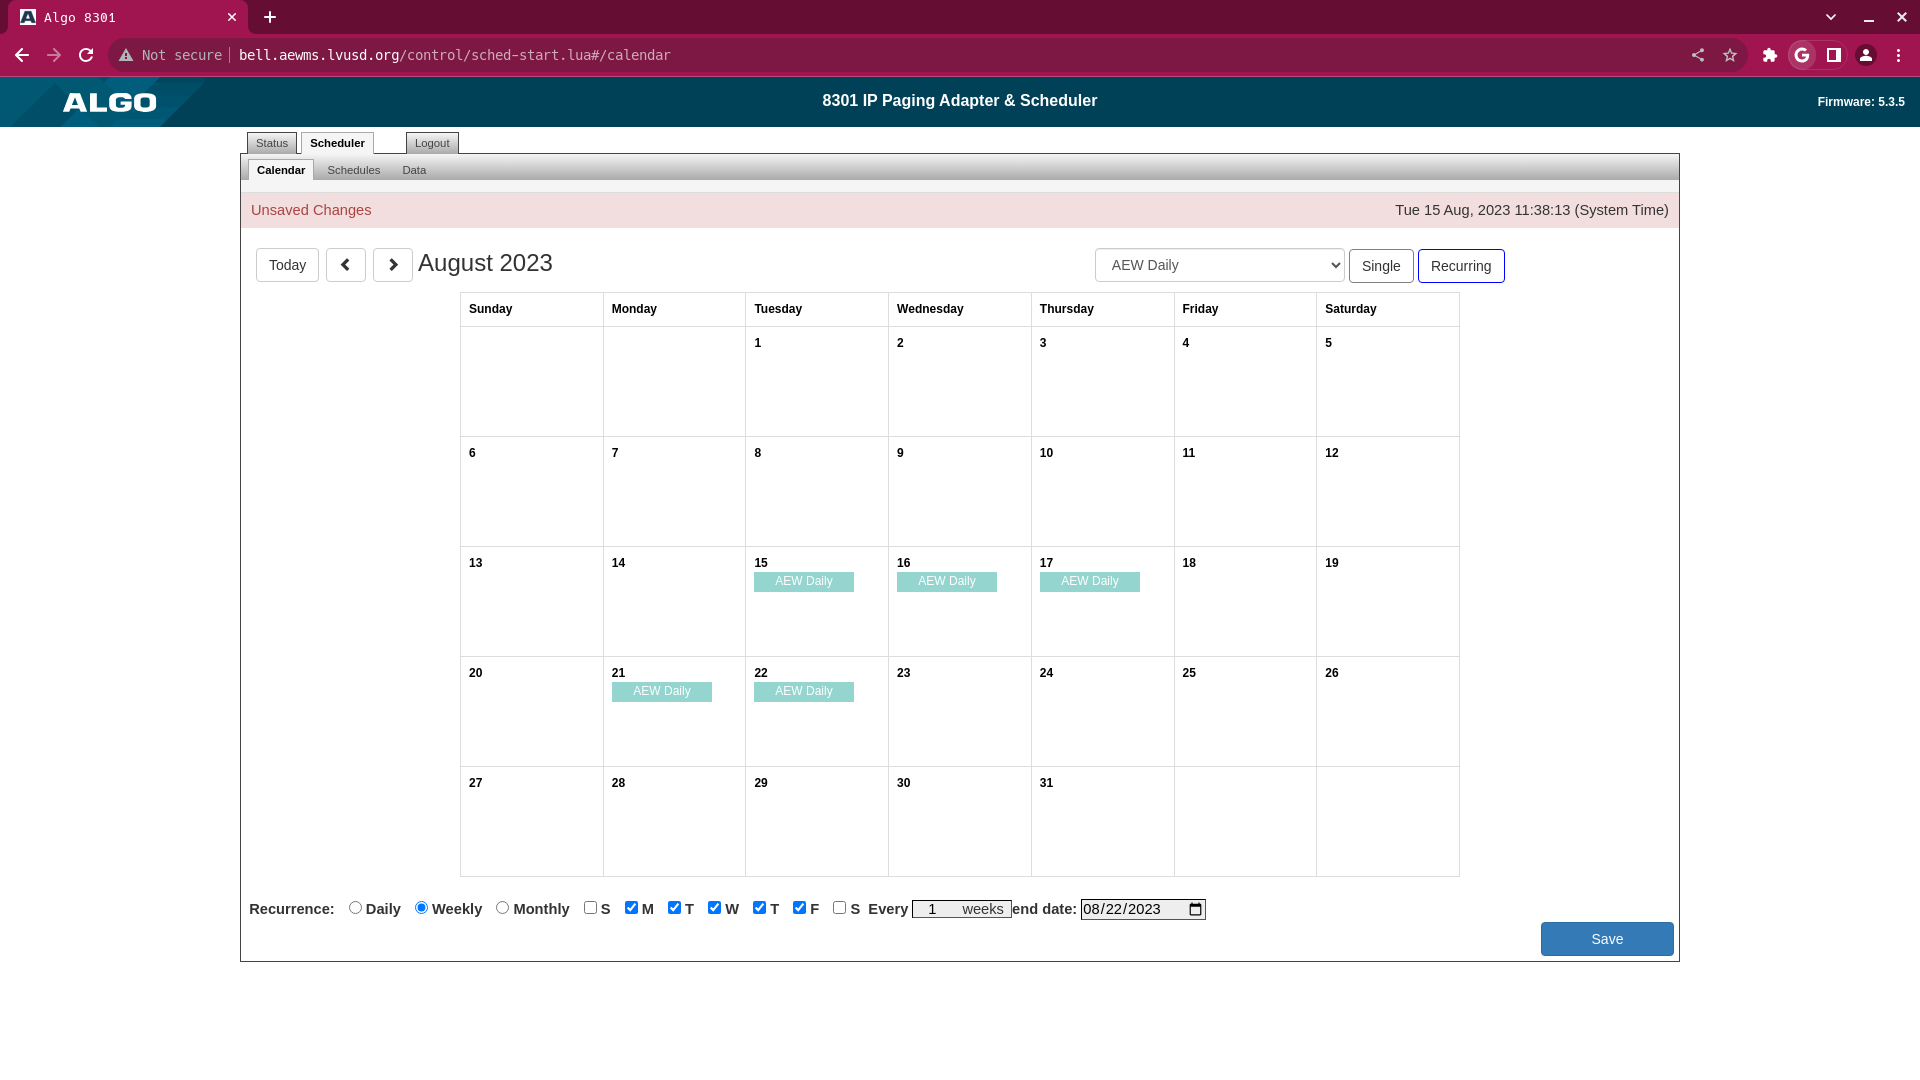
- Select “Recurring” to create a daily, weekly, or monthly schedule
- Choose the date(s) you want the bell schedules to run
-
For “Single” events, simply click to select each date you want the bells to run
-
For “Recurring” events, select the desired options below the calendar
- Choose Daily, Weekly, or Monthly
- If Weekly, choose the days of the week and the frequency
- Choose an End Date
-
- Click “Save” to save the new scheduled events