Chromecast
Usage
- Turn on your projector and set it to the HDMI input.
- The Chromecast homescreen will appear.
- The Chromecast is usually named by the room where it is located.
- On your computer, open Google Chrome browser, open the 3-dot menu, hover over “Save and share” and select “Cast…”.
- At the bottom of the small window that appears, click on “Sources ▼” and choose either “Cast tab” or “Cast screen”.
- “Cast tab” will cast only the current tab, even if you switch to a new tab or window.
- “Cast screen” will cast everything on the screen, including when you change windows, tabs, and even programs.
- On the list of Chromecast devices, scroll down until you find the one labelled with your room number/letter, and click on it.
- If you chose “Cast tab”, the cast session should begin immediately with your tab appearing on the projection.
- If you chose “Cast screen”, you will need to select the display in the small window that pops up first, then click on “Share” to begin the cast session.
Troubleshooting
Device Not in List
- Make sure your computer is connecting to LVUSD Wi-Fi, not LVUSD-devices or LVUSD-Guest
- Update Google Chrome browser
- Restart your projector
- Restart your Chromecast
- Unplug the USB cable from the back (not the HDMI that is in the projector), wait 15 seconds, then plug it back in
macOS Screen Recording Permissions
Ventura
-
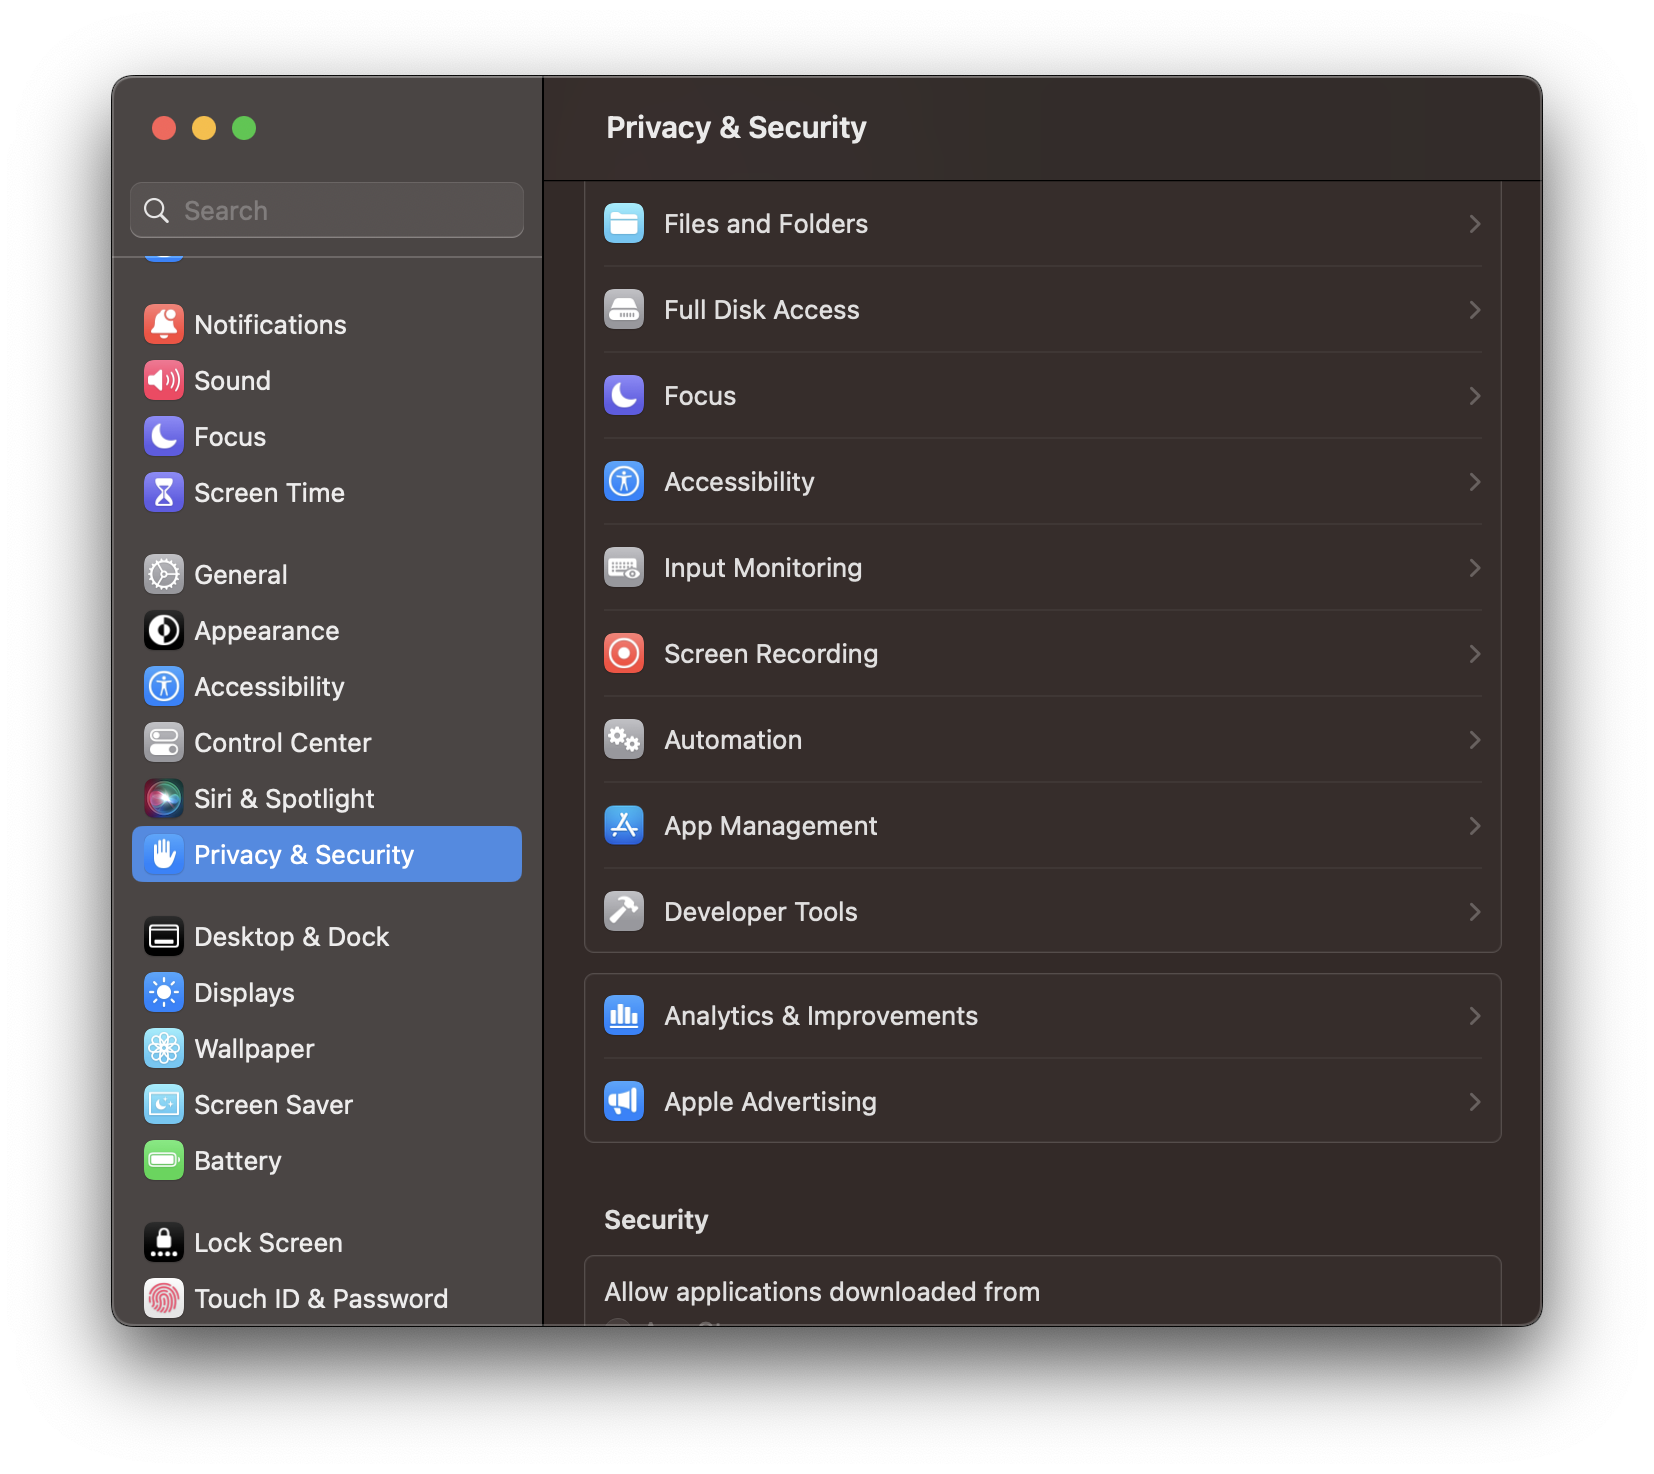
Open System Preferences and open to the “Privacy & Security” page
-
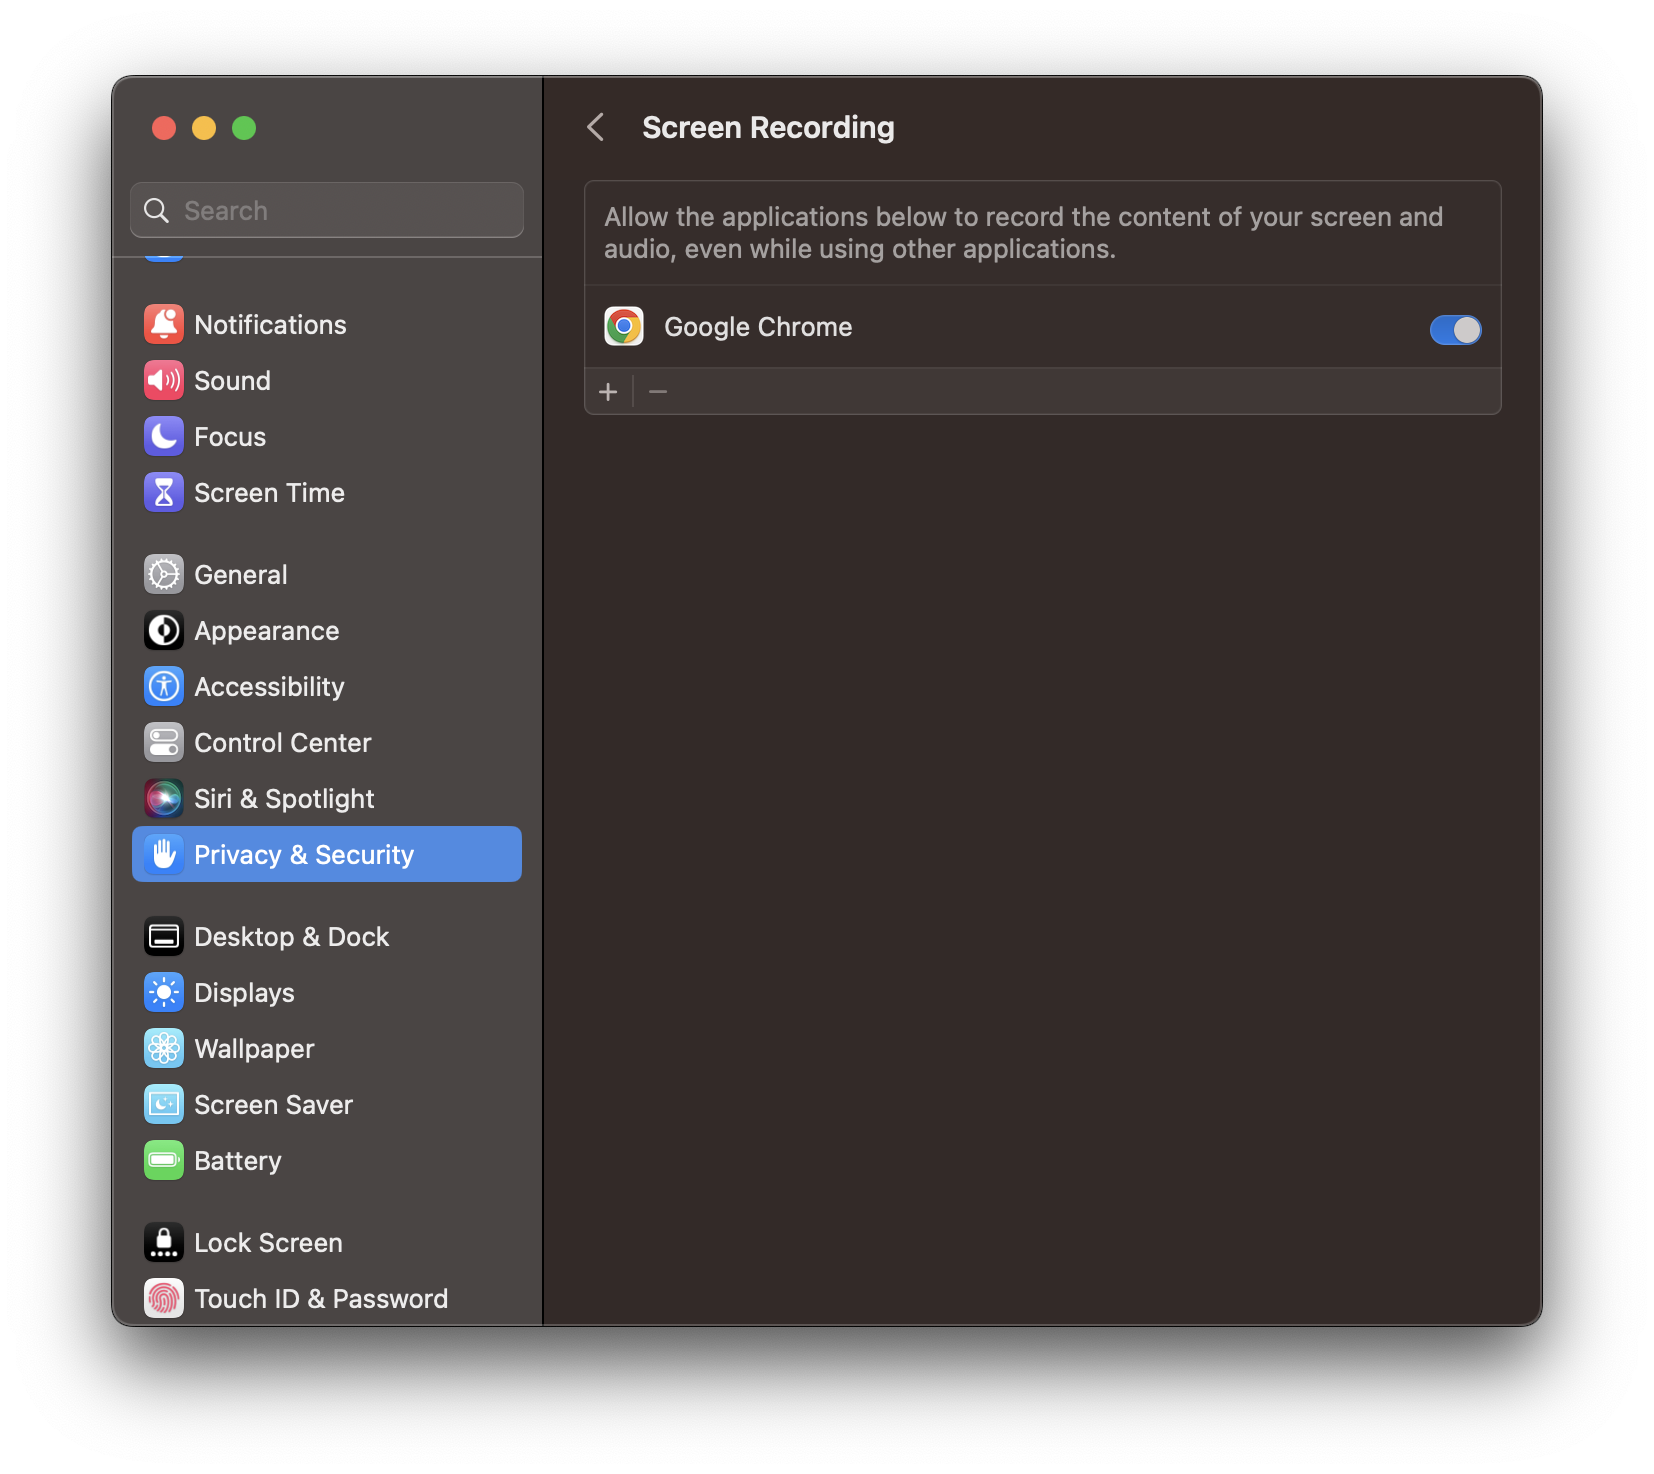
Select the “Screen Recording” setting from the list on the right, and enable the “Google Chrome” checkbox
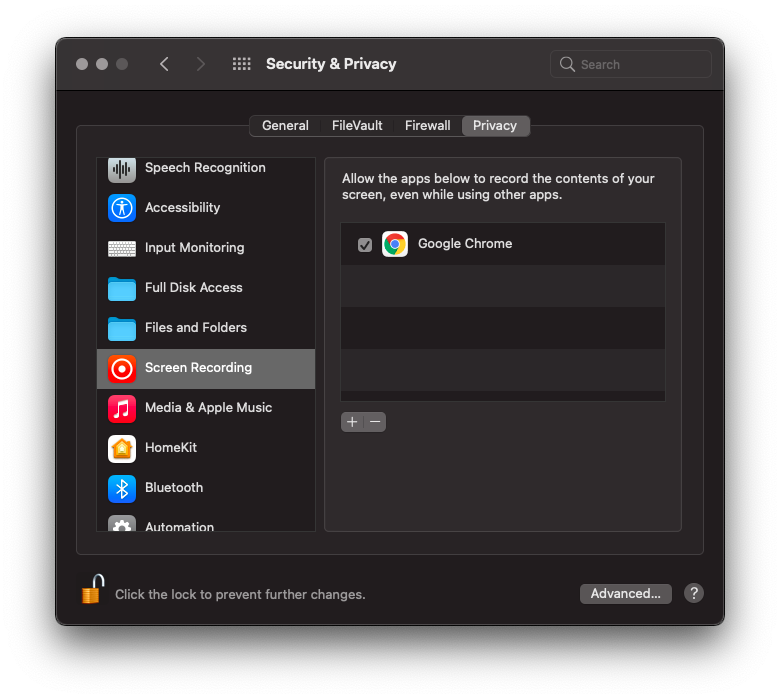
Monterey and older
-
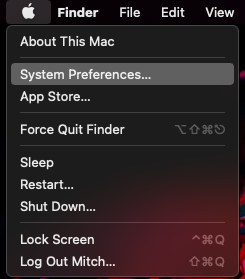
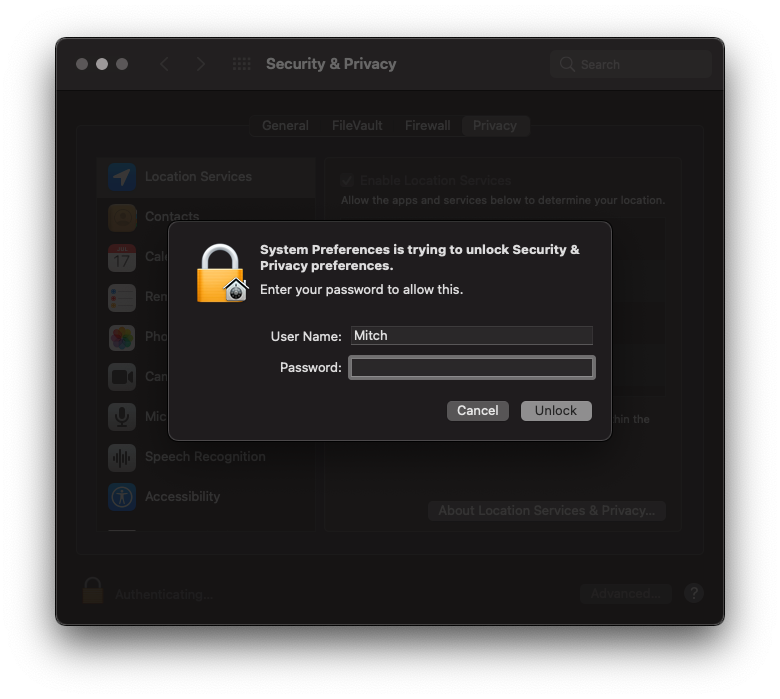
Open System Preferences and open to the “Security & Privacy” page

-
Click the lock icon in the bottom right and enter your computer password to unlock the page

- Navigate to the “Privacy” tab
- Scroll to and select “Screen Recording” in the list on the left
-
Enable the “Google Chrome” checkbox on the right
-
Click the lock icon in the bottom right to lock the page again
